The two biggest challenges faced by eCommerce retailers are getting people to the store and getting them to buy something when they arrive. Marketing is the domain of solutions to the first problem, and WooCommerce has many features to help bring shoppers to your store. Some are built into WordPress and WooCommerce, but many of the more sophisticated marketing tools are available as plugins and integrations.
In the WordPress world, there are excellent plugins for every possible problem, but in this article we’re going to highlight five marketing plugins that those new to WooCommerce should know about.
Google Shopping is one of the most important marketing channels for eCommerce stores. If your products aren’t included in Google’s dedicated shopping search engine, they won’t appear in desktop and mobile searches. Google Shopping is a paid service — to be listed, retailers pay for Google Shopping and Product Listing Ads. They also have to submit a feed of their products via the Google Merchant Center.
The Google Product Feed plugin generates a feed of products and associated metadata in the correct format. Retailers can choose which products and fields to incorporate, including additional data that isn’t normally available within WooCommerce. The plugin creates feeds compatible with Google and Bing.
Yoast’s SEO plugin is one of the most popular WordPress marketing plugins. It adds numerous search engine optimization features, including input elements for meta description and title tags, content auditing tools, and internal link suggestions. WooCommerce SEO makes these features compatible with WooCommerce and adds a number of eCommerce-specific features, including improved breadcrumb navigation and rich social media posts for Facebook and Pinterest.
There are over 500 million Instagram users, many of whom use the platform to discover products and follow their favorite retail brands. The WooCommerce Instagram plugin allows retailers to showcase Instagram images with a specific tag on their WooCommerce store.
OptinMonster is a cloud service that provides a suite of tools for increasing conversions on eCommerce stores. In addition to high-converting opt-in forms — including exit intent popups — OptinMonster can display relevant promotions and content to shoppers and retarget shoppers who left the store without making a purchase.
The OptinMonster WooCommerce plugins brings these features to WooCommerce, providing easy-to-use forms, personalized messages, split testing, and cart abandonment solutions.
AutomateWoo is a marketing automation solution for WooCommerce. There is some cross-over of features between AutomateWoo and OptinMonster, but it’s worth taking a look at both to see which fits your needs better. AutomateWoo automates a number of common email-based marketing strategies, including follow-up emails for upselling and cross-selling, abandoned cart recovery emails, personalized coupon generation, review rewards, card expiry notifications, and more.
We’ve covered just five of the best marketing plugins available for WordPress and WooCommerce. There are many more, and you can browse the full selection on the WooCommerce extension directory.
When it comes to selecting the right eCommerce platform, merchants have a lot to consider: Store size and number of products, payment and shipping options, and how they want the store to actually work.
At the center of these questions is an answer to which platform will do everything you want, while still being cost effective and providing the customer experience you’re looking for? Two of the main contenders are Magento and Shopify.
While both are able to create unique eCommerce stores, they differ significantly in almost all areas. As we’ll look at in more detail, Magento and Shopify have two different target audiences. Magento is aimed at larger, enterprise businesses, while Shopify is designed around small businesses looking for simple site creation.
We’ll explore several different areas and ask which platform is best for merchants in what ways. This article will try to answer:
When it comes to numbers, Magento and Shopify couldn’t be more different.
In terms of number of sites, Shopify boasts over 880,000, which dwarfs the 245,000 Magento sites currently live.
Yet if we take a look at the percentage of those sites that have made it into the top 1m and top 10k sites, we begin to see a different picture.
According to BuiltWith, 6.2% of Magento sites are featured within the top 1m sites globally, compared with just 2.51% being sites that operate on Shopify. This trend continues into the top 10k sites, with 0.07% of Magento stores featured, compared with just 0.05% of Shopify sites.
This suggests that Magento is more likely to support enterprise level stores that are able to better hone in on personalized customer experiences.
As we will dive into later in this article, Magento is known for its incredible functionality and ability to customize the eCommerce experience. So it’s no surprise that larger online stores lean towards using it.
* Requires a hosting solution, which normally starts at around $29 per month.
Magento vs Shopify: Pros and Cons
Magento Pros
Functionality
Magneto offers incredible functionality compared to almost any other eCommerce platform out there. This makes it one of the most versatile options for merchants looking to create personalized customer experiences, especially if they have a developer team behind them.
Advanced Shopping Cart Options
Shopping cart customization can make all the difference in terms of real ROI. As one of the most vital stages of a customer’s journey, the right options during purchase can be the difference between clicking cross and clicking buy.
Extension Expandability
Magento has almost twice the number of extensions as Shopify. And it’s not just quantity either. Magento extensions stay true to the platform’s reputation for flexibility by providing more in terms of functionality.
Great Community
An asset that is not talked about enough. Magento’s community provides the eCommerce web application with a lot of support that other non-open-source applications don’t receive.
Magento Cons
Difficult for Beginners
Magento was not designed for those looking to take their first steps into eCommerce. While there is a page builder in the works for open source, you still very much need either coding knowledge or a developer to get started.
Cost
While open source itself is free, hosting is not. This can cost many hundreds of dollars if you’re a large store. It can cost you more than the Shopify equivalent, but we would argue that you get more for your money by self hosting.
Shopify Pros
Ease of Use
Shopify is designed to be a simple eCommerce platform that provides owners with an easy way to get started selling quickly. Pages can be easily customized, as can products. While this customization is nowhere near Magento’s, it’s enough to get started.
Free Themes
Shopify has several free themes available to get started with. They require no coding, are responsive, and look modern.
Inclusive
Shopify is all managed through a single point of contact. Instead of having to manage your store on multiple fronts, you’re able to access and do everything in one place.
Price
Once you’ve gone through all the additions you’ll have to add to your Magento budget, Shopify is often the more inexpensive option.
Shopify Cons
Transaction fee per sale
Each time you sell a product, you pay Shopify. With the basic plan, this starts from 2.9% + 30¢ per sale. If you use an external payment gateway, you can add an additional 2%. Learn more about Shopify’s transaction fees.
Lacks Functionality
As we’ll explore in this article, Shopify just can’t compete with Magento in terms of functionality.
Designs and Themes
In terms of design, both Magento and Shopify hold their own. From the get-go, Shopify does offer a better experience for beginners. The stock themes available come in both free and paid flavours, and provide a classy, modern look.
Shopify’s themes can also be tweaked to line up with your brand image. These tweaks can include, but are not limited to:
Changing color schemes throughout the site
Applying custom images to products and pages
Changing how newsletter signups work
Editing the action bar and navigation text
Mobile responsiveness is now more vital than ever. 79% of mobile users made a purchase with their mobile in 2018. For merchants, this means it’s important that their site looks good and offers a great user experience on mobile.
Both Magento and Shopify offer responsive templates by default. However, if you’re willing and able to develop your own eCommerce store, Magento really shines.
Creating your own theme in Magento can be a long process that requires coding knowledge. However, the rewards are multitude. A customized Magento build allows you to create a storefront unlike anything offered in Shopify.
This includes:
Cross-selling and up-selling blocks throughout your site
Advanced search functionality with tools like Elasticsearch
Featured product sliders and hero carousels
Expanded footer functionality including newsletter sign-ups
Advanced cart and payment integration
Which platform is better really depends on what you want to do with it and your experience level. Shopify is great for beginners, but Magento offers more experienced users a wealth of design and theme options you just won’t find in simpler eCommerce applications.
Winner: Draw
Ease of use
Straight out of the gate, Shopify takes the lead. Known for its ease of use and ability to create simple, easy to navigate online stores. It, without a doubt, is the easier application for merchants.
Shopify also features an easy to use drag and drop interface. This is something you won’t find in Magento and makes creating new pages much easier.
Shopify makes store creation simple with an easy to navigate admin interface.
However, with that simplicity comes a lack of versatility. Versatility that can be found and taken advantage of with Magento.
Besides offering a host of built-in customizations and functionalities, Magento also offers an extension marketplace with over 4,700 extensions available to download and add to your store.
Additionally, Magento’s recent acquisition by Adobe has already led to other added functionality and integrations for the eCommerce application. Integrations that Shopify simply can’t compete with for enterprise level clients.
If you’re looking for ease of use, Shopify is the way to go. However, if you’re willing to put in the time and energy needed to learn and adapt a Magento store’s customer experience, Magento is the application you should stay behind.
Winner: Shopify
eCommerce Functionality
Magento is known as an eCommerce powerhouse. Between built-in functionality and add-on extensions, it stands as one of the most adaptable eCommerce platforms available.
Yet Shopify does offer enough functionality for small and medium businesses to grow. The eCommerce application makes it easy to do a lot of things without having to code even a single line.
This includes:
Inserting custom images to create a personalized experience
Adding products and SKUs to your store
Setting up optimized payment options
Customizing the customer experience and the look and feel of your store
However, as you start to require more advanced functionality, your monthly premium will increase. You’ll have to pay more than $29 a month if you want to use gift cards, build professional reports, and implement advanced shipping options.
Magento, on the other hand, is engineered to allow merchants full control of the customer experience by default. This means creating and selling fully customizable products and managing them across multiple stores (if needed).
One of Magento’s greatest strengths benefits international merchants. Magento offers 148 payment processors, many of which come with support for different countries and languages. 60% of overseas, online consumers rarely buy from English-only websites. So being able to offer that international, multilingual experience is vital if you want to target this group.
Shopify does offer a limited number of translation apps, but they don’t provide the complete experience like Magento can.
Magento wins here. But we knew that before we even started.
Winner: Magento
Apps and Extensions
Once you’ve got your store up and running, you may find that some functions and features you want are missing. Advanced checkout, improved search, and expanded payment options, as a few examples. Both applications have an answer to this, and it comes in the form of 1-click add-ons that can be purchased (in some cases), downloaded, and installed. Shopify call these Apps, Magento calls them Extensions.
Delving into the options available to merchants, it’s easy to see why Magento’s marketplace is praised, where Shopify’s app store is seen as more of a useful addition.
The first thing you might notice is the difference in the number of extensions made available for each. The Magento marketplace offers over 4,700 extensions, almost double Shopify’s 2,500. And it’s not just the quantity of add-ons that make Magento so much more versatile, it’s the quality as well.
Shopify apps allow users to:
Integrate their store with social and shopping channels
Add additional shipping options
Make basic edits to SEO important data
Magento extensions make it possible to:
Add advanced pre-order functionality
Draw insightful analytics into how well a product is doing
Integrate marketing and analytics software into the eCommerce platform
Leverage powerful advertising tools both internally and externally.
A comparison of some of the more popular add-ons for each, shows that Magento truly is aimed towards delivering a custom user experience and that its extension marketplace only aids in doing so.
Magento
Shopify
Yotpo Reviews
Facebook Channel
Amasty Improved Layered Navigation
Instagram Channel
Amasty Customer Attributes
Oberlo
Aheadworks Ajax Cart Pro
Point of Sale
Aheadworks Add Free Product to Cart
Messenger Channel
Magento extensions can be found on the Magento marketplace.
Unfortunately, Magento’s extensions (in general) are costly compared with Shopify’s apps. Moreover, Shopify offers a lot more in terms of free add-ons.
Magento is the clear winner here. Despite costing more, the extensions available add more in-depth functionality and there’s a much larger range.
Winner: Magento
Inventory Size
Both eCommerce platforms allow for an unlimited number of products. They also both allow for you to integrate shipping and fulfilment extensions into your store so that inventory management is easy.
However, the larger your store becomes with Magento, the more likely you are to run into performance problems if you don’t upgrade your hosting account. Shopify has similar problems. However, because your store will be hosted by Shopify themselves, they will encourage you to upgrade your account before you start to experience slowdowns.
With Magento, we recommend finding a Magento-optimized hosting provider, as they will provide you with a fully managed service, similar to Shopify. In some cases, you may even find that your store is faster and more reliable than its shopify counterpart.
Shopify still wins this round, simply because it’s easier to manage performance and inventory through one point of contact, instead of having to get in touch with a developer, hosting provider, and the Magento community.
Winner: Shopify
Performance
Magento is a known resource hog, requiring a serious hosting environment to back it up. It’s common knowledge that a merchant’s hosting infrastructure can start to feel the strain as more product SKUs are added. Backed by over a decade of experience, we offer an optimized Magento solution that uses caching to improve the performance of Magento stores. Many of those optimizations you won’t find elsewhere.
Shopify, on the other hand, is a lightweight application. As a result, it runs quickly in most environments, and can hold a larger number of product SKUs on the same hardware that will only run a smaller Magento store.
However, Shopify doesn’t have the same level of functionality as Magento. Personalized shopping experiences with Shopify can be as much as occasional product recommendations and cross-selling.
The reason Magento is such as resource hog is because of everything going on behind the scenes. True personalization of the commerce experience with cross-selling, up-selling, customized shopping cart experiences, and more.
And Magento will run smoothly if the server is configured properly. In 2018, we saw 64% of our hosting solutions run Magento. When asked why they chose us for Magento, merchants cited uptime and functionality as the two main factors at play. Indicating that performance did have a part to play.
Magento scrapes by as the winner here. While Shopify requires less optimization, Magento reigns champion due to the added functionality that comes with it. Moreover, with customized customer experiences, it’s almost certain a Magento store will perform better in terms of ROI.
Winner: Magento
SEO
Both Magento and shopify are strong SEO contenders. In some research, Shopify comes out on top with an SEO score of 98, compared with Magento’s 95.
However, while Shopify is better from an absolute beginner perspective, those with some SEO knowledge will be able to get more out of a Magento installation. The primary reason for this is the extensions available and the ability to truly conform to coding best practices.
Magento doesn’t just let you edit metadata, it also allows you to make vital product and on-page customizations that can provide you with an SEO boost you won’t find in a SaaS product. Additionally, if you’re looking to start working in SEO longtail, adding a WordPress blog to your Magento store is a relatively simple process.
We’re setting Magento as the winner here, due in large part to the added customization options available for users and the ability to customize the SEO process manually.
Winner: Magento
Security
Security should be at the top of your list. According to the State of Hosting, 61% of shoppers will not purchase from a site that is missing a trust seal such as an SSL certificate.
With changes to the way Google handles security, sites that lack an SSL certificate will now be subject to unsecured site warnings before shoppers can proceed. 98% of shoppers will not proceed past these warnings.
While Shopify manages the integration of an SSL certificate, Magento requires you to purchase and install one separately. This process can be managed for you by a managed hosting provider, but you’ll need to find one first.
In terms of updates and patches, Shopify manages them for you. Magento requires you to do this manually. While Magento’s method requires more time investment from the merchant or developer team, it also provides more flexibility. This is, in large part, due to the incredible community behind Magento.
Magento frequently releases dedicated security patches that are the result of constant testing and development by a community of developers well-versed in the requirements of eCommerce stores.
Shopify, on the other hand, is only managed by in-house talent. This makes for a much smaller pool of resources working on creating and deploying fixes for security problems. While there is a Shopify bounty program that rewards users who find vulnerabilities, the fixes themselves are internal.
Finally, in order for merchants to process credit card data, it’s important for them to be PCI compliant. Shopify, again, manages this internally. However, once again, finding the right Magento hosting provider will make managing PCI compliance just as easy.
Magento is the winner here. While it’s true that Shopify makes security easier, Magento community support can’t be matched. Moreover, by searching for and finding the right hosting provider, managing security with Magento can be just as easy while still providing flexibility you won’t find with a SaaS platform.
Winner: Magento
Pricing
A quick look at the pricing for each eCommerce platform makes it seem as though Magento is the cheaper option. However, while Magento open source itself is free, there are numerous hidden costs.
As a Magento merchant, you have to consider hosting costs, security costs (such as SSLs), and developer fees. Developer fees can be the largest, with some Magento stores costing several thousand dollars in terms of development.
If you’re looking for a cheaper option, Shopify is the better choice. It’s also a lot more predictable, with a clear, monthly payment in addition to a transaction fee per sale.
Winner: Shopify
Magento vs Shopify: The Winner
So when it comes down to it, which is better: Magento or Shopify?
We’ve come to the conclusion that it really depends on what you’re looking for. Magento is better for those looking to create personalized customer journeys that visitors won’t find anywhere else. Shopify is good for merchants looking to create an eCommerce site with little coding or technical experience behind it.
If you do have either the technical experience or a team of developers, we highly recommend Magento. With functionality you just can’t find anywhere else, and an open source version driven by an incredible community, it’s hard to beat.
If, however, you don’t have the time or money to invest in creating these unique experiences, Shopify is going to leave you with a better storefront that serves customers that information they need.
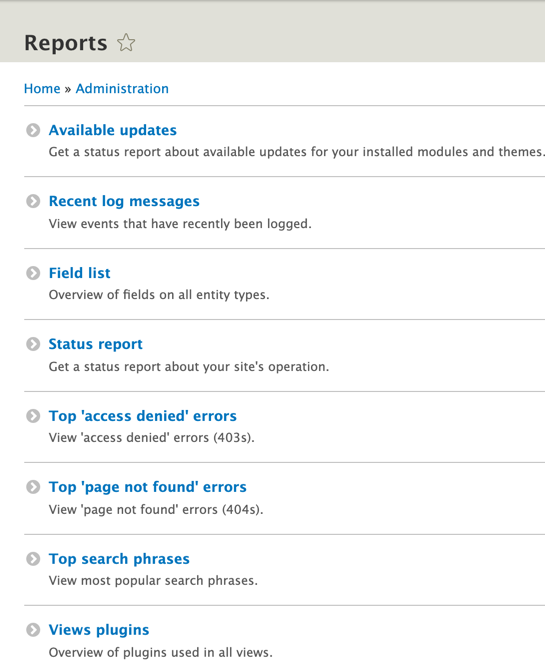
Welcome to Part 5 of our series, Getting Started with Drupal 8. Go here for Part 4.
Previously, we covered the basics of managing content and creating graphics, metadata, teasers, and blocks. This chapter provides you with a few more essentials, like comment management, forums, and menus.
As with earlier entries, the images reflect changes made during previous lessons using the default Drupal 8 theme, Bartik. Recreating these changes is not necessary, but if you’re using a different theme, or have added modules, what you see will differ from the provided images.
Contents
Although there’s a school of thought that allowing your visitors to comment invites a world of headache, it has the benefit of encouraging people to interact with your website. Properly moderated, comments function as free content for your site.
While it potentially invites spam and certain types of negative behavior, Drupal 8 gives you everything you need to mitigate these inconveniences.
Setting Comment Policy
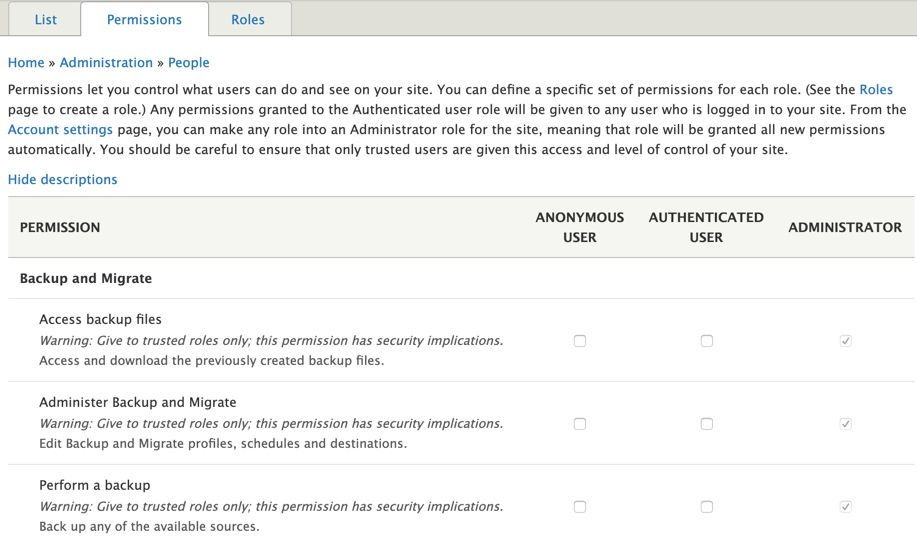
The default Drupal 8 comment policy is reasonable for many sites. To view your current settings, go to your Admin Menu (Manage) and click People, then click the Permissions tab.
Only authenticated users — visitors that are currently logged in to their registered account — can post comments. Anonymous users can only view comments. Your ideal settings will vary according to your needs and wants, but here’s a few guidelines:
Administer comment typesand settings and Administer comments and comment settings are only appropriate for site admins.
Anonymous users should have only the View comments permission. This will discourage spam and abuse.
If you want authenticated users to have the ability to comment, the only mandatory permissions are Post comments and View comments.
Whether you grant the Edit own commentspermission to authenticated users is purely up to you, though most users appreciate the ability to do so.
If you anticipate more than a few authenticated users, we recommend leaving Skip comment approval enabled to prevent micromanagement headaches.
Comments Admin Page
For the sake of demonstration, we already created an authenticated user and added some comments to this site.
To view all comments for your site, go to your Admin menu and click Content, then click the Comments tab.
From the Comments page, you can perform a variety of useful functions:
View Unapprovedcomments if you chose to require comment approval.
Filter by Subject, Authorname, or Language.
Perform an Action (Delete or Unpublish) on all comments you’ve selected with the check boxes.
View any comment by selecting its Subject.
View any author’s account information (see below for how to block users).
Perform an Edit or DeleteOperation on an individual comment.
It is possible to block troublesome users by clicking their username (option 5 above), then the Edit tab. In the Status section, select the Blocked option, then click Save.
It is also possible to access user accounts from your Admin menu by selecting People, then their username. From there, you can reset passwords, change roles, and perform other useful functions.
Page-Specific Settings
When viewing comments as an admin, you can Delete, Edit, or Reply to any comment.
Although you can restrict comments according to content type, it is also possible to adjust settings for specific pages. To do so, navigate to your content and click the Edit tab.
In the CommentSettings section, choose Open, Closed, or Hidden, as desired..
Comments and Content Types
Default Drupal provides two content types: Article and Basic page. To view content types, go to your Admin menu, then select Structure > Content types.
Although it’s possible to create additional types, let’s just focus on how to tailor comments for each type.
By default, the Basic page type does not allow comments, though for demonstration purposes, let’s change this now:
In the Basicpage row, click Managefields.
Only one field appear, named Body. Click Add field.
From the Select a field type drop-down list,select Comments. In the Label field, enter comments. Click Save and continue when done.
Confirm the default settings by clicking Save field settings.
The Settings page controls how comments appear on the page, allowing you to toggle Threading, set a comments-per-page value, and other options. Click Save Settings to save the default.
Comments are now enabled for Basic pages. You can Delete the comment field from the Operations menu; however, doing so permanently deletes all comments in that content type.
Forums
Drupal 8 allows for the creation of forums, which can give your community members another way to interact with one another.
Initial setup
Follow these steps to install and set up the Forums module:
From your Admin menu, click Extend.
On the Extend page, type “Forum” in the search field. Select the Forum checkbox, then click Install.
We have now created our first forum, “General Discussion.” The web address will be yourdomain, followed by /forum. We can test it as user by visiting that web address in another browser (one in which you are not logged in as site administrator). Note we are unable to post because our permissions prevent unregistered users from creating forum posts.
Unfortunately, our forums are currently accessible only to people that know the web address. Let’s fix that now:
Copy the forum web address to our clipboard.
While logged in as admin, locate the pencil icon corresponding to the menu bar at the top of the page.
Click EditMenu.
This page shows our current menu items and provides several options. Click Addlink.
In the Menu link title field, enter “Forum.” In the Link field, enter the web address for your forum (paste from your clipboard). Click Save when done.
Our forum is now set up with the name “General Discussion,” and any visitor can easily find it!
Posting topics
Posting a forum topic looks much like creating other types of Drupal content. Any admin or user with appropriate permissions can add new topics in that forum by clicking Add new Forum topic.
For demonstration purposes, here’s an example with several posts in our General Discussion forum.
Adding Forums
Perhaps we’d like several more options beyond “General Discussion.” To get started adding the, go to your Adminmenu, then select Structure> Forums.
On the Forums page, click Add forum.
The Addcontainer option adds content much like the Addforum option, but users cannot add topics to containers. Think of it as a read-only bulletin, though admins can delete or edit them at any time.
On the Addforum page, enter a Name and, if desired, a Description. It is often wise to designate another URL alias. If you enter no value, it will be yourdomain.com/forum/#, where # is a number. If you want to replace # with something else, you can do so, but precede anything you type with a forward slash (/). Click Save when done.
This returns Drupal to the Forums page. Note you may reorder forum topics from this page by dragging-and-dropping the crossed arrow icon as needed, then clicking Save.
Menus
When we created our forum, we edited the Mainnavigation menu. Let’s take a closer look at the other default menus in Drupal 8.
Editing Menus
Where menus appear on your nodes depends on your theme, though you can always alter their placement and function.
To get a better sense of where these menus currently appear, navigate to your homepage as admin and click the pencil icon near any block. If the pencil icons aren’t present, click Edit on the upper right. If the block is a menu, the Editmenu option will appear.
It is possible to access the same Editmenu option from the Drupal 8 Menus page. To get started, go to your Admin menu, then select Structure > Menus.
The Menus page shows all menus for your current theme. The default theme, Bartik, provides five menus: Administration, Footer, Main navigation, Tools, and User account menu.
You can edit any menu by selecting Editmenu from the Operations column. For example, edit the Mainnavigation menu to see the change we implemented earlier when creating our forum.
Maybe we want the order to be Home, About Us, then Forum. To reorder them, drag-and-drop the crossed arrow icon as appropriate. Click Save when done.
To access this page, go to your Admin menu, then select Structure > Block layout.
Locate your desired block, then click Placeblock.
On the Forums page, click Add forum.
Remember, you can click Demonstrate block regions to see how your theme organizes block on your nodes.
From the Configure block page, you can change the title, menu level, and the region of the page in which it appears. You can also restrict the visibility of this block by content type, page, or role. Click Save block when done.
You now have a decent grasp of the fundamentals of Drupal 8, but there’s much more to learn! If you haven’t done so already, we recommend exploring the available themes and modules from the Drupal website.
When you’re ready, consider learning about Views, which allows you to fetch content from the database of your site and present it to visitors as lists, posts, galleries, tables, blocks, reports, and so on. We may cover Views more in a later entry, but for now, feel free to get started on the Drupal website.
In January, users of the popular WPML WordPress plugin received a concerning email. It warned that there were serious security vulnerabilities in the plugin. The email came from a genuine WPML address, and customers had no reason to think it wasn’t legitimate. WPML is used on tens of thousands of WordPress sites, and a critical unpatched vulnerability could have been a security nightmare.
Except there was no vulnerability, and the email had been sent by a disgruntled former employee who had gained access to WPML infrastructure. The attacker used an old SSH password to gain access.
Insider attacks are not as rare as you might think. In a recent survey, 53% of respondents said that their organization had suffered an insider attack in the last year. Insiders are implicated in just under a third of all cybercrime breaches. A PwC survey showed that employees, service providers, and contractors are responsible for a huge number of security breaches. A third of executives reported that online crimes perpetrated by trusted insiders caused financial and reputation losses to their organization.
Insider threats are challenging to defend against. A certain level of trust is required for employees to do their jobs. If they choose to abuse that trust, there’s little a business owner can do about it until the damage is done. But there are steps that security conscious business owners can take to limit the risk of insider threats to their WordPress business.
Give Every Employee Their Own Account
Every employee and freelance developer, designer, or marketer should be given their own user account if they need an account at all. For every application or server they need access to, a unique account should be created just for them. There should be no shared accounts.
It is often more convenient to use shared accounts, which is perhaps what happened in the case of WPML. There should be no “old SSH” accounts to be used by anyone who happens to know the password. Consider how many other ex-employees and contractors may have had access to the same account.
Limit Access Using WordPress’ Roles And Capabilities
WordPress comes with a range of user roles, each of which has associated capabilities. A user given the Administrator role has full control over all admin features on a site. An Editor can publish and manage their own posts and the posts of others. An Author can only publish and manage their own posts.
Because you give everyone their own account, you can restrict their privileges to those they need to do their job.
Delete Accounts As Soon As An Employee Leaves
The main benefit of giving everyone their own account is that it can be deleted immediately if they leave. Once the departing employee’s accounts are deleted, they no longer have access to do mischief. When you hire a writer and give them access to publish content on your WordPress site, it’s a bad idea to let them keep their access forever.
Keep a record of which accounts an employee has access to, and delete them as soon as possible.
Educate Employees
Giving everyone an account with limited privileges is security commonsense, but it doesn’t help if employees share their passwords. There are many reasons to share passwords, and it is often convenient to give a co-worker a password so that they can access features and data they wouldn’t ordinarily be able to. But sharing passwords undermines security. Employees and contractors should be made aware of the risk and discouraged from sharing authentication credentials.
The security precautions we have covered are widely acknowledged to be the right thing to do, but they are rarely implemented. Why? Because it is inconvenient, creates extra work, and costs money. However, taking security precautions is not as inconvenient as the financial and reputational havoc of a security breach caused by an insider.
File permissions are an important aspect to consider for any website. This is even more important in a shared hosting environment, since neighboring clients can potentially read or write to your files if the permissions are configured incorrectly.
Even just the ability to read files can expose sensitive information from site configuration files, such as the credentials necessary to access your database. The ability to write or alter your files could allow others to use your site to run malicious code, spread malware, or perform any other number of unwanted activities, including vandalizing your site.
Why Are File Permissions Important?
While file permissions are important in any hosting environment, this article will be dealing specifically with current Hostdedi hosting environments. If file permissions are new to you, ask your service provider about best practices pertaining to your specific environment before making any changes.
Before attempting to set or alter permissions, you should first understand how they are represented on a typical web server.
Permissions are granted to three categories: user, group, and other. The user is the user on the system that owns the file. On Hostdedi systems, the group owner will typically be the user. On other hosts, you may have shared groups set up for the web server, FTP processes, and so on. In this context, “other” means absolutely any user having access to the system, including the group and owner.
What File Permissions Are There?
Each of the above categories can be granted three standard permissions: read, write, and execute.
The read permission allows a user to see the contents of the file. The write permission allows users to alter the contents of a file. The execute permission gives a user the ability to run a file if the file type is executable on the system, or can be run within a directory. This would not typically grant any special abilities on a normal image file.
The read, write, and execute permissions are typically represented in two forms. One form is the letters r (read), w (write), x (execute).
Octal Form File Permissions
The other form is known as an octal form, where 4 represents read, 2 represents write, and 1 represents execute.
If more than one permission is being granted, the numbers are added together, with the numbers shown in the order, user–group–other. For example, permissions of 700 would mean the file owner (user) has read, write, and execute permissions, but the group and everyone else has no permissions. If the permissions were set to 600, the file owner would have read and write privileges (4+2), with all others having no permissions. 777 grants read, write, and execute access to all users.
One special, helpful permission, is the setgid permission. Using this on a directory will cause any file created in the directory to inherit the same group as the parent directory. There are other special permissions, as well as access control lists that can be applied to files and folders beyond the user, group, and other categories, but they are outside the scope of this article.
Hostdedi File Permission Defaults
Current Hostdedi systems run the Apache web server as a separate user, so directories typically need “other” execute permission. This allows Apache to operate on the contents of the directories.
Apache needs read access for any .htaccess files used by your site, and read access to static files like CSS, JS, and image files. These permissions allow Apache to read and transmit files to the end client requesting them. All PHP files will be executed by your system user using PHP-FPM, and should typically only have permissions granted to the user.
Since PHP processes and application run as your user on the system, these files typically only need to be accessible by your user.
To summarize general permission settings for securing a web application:
Directories should be 711, which allow your user full access and allow the web service access to the directories to read static files.
PHP files and application configuration files should have permissions of 600, which allows only your user access.
Image files and static site assets such as CSS, JS, font files, and so on need permissions of 644, which allows Apache to serve these as expected without receiving a 403 or forbidden response.
Checking File Permissions
Two easy ways to check file permissions are with the stat and ll commands.
Issuing the stat command on a file does show much more information that simply the permissions, but on the first line that starts with Access: will show the permissions in both numerical and alphabetic forms. The stat below shows the permissions as 0660 or -rw-rw—- . Which would be user and group having read and write access but all others having not access.
Using the ll command you will only receive the alphabetic form of the permissions, output from the same file above looks like the content below when using ll.
The chmod command is used to change permissions, it accepts the permissions in several formats. Below we are changing the permissions to 600 for the file.xyz file.
chmod 600 file.xyz
To express this in the non numeric way, we would use the command below. This would set it so the user has read and write access.
chmod u+rw file.xyz
To add permissions so a user group can have read and write access, you would use the following syntax.
chmod ug+rw file.xyz
Bulk File Permission Changes With the Chmod Command
Changing the permissions on a large number of files at once can be done by using the -r or recursive flag with the chmod command. You can also use the find command, in conjunction with the chmod command, to select certain files or file types and adjust their permissions.
An easy way to help secure file permissions across your site is to run the following commands from your web application root directory.
First we set all directory permissions to 711.
find . -type d -exec chmod 711 {} ;
You may want to use the setgid on the directories, this would be set on all directories with the following command.
find . -type d -exec chmod 2711 {} ;
Then we set all file permissions to 644 so your user has read and write access and your group and others have read access. This will allow Apache to access and serve static site files.
find . -type f -exec chmod 644 {} ;
We would then want to go through and tighten security on all PHP files so only your user has access to them.
find . -type f -name “*.php” -exec chmod 600 {} ;
After doing the above, you would want to manually change the permissions with chmod on any sensitive site files without the .php extension to 600. For something like Magento 1.X with a local.xml configuration file, the command would be the following, run from your web application root:
chmod 600 app/etc/local.xml
Application Specific Configuration Files
Below are some notable application-specific configuration files that should use 600 permissions exclusively. For additional security, some of the below applications also recommend moving directories containing configuration files outside of the website’s document root. If your application has been modified, some of these files may be in a different location, or there may be additional sensitive configuration files. When in doubt, contact your web host or development team.
As a popular CMS, Drupal is a great platform for making the most of a site’s SEO value. However, it’s also a complex beast, with its ability to create customized experiences both elevating its popularity and complicating its implementation. For this reason, creating the best possible SEO experience with Drupal means paying attention to details you may not have to with alternative CMS.
Yet don’t think that this makes Drupal any less of a powerful CMS in terms of SEO value. In fact, Drupal’s need for advanced tweaks affords it unrivaled versatility in delivering nuanced experiences that can truly narrow in on user experiences and journeys. If implemented correctly, Drupal can offer users of your site an organic search experience you won’t find elsewhere.
To help you avoid some of the most common pitfalls, this article takes a look at some Drupal SEO best practices, providing a good template for the knowledge that helps Drupal developers deliver organic search experiences that truly exemplify the platform.
What You Need to Know
SEO begins with an understanding of how sites are read and indexed by search engines. For different CMS, this process changes as they create pages and store data differently.
So it goes to reason that the more widespread a CMS is, the more likely search engine crawlers are going to be optimized to understand it.
According to Builtwith, Drupal is used by 5% of CMS users. This positions Drupal comfortably as the second most popular CMS after WordPress. So it should come as no surprise that Drupal is one of the better platforms available for those looking to optimize organic discoverability of their site.
However, as mentioned previously, the platform is also complex. Proper SEO means a deeper understanding of what SEO best practices have been set by search engines, and how to make sure they are implemented from both technical and on-page perspectives.
This is especially important with Drupal due to its focus on near-unlimited functionality and the caveats that can quickly arise when implementing advanced features.
Don’t forget, Drupal SEO also means knowing which Drupal version your site is running on. Drupal 7, for instance, requires users to implement clean URLs for a better SEO experience. Drupal 8, though, comes with clean URLs by default. Different versions require different implementations.
Currently, Drupal 7 is still used by the majority of Drupal site owners. Over 69% of sites still run Drupal 7, while just over 26% of sites run Drupal 8. While much of this guide will also apply to previous versions, it is primarily aimed at Drupal 8 users. If you’re just starting out in the Drupal space, we recommend starting with Drupal 8.
Drupal SEO: Best Practices
Instead of delving into a general list of SEO tactics like most blog posts on Drupal SEO do, we’re going to take this opportunity to look at SEO specific to Drupal.
Language Differences
By language, we mean coding language. Each language causes web elements to interact differently. From an SEO perspective, this can have a huge effect on how your site is crawled and how users interact with it.
According to a survey by Stack Overflow, JavaScript is the most popular coding language available, being used by 69.8% of respondents. This is followed closely by HTML and CSS, used by 68.5% and 65.1% of respondents respectively.
Under the JavaScript modernization initiative, headless and decoupled JavaScript implementations have become increasingly common. In this environment, an understanding of how code can affect SEO is vital.
An understanding of how JavaScript can effect SEO is especially important as search engines will, in some cases, not read JavaScript or other esoteric code properly. This can lead to a potential loss of rankings and page value.
MediaCurrent’s state of Drupal 2019 provides a good starting point for understanding which coding languages are going to be more applicable in 2019. We recommend sticking with JavaScript and CSS, and begin getting to grips with Python and Java for the next-gen of web apps.
As a developer it’s important to implement coding best practices and not just opt for a mess of CSS styles and JavaScript implementations.
Content Parsing With Structured Data (Schema)
Structured data from schema.org’s microdata vocabulary improves how search engines understand the content of your website. It does this by allowing you to highlight content and define its context.
For instance, if you are running a cooking website, recipe schema will allow you to define and publish specific elements and their properties such as cooking time, nutrition data, the ingredients list, direction, and more.
By telling search engines the context of individual pieces of content, they are more likely to show it in featured snippets (the famed rank zero). Below is an example of this done with a recipe for apple pie.
There are two ways to get started with Drupal schema. You can either begin the markup process manually, or you can implement it automatically by installing a module.
If you want to get started with Schema manually, get ready for a lot of HTML code tagging with schema properties. Start by inserting the following HTML at the top of your page and defining a relevant schema.org page. In the example below, we use the recipe schema page.
For a more detailed look at schema markup and how to implement it on your Drupal site, check out the Search Engine Journal’s informative article on how to get started with schema.
If you would rather implement schema automatically, you can install the Schema.org Metatag module. This module allows for content creators to add schema values as JSON LD in the head of web pages. It currently offers full support for Drupal 8.
A Properly Configured Sitemap
In order for all of your content to be found by search engines, it’s important to have a properly configured site map. To do this, we recommend installing a Durpal module. At the time of writing, the most popular sitemap module available is the XML sitemap module.
The XML sitemap module allows you to automatically update and submit a sitemap to ASK, Google, Bing, and Yahoo. Moreover, it follows specifications outlined at sitemaps.org.
Perhaps because it is still in alpha for Drupal 8, the XML sitemap module has not seen as high an adoption rate with Drupal 8 users as it has with 7 users. Almost 90% of sites that run the XML sitemap module are still running Drupal 7, just 6% are running on Drupal 8.
If you’re running Drupal 8, we recommend opting for the less well known simple XML sitemap. This module is able to generate multilingual hreflang and image sitemaps. It supports Drupal content types out of the box and is a great replacement for site owners looking to stay up to date.
Simple XML sitemap’s ability to provide multilingual sitemaps is also vital for modern sites that cater to multiple regions. As of 2019, Drupal is available in over 100 languages. Appearing in searches for as many of those as possible can make a huge difference to the user experience.
While simple XML sitemap is used by just 41,000 websites, 100% of those are running Drupal 8.
Site Speed Is Important
Site speed has been a ranking factor since April 2010. It is something you should be considering. From an SEO perspective, there are three main areas that can lead to quick and quantifiable site speed increases.
However, with hosting, it’s becoming increasingly important to have a competent system operations admin behind your infrastructure to get the most out of it.
Take, for instance, the importance of caching in speeding up page delivery. Applications like NGINX and Varnish can speed up asset delivery, yet can be tricky to configure. We offer a hosting infrastructure with these caching techniques enabled and configured by default.
Remember, a lot of hosting providers offer seemingly impossible Time To First Byte (TTFB) speeds. However, if you’re worried about SEO, TTFB isn’t the metric you want to look at.
Instead, you should be looking at time to render and time to activity. These provide you with the metrics that really affect user experience.
Understanding Drupal Views and Duplicate Content
(Drupal 7 and lower only)
Views are one of Drupal’s strengths. They allow you to easily manage, view, and sort lists of content from a single location. In fact, they have been deemed so useful that they became a part of core with Drupal 8.
Yet while views provide a powerful interface for organizing and managing content, the way in which they are generated can cause problems with duplicate content. SEO 101: duplicate content isn’t good.
The reason views can easily lead to duplicate content is due to exposed filters, which can lead to several URL paths directing towards similar content. These URLs can be read as individual pages, with their on-page content only being minorly different from one another.
If you’re still working in Drupal 7 or earlier, it’s important to implement a simple fix. Simply pull up your Robots.txt file and add the lines below:
Note that Drupal 8 installs clean URLs by default and it can not be disabled.
The Bottom Line: Is Drupal SEO Friendly?
In terms of SEO value, Drupal still stands as one of the best CMS to operate within. That being said, it does require some clear optimizations and tweaks to ensure that all content is being read by search engines the way that it is meant to be.
What’s great about Drupal is the ability to install additional modules that will handle all of this for you. We identified several great examples above that gives Drupal the versatility and power it needs to perform better.
On to Part 4 of our series, Getting Started with Drupal 8. Go here for Part 3.
Previously, we covered the basics of customizing your site, setting permissions and roles, and giving your visitors a way to contact you. This entry provides you with a few more tools for adding and managing content in Drupal 8.
Our screen captures reflect changes we made during earlier entries in this series, without modules and with default Drupal 8 theme, Bartik. Recreating these changes is not necessary, but if you’re using a different theme, or have added modules, what you see will differ from our images.
Contents
Graphics & Text Styles
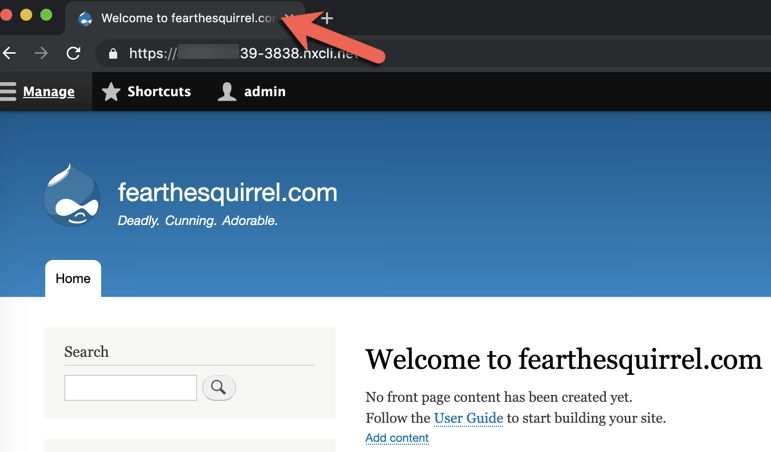
In a previous article, we created a simple blog post. To get a better feel for how to wrangle graphics and text styles, we’ll create an “About Us” page for our website, FearTheSquirrel.
From your admin menu (click Manage), click Content, then click Add content. Or, select Add content from Shortcuts.
Click Basic page.
In the Title field, enter “About Us.” In the Body field, enter one standalone sentence, followed by a few paragraphs. We’re using mostly “lorem ipsum” placeholder text, but feel free to use whatever you like.
The bar along the top of the Body section allows you to adjust text size and appearance, as well as add hyperlinks, images, and other elements common to text editors. Highlight the first sentence, and click the B icon to make it bold.
Before continuing, note the Source button, which will show your text as HTML. You can enter or edit HTML while in this mode. Click Source again to revert.
To add an image, click the image icon, then click ChooseFileto upload an image. If necessary, use the one provided below.
After uploading your image, fill the Alternativetext field, which will help screen readers and people with vision impairments. Decide which Align option appeals to you, but leave the Caption option alone for now. Click Savewhen done.
To publish, confirm the Published check box is selected, then click Save.
Tip: You can preview content at any time by clicking . Click Back to contend editing to return to your editor.
Once published, note the View, Edit, and Delete tabs. These tabs are only visible when logged in as a user with permissions that allow content editing.
Metadata, or “data about data,” is used by search engines and other websites to gather information about your content.
Return to your previous post and click the Edit tab; or, click Content from your admin menu, find your recent post, then click Edit.
While we’re here, it’s worth noting the RevisionLog on the right. Enter “adding metadata.” Getting into the habit of this now will make it easier to track revision history when managing your content later.
In Menu settings, select the Provide menu link check box. Parent item and Weight change how it appears in the menu, but leave these alone for now.
The URLalias field re-assigns the web address of this node from the default, which is currently your domain, followed by /node/, then a number; for example, https://mydomain/node/9. Change the URL alias to “/about-us”, and don’t forget the forward slash (/)!
Authoring information allows you to designate an author and change the date of authorship., The author must match the username of a content author for your site.
Promotion options is useful for when you want to highlight important content. Leave these selections unchecked for now.
Click Savewhen ready. Go to your homepage, then click your newly created AboutUs menu option.
Tip: It’s usually worthwhile to view recent changes as an external visitor. To do so easily, visit your site in an alternate browser.
Should you need to view the revision log or revert to a previous version, click the Revisions tab.
In the Revisions Log, you can view any previous version, read log messages, and Revert as needed.
Teasers
As the name suggests, a teaser is an abbreviated view of your content. Teasers make it easier for visitors to find content that interests them, and ignore content that does not. Before continuing, go to your home page and create a new post (Shortcut > Add Content > Article). You can choose your own content if you prefer.
In this example, we’re entering “Caught in the Act!” in the title field, placing mostly “lorem ipsum” text in the Body field, and adding the image of the vile creature below.
Once we publish, the teaser appears:
Note the Read more option near the bottom of the teaser.
By default, Drupal 8 allows you to customize the appearance and behavior of teasers by content type. Additional themes and modules can expand your options, but for now, let’s stick with the default Bartik theme.
To customize a teaser, go to your admin menu and select Structure > Content Types. In the Article row, select Manage Display from the drop-down menu.
Tip: On this page, it’s also possible to create additional content types by clicking . It is possible to administer an attractive Drupal website without creating additional types, but some admins will appreciate the option.
You are now on the Default tab within the Manage Display page. Click the Teaser tab.
From this page, you can change your teaser options as needed, just keep in mind it affects all content of this type.
For example, to adjust the size of the image in the teaser, click the geariconthe Image row. Set the Imagestyle to large, then click Update
It is also possible to reorder items in the Field column by clicking and dragging the icon corresponding to each field.
Newsfeeds
Visitors can click the orange RSSlinkicon at the bottom of any page to subscribe their news reader to your site. Just as with teasers, can customize how this content appears in their news feeds, and the interface is nearly identical.
To customize RSS, go to your admin menu and select Structure > Content Types. In the Article row, select Manage Display from the drop-down menu, then click the RSS tab. Make your changes, then click Savewhen done.
Content Management
As your site grows, so will the need for one “point of truth” for managing your content. From your admin menu, click Content.
Tip: Although it is possible to manage your content directly from the database, do not attempt to edit content in the database; use the Drupal interface instead. If you need to manipulate images, most are found in sites/default/files, though any related to specific themes and modules will be in those folders.
Basic Interface
This page shows every published and unpublished node on your site. From here, you can edit and delete individual nodes from the Operations column.
You can also can perform operations on multiple nodes at once. To do so, 1) select the check box corresponding to each article, 2) select an action, then 3) click Apply to selected items.
Tip: You can also manage comments and files from this page by selecting the Comment or File tab near the top of the page.
Filters
Eventually, your site will contain too many nodes to manage effectively without a filter, which appears at the top of this page.
The Title field functions as a search bar, though it will search only titles, not topics or keywords. The Contenttype, Publishedstatus, and Language options are self-explanatory. However, remember you can add content types, which will give that filter greater significance.
Block Basics
Blocks provide you an easy way to “layer” important information without getting in the way of your core content. Blocks can look different based on who is viewing them (user, admin, and so on), but only users with appropriate permissions can
Configuring blocks
You can interact with blocks on any node by clicking Editon the upper right, then clicking the pencil icon near any block.
First, let’s check out the “Tools” block on our homepage. Click near that block, then Configure Block.
From the Configure block page, you can change the title, menu level, and the region of the page in which it appears. You can also restrict the visibility of this block by content type, page, or role.
For now, let’s just remove this block. Click Removeblock at the bottom of the page, then confirm.
Block Layout
From your admin menu, select Structure > Block Layout. This view shows all the blocks on your website, though as noted above, it’s possible to restrict individual blocks to certain pages, roles, and content types.
From the Operations column, it is possible to Configure, Disable, or Remove any block. The Configure option opens the same page described in the above Configuring Blocks section.
The Block column shows various regions: Header, Primary menu, Secondary menu, Highlighted, and so on. You can move blocks by either clicking and dragging them from one region to another (use the pencil icon), or select a new region from the dropdown list in the Region column.
Tip: Use the tabs near the top of the page to compare block layouts between themes.
Click Demonstrate block regions to see a graphical representation of all regions.
While it is not possible to move blocks from this view, it will give you an idea of their placement. When done, click Exit block region demonstration to return to the Block Layout page.
Creating blocks
From the Block Layout page, click the Custom Block Library tab, then click Add custom block.
As when creating content, note you can insert links and images.
Enter some text in the Block description and Body fields, then click Save.
Return to your Block Layout page. You can either add your newly created block to an existing region, or designate a new one, though the process is very similar either way.
Tip: Remember, if you’re curious about where the Sidebar second region is, click Demonstrate block regions.
Select a new block by scrolling to the Sidebarsecond option, then click Place Block. Locate your newly created block in the provided list, then once again click Place Block.
This brings you to the Configure Block page for your newly created block, which you can always edit later. See the Configuring Blocks section for more information about your options. Click Save Block when ready.
Return to your home page to view the results!
Next Steps
That’s all for now, but we’re not done yet! Part 5 will dive into comment management, shortcuts, using views, and other tricks of the Drupal 8 trade.
Unless you’re a network administrator or tech enthusiast, you’ve probably never heard of BGP (Border Gateway Protocol), but the Internet could not exist without it.
A network is a group of computers linked together, either wired or wireless. Each computer is identified by a unique ID number called an IP address. BGP allows computers in different networks to communicate with one another, and we’ve come to know the combination of all the countless interconnected networks on the planet as the Internet.
A technology that defines how exactly to communicate messages is called a protocol. When you define a protocol, you mostly define what kinds of communication can take place. So what kinds of communication are possible with BGP?
First, it advertises blocks of IP addresses on that network to neighboring networks, a process known as originatinganadvertisement. Second, it gives networks a way to pass along this information to other networks, who pass it in turn to other networks, a process known as propagatinganadvertisement.
So why are these two kinds of communication needed?
One network
Figure 1
If there was just one network in existence, there would be no need for a protocol that allows networks to share information about addresses. Figure 1 represents a network, labeled AS1.
You can think of this as just a name, but AS actually stands for AutonomousSystem, which is another word for network. A network is a system that is managed by a single person or group of people, and is thus “autonomous”. Generally, each organization has its own AS, and each has a unique number assigned to it. Networks use numbers rather than names because numbers are easier for computers, so AS1 is network 1.
Two networks
Figure 2
If there were two networks, then each network would just need a way to tell the other, “These are my IP addresses.” This type of message is called an advertisement. This makes more sense when dealing with more than two networks, but for now, it’s worth knowing that creating an advertisement for your own IPs is called originating an advertisement. The red arrow in figure 2 represents AS2 originating an advertisement to AS1.
Three networks
Figure 3
With three networks, we need an additional mechanism. In the diagram, AS3 is originating the advertisement for its addresses. But it would be nice if the people in AS1 could also reach AS3. So AS2 now takes the advertisement from AS3 and sends it on to AS1. This is called propagating an advertisement, and the diagram represents it with the green arrow. In this simple example, AS2 could just pass on the message it got from AS3 to AS1 without any changes. But in the real-world application of BGP protocol, AS2 would add its own AS number to the advertisement.
A more complex example
Figure 4
In this image, AS5 now is originating its advertisements to both AS3 and AS4, which are in turn propagating the advertisements to the remaining networks. AS1 can reach the AS5 addresses through either AS2 or AS4.
How does AS1 decide which path is better? Because each AS has been adding its own AS number to the advertisement, each one looks different:
AS2’s advertisement says the path is AS2 > AS3 > AS5
AS4’s advertisement says the path is AS4 > AS5
All other things being equal, a path with fewer networks is usually more desirable, but other factors often come into consideration.
BGP Allows Networks to Set Their Own Policy
BGP allows a network to control how it sends and receives traffic: what your network advertises, what it accepts, and what paths it prefers to use. In the example from Figure 4, AS1 might decide that the path through AS4 looks shorter. However, it might also decide that AS4 is untrustworthy and prefer the other path through AS2 > AS3. How exactly the network uses the data depends on the policies configured by the people running the network.
Ready, Set, Dive
It’s easy to take the Internet and the technology behind it for granted. If you made it this far, it you’re showing interest in looking under the hood and going beyond being a strict consumer. Keep your eye on this space for opportunities to learn more!
As a WordPress hosting client, you don’t need to know how WordPress works behind the scenes. In fact, WordPress was created so that people could focus on writing and publishing, not on the technical details. But it’s useful to have a basic grasp of what’s happening under the hood of your WordPress site. It may help you to diagnose problems more easily and understand why WordPress behaves as it does.
The Building Blocks of a WordPress Site
Carl Sagan once said that “if you want to make an apple pie from scratch, you must first create the universe.” Something similar is true of a complex piece of software like WordPress. If you wanted to fully understand WordPress, you’d have to be a developer, a network engineer, a database administrator, and a designer. It would take (several) books to explain the WordPress universe from scratch, so let’s stick with the basic building blocks.
WordPress is a PHP application that relies on three key components: a web server, a database, and a programming language interpreter.
Apache. Apache is a web server. It is responsible for listening for requests from a browser and sending a response – the web page – back. After Apache receives a request, it gives the URL and other information to WordPress, which then generates the web page.
MySQL. MySQL is a relational database – it stores information in tables. All of the blog posts on a WordPress site are stored in a table called wp_posts, for example.
PHP interpreter. WordPress core is a collection of files that contain code written in the PHP programming language. It is the execution of these files that generates web pages.
The PHP files can be divided into two basic groups: template files and files that contain functions – reusable chunks of code – and constants that are used in templates and elsewhere in WordPress’ code. WordPress is a content management system, so the template files are the most interesting from our perspective. They generate the web pages.
Generating a HTML Page
When the Apache web server receives a request for a page, WordPress first runs a number of set-up scripts, including the wp-config.php file that provides information such as which database WordPress should use.
After the set-up phase is complete, WordPress starts the process of generating an HTML page by executing a template file. The template files are a mixture of HTML and PHP. The role of the PHP code is to fetch data from the MySQL database and to process it into HTML. Exactly which HTML is output depends on various factors: the available data, which user is logged in, the time of day, and more. Other functions are executed on template pages, but the ultimate goal is to dynamically generate an HTML page that can be sent to the requesting browser.
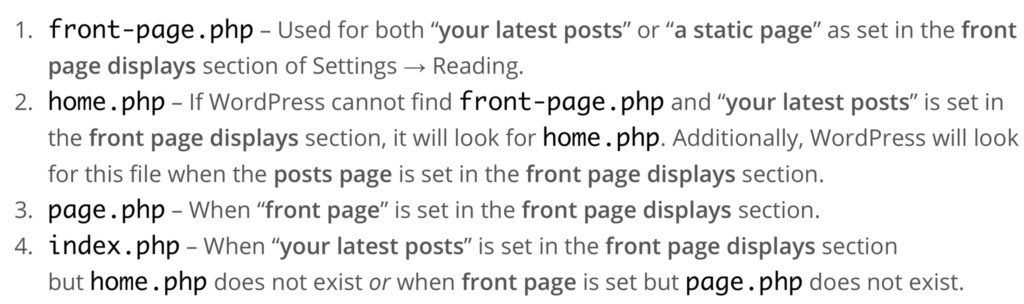
There are many template files and which one is executed depends on a complex set of rules, but is primarily determined by the URL of the request. For example, if the URL is the site’s home page and the site is configured to display a list of blog posts, the home.php file is executed, unless there is a front-page.php file, in which case that is executed.
There are templates for posts, pages, tag indexes, category indexes, the 404 page, and more. Most of them are provided by the site’s theme.
Hooking In
You might have noticed that we haven’t mentioned plugins yet. Plugins can change the HTML that is rendered on a page, but their code does not live in the template files. Instead, WordPress provides a number of hooks onto which people can hang their own code. Hooks are the foundation of an event-based system for extending WordPress. Developers can register code to be executed when an event occurs. There are dozens of events developers can hook into, such as wp_loaded, which runs after WordPress is fully loaded, and pre_get_posts, which runs before a database query.
Hooks come in two varieties: action hooks and filter hooks. The difference between them is not important for our explanation of how WordPress works. It is enough to understand that the code associated with hooks can carry out actions and change the HTML that is output. For example, a hook can be used to add a widget to a page.
WordPress plugins use hooks to integrate their functionality with the HTML rendering process, and they’re one of WordPress’s major strengths. WordPress would be much less powerful if it didn’t provide a mechanism for developers to extend its functionality.
As we said at the beginning of this article, there is a lot more happening beneath the hood of a WordPress site than can be explained in a blog article, but we hope that reading this has given you a useful understanding of what happens when someone loads a page on your WordPress site.
Welcome to Part 3 of our series, Getting Started with Drupal 8. Go here for Part 2.
Last entry, you learned the basics of creating content, adding images, and dabbled in your first themes and modules. Before we start adding more your content — and we will in Part 4 — let’s look at some other fundamentals of managing your Drupal site.
Contents
Tailoring Your Site’s Identity
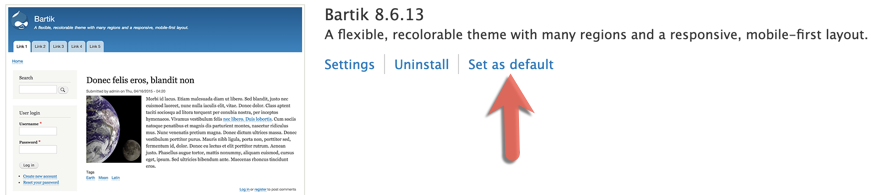
Although we installed a theme in Part 2, Navigating Drupal, this section uses the default theme, Bartik. If you are currently using a different theme, you can revert by selecting Manage > Appearance, locating the Bartik theme, then clicking Set as default.
Tip: To stay focused on Drupal basics, this article does not explore Cascading Style Sheets (CSS), which are a powerful and effective way for a developer to customize a website.
Site Details
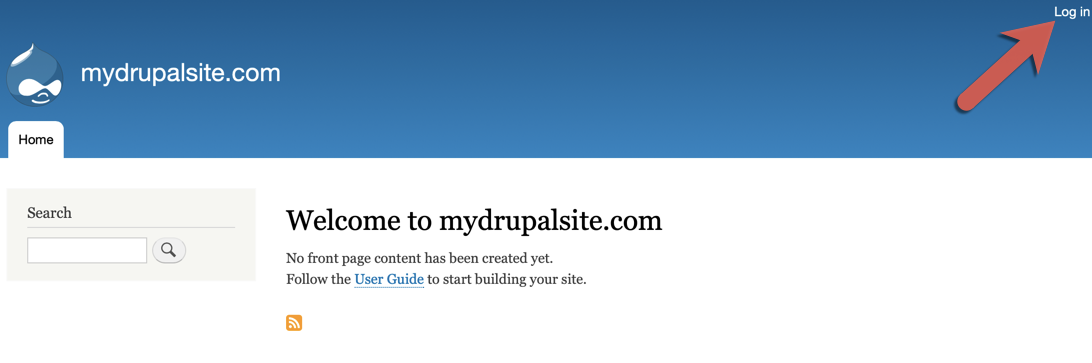
To start, view your current site as a user by opening an alternate browser where you are not currently logged in as an administrator. There’s a few ways to confirm you’re viewing it as a user, but the easiest is to check for the Log in option on the upper right.
It’s possible to move this, but we’ll cover that in a later entry.
First, let’s change your site name. From your admin menu, select Configuration > System > Basic Site Settings.In the SITE DETAILS section, fill the Site name and Slogan fields with whatever appeals to you.
The Email Address field is the email for the site itself, though it currently shows whatever email you provided when creating the site. You can change this later. This address will receive automated emails, such as password resets and other notifications. It is not what site visitors will use to contact you, which we will set later.
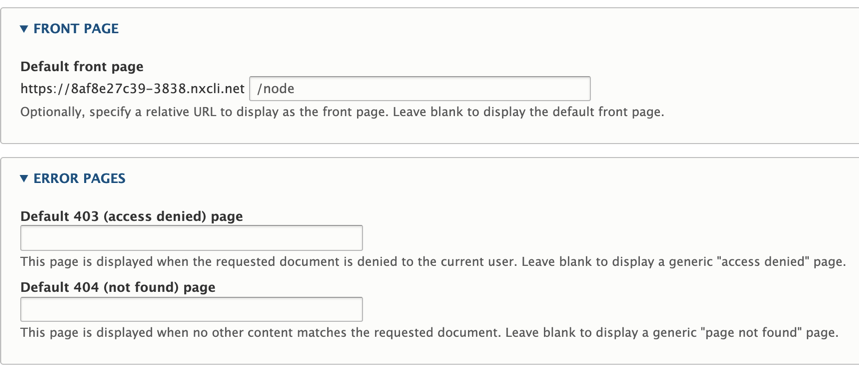
Scroll down to see areas to designate your site homepage (FRONT PAGE) and 403 (access denied) pages. Note where to find these, but leave them blank for now.
Click, then click to view your changes as an admin. While you’re at it, check out your browser tab. This is your first step in search engine optimization (SEO), which makes it easier to search engines to find your site.
Regional Settings
From your admin menu, select Configuration > Regional and Language > Regional Settings.
Make necessary changes to the DefaultCountry, First day of week, and Default time zone drop-down options.
Click when done.
Adding Your Logo
If you don’t already have a logo, save the “FEARTHESQUIRREL” logo to your local device. You can always change this later.
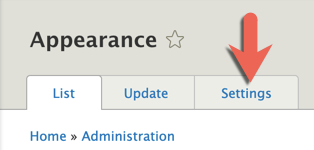
From your admin menu, select Appearance, then click the Settings tab.
In the LOCALIMAGE section, clear the Use the logo supplied by the theme checkbox. In the Upload logo image section, click to upload your logo. Click when done, then return to your homepage.
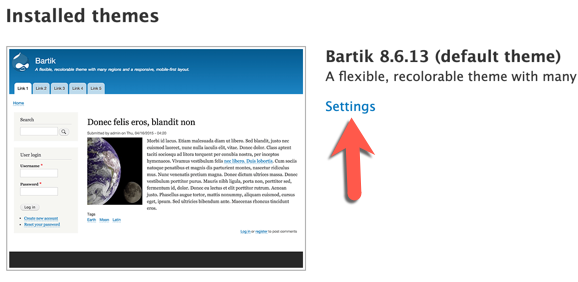
It’s a welcome replacement for the Drupal logo, but it clashes with the default blue at the top of the page. To fix it, select Appearance, then locate the Bartik theme and click Settings.
You will now see a COLORSCHEME and Preview section.
Tip: If you are using a theme other than Bartik, this page may look different from our screen captures.
The Color set drop-down list is currently set to the default Drupal appearance, Blue Lagoon. It provides a handful of other options, but ignore those for now.
For the sake of learning the basics, we’re adopting a minimalist approach:
Tip: As you make changes, view the Preview section to see their effects.
Set the Header background top and Header background bottom fields to pure white. You can use the color grid, or just enter FFFFFF in both fields.
Oops! The white background washed out our slogan and some of the other text. Change the Title and slogan field to black. Either use the grid, or enter 000000.
Adjust the Sidebar borders field to black, just as you did in step 2.
Click , then return home to check your work.
As you can see in the preview, the site name next to our logo is redundant. Let’s remove it. Click on the upper right.
Click the by the site name, followed by Configure Block.
In the TOGGLE BRANDING ELEMENTS section, clear the Site name check box, then click .
You can view your site from your home page, but now would be a good time to view it from your alternate browser so you can see it as a visitor would.
Sparse but clean!
Adding Your Favicon
Let’s replace the Drupal favicon appearing in your browser tab with our own.
If you don’t already have a suitable Favicon, download the one shown below to your local device.
Select Appearance from your admin menu, then once again locate the Bartik theme and click Settings. Scroll down to the FAVICON section, then clear the Use the favicon supplied by theme check box.
In the Upload favicon image section, click to upload your logo. Click when done.
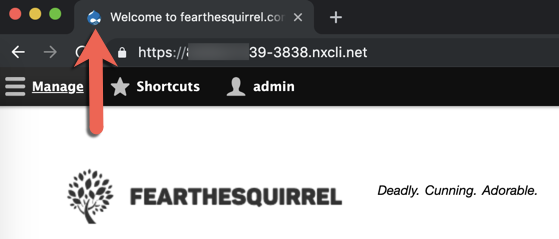
Return to your home page to view your new favicon!
Setting Permissions and Roles
Drupal is designed for teams of multiple users. It is possible to tailor specific roles and permissions without adding modules.
Access your permissions and roles by selecting People from your admin menu.
Permission Fundamentals
Tip: Use caution when assigning permissions, especially ones saying “Warning: Give to trusted roles only; this permission has security implications.”
Click the Permissions tab.
Drupal’s default installation provides three types of users; anonymous, authenticated, and administrator. Take a few moments to scroll through the list and take a glance at the default permissions for each type. You can customize any of these roles.
Anonymous users
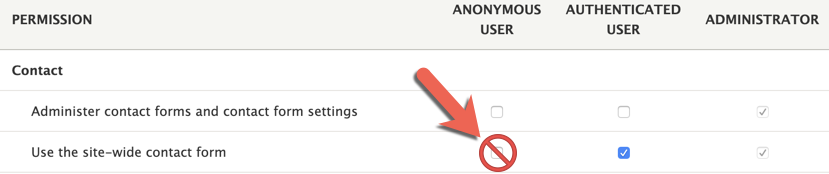
Anonymous users are unregistered. Anyone visiting your site for the first time will be this type, and the View published content permission means they can view your site. Otherwise, they have very few permissions, but we recommend going one step further: disable their ability to contact the site using the site form. This will help prevent spam.
Authenticated users
Authenticated users represent users logged in with registered accounts. Unlike anonymous users, they can use shortcuts, contact the site, view basic HTML, and post comments. We’ll save the topic of comment moderation for a later entry in this series.
To set up the process by which anonymous users become authenticated users, go to your admin menu and select Configuration > People > Account Settings. Scroll to the REGISTRATION AND CANCELLATION section.
The default settings achieve a good balance of security and convenience for many sites. The current option under Who can register accounts?, Visitors, but administrator approval is required, means admins must approve any user attempting to become an authenticated user. The top option, Administrators only, means visitors wanting to become authenticated users must contact an admin directly, who will create the account on their behalf. Your choice will depend on the purpose and volume of your site.
Administrators
Administratorshave access to all areas of the site. This role can be given to anyone. As the site’s creator, however, you are the superuser and it is not possible to change the superuser’s permissions.
Tip: Protect your site by keeping the superuser role to yourself. Don’t share your superuser login credentials with anyone!
If you plan to have several people helping you work on your site, it is best practice to avoid handing out this role to everyone. Continue to the next section for details.
Creating Roles
You can designate different “flavors” of administrators by creating new roles. While the “how to build a site development team” question is outside of our scope, possible roles include:
Site builder: Researches and maintains modules, structure, and configuration
Site designer: Creates CSS and maintains appearance and aesthetics
Content manager: Writes, edits, and manages all site content; may oversee content writers
Community manager: Oversees content, permissions, and the comments
System administrator: Monitors and maintains site performance, security, and uptime
Drupal makes it easy to tailor permissions on an as-needed basis. To create a role, go to your admin menu and click People, then click the Roles tab. Click to get started.
In the Role Name field, enter a name, like “Content Manager.” Click when done.
Any new role you create begins with the same permissions as Authenticated Users. To customize them, click the Permissions tab.
For a content manager, we’d likely want them to have any permissions related to creating, editing, or maintaining content. Many of these are found in the Node section. The exact permissions for each member of your team will vary according to your needs, your team size, and other factors.
Tip: Always assign permissions with care, particularly any that change content or contain the phrase, “Warning: Give to trusted roles only; this permission has security implications.”
Giving Users a Way to Contact You
It is usually in your interests to make it easy for authenticated users to reach you with feedback about your site.
Go to your admin menu and select Structure > Contact forms.
For now, ignore the Personal contact form, which allow users to contact one another, not you. Go to the Website feedback option, then click .
In the Recipients field, specify the email addresses to receive the feedback. In the Message field, enter the message viewed by the user after they send you feedback. Click when done.
Test your work. Return to your homepage, click Contact, and walk through the process to see if it unfolds as you planned.
You can create additional forms, but without modules, you can only have on default feedback form at a time.
Reports to Rememgber
Your default installation of Drupal 8 provides you with reports to help you maintain your site troubleshoot issues. To view your options, go to your admin menu, then click Reports.
Available updates serves as a reliable way to check if you site is out of date. Running anything other than the latest stable version can expose your site to malicious activity. You can also subscribe your email address to update notifications by clicking the Settings tab. We also recommend following @drupalsecurity on Twitter and subscribing to RSS feeds for core security updates, contributed project updates, and public service announcements.
Recent log messages can help you monitor or troubleshoot your site. Use the Type and Severity filters to refine your search as necessary.
Status report a general assessment of the “health” of your site and provides other system information. If you have a more serious error or warning, it will often, but not always, be found here.
Next Steps
See you soon in Part 4 of our series, Getting Started with Drupal 8! On deck is trying our hand at graphics, metadata, newsfeeds, sidebars, and a few other squirrely surprises.

 When it comes to selecting the right eCommerce platform, merchants have a lot to consider: Store size and number of products, payment and shipping options, and how they want the store to actually work.


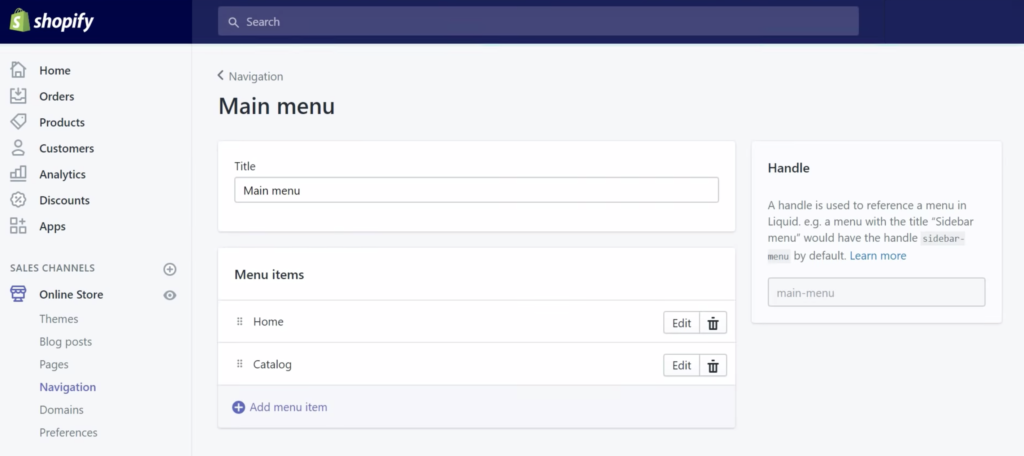


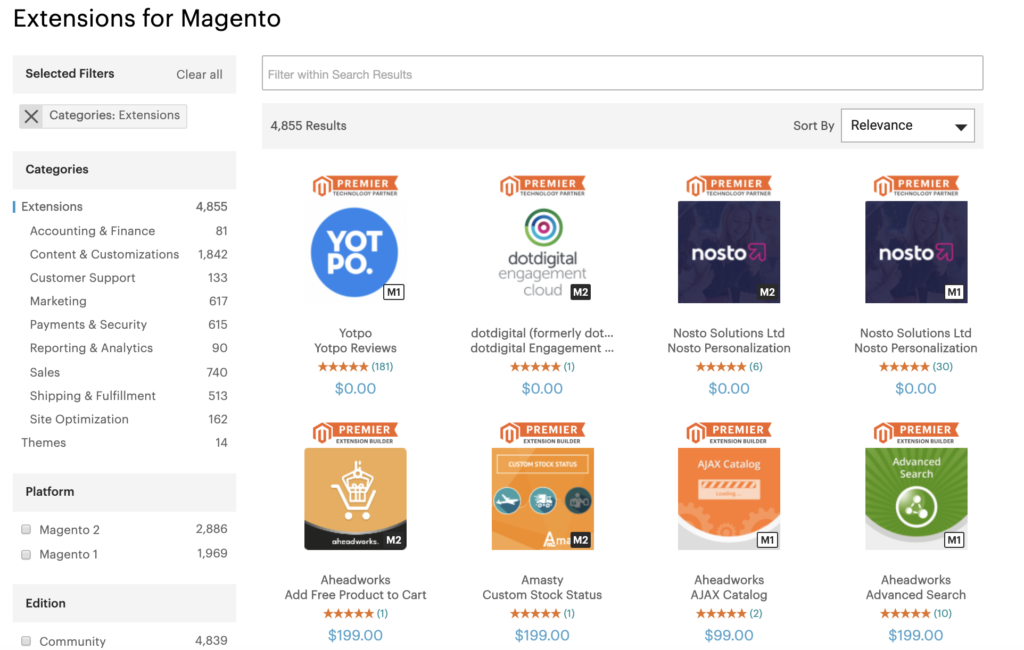
 Shopify, on the other hand, is a lightweight application. As a result, it runs quickly in most environments, and can hold a larger number of product SKUs on the same hardware that will only run a smaller Magento store.


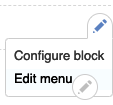


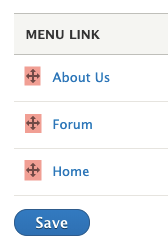


 In January, users of the popular WPML WordPress plugin
  File permissions are an important aspect to consider for any website. This is even more important in a shared hosting environment, since neighboring clients can potentially read or write to your files if the permissions are configured incorrectly.
 As a popular CMS, Drupal is a great platform for making the most of a site’s SEO value. However, it’s also a complex beast, with its ability to create customized experiences both elevating its popularity and complicating its implementation. For this reason, creating the best possible SEO experience with Drupal
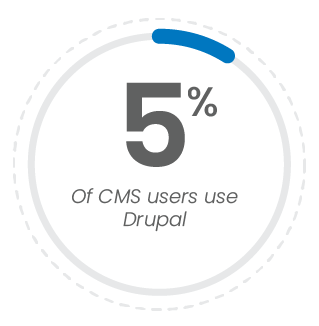
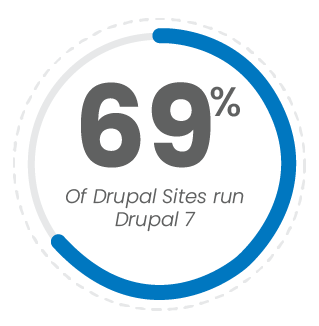
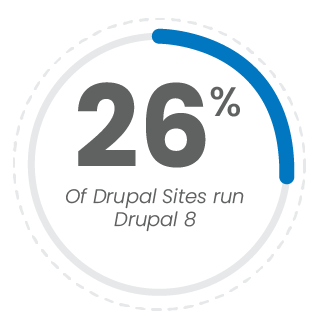
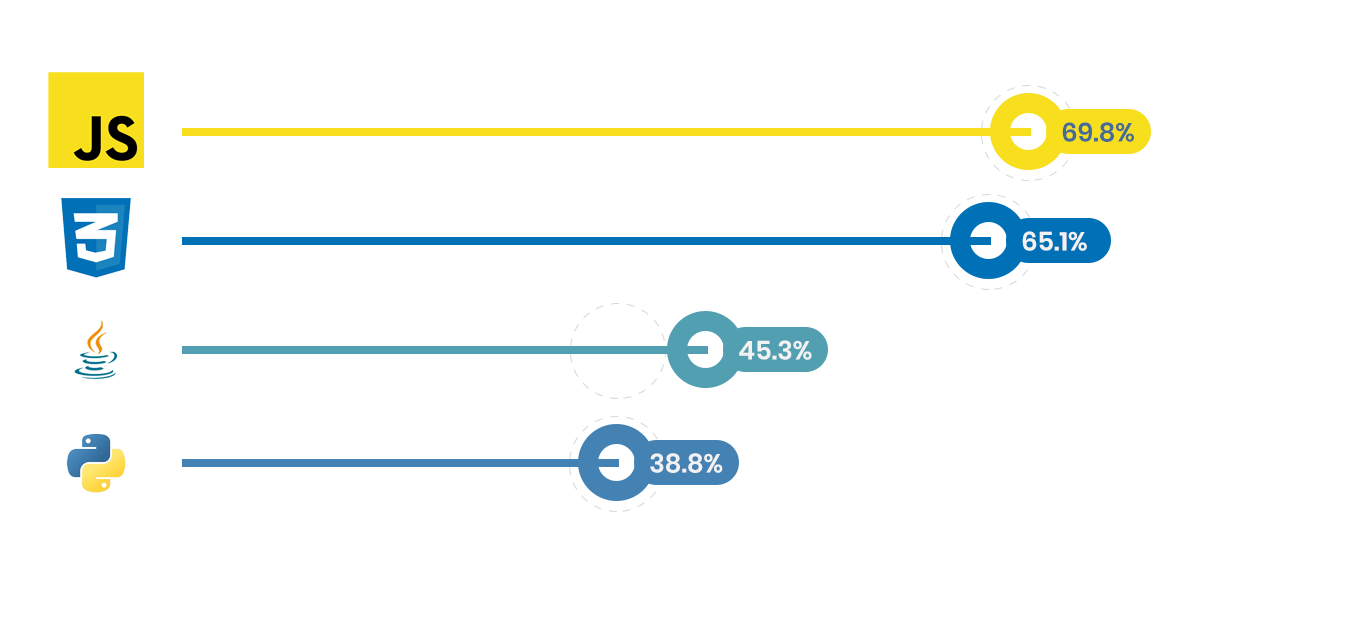

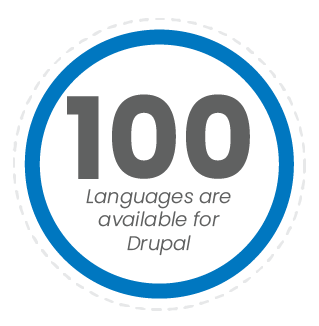

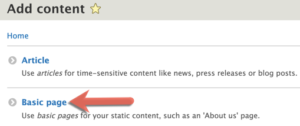
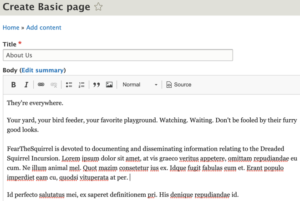

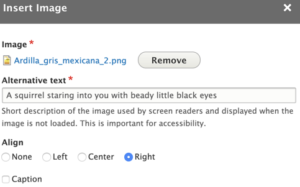
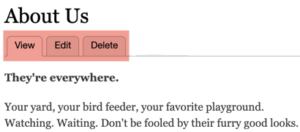
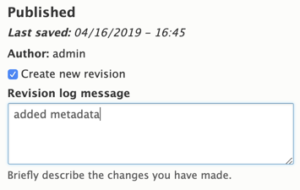
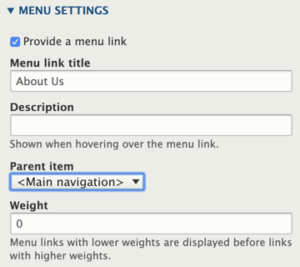
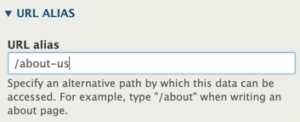
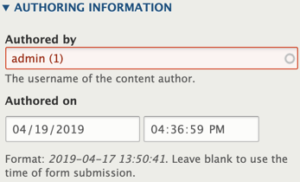

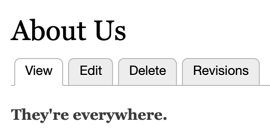
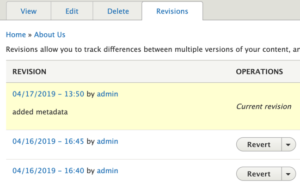


 Unless you’re a network administrator or tech enthusiast, you’ve probably never heard of BGP (Border Gateway Protocol), but the Internet could not exist without it.
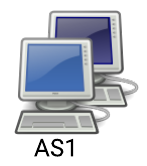
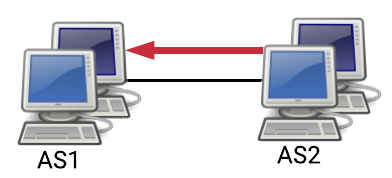

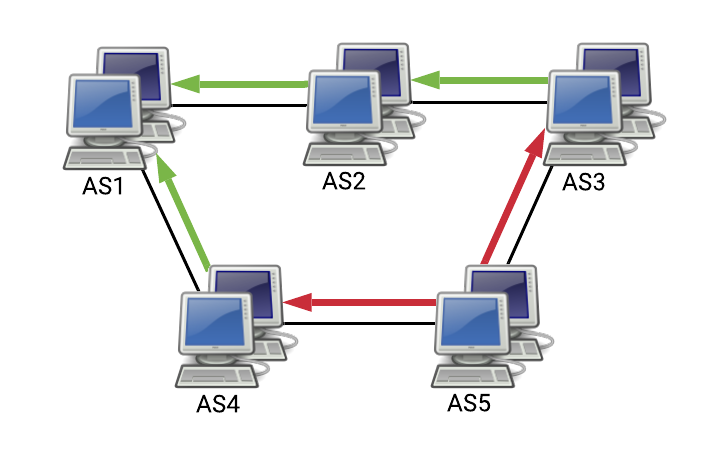
 As a WordPress hosting client, you don’t need to know how WordPress works behind the scenes. In fact, WordPress was created so that people could focus on writing and publishing, not on the technical details. But it’s useful to have a basic grasp of what’s happening under the hood of your WordPress site. It may help you to diagnose problems more easily and understand why WordPress behaves as it does.