CAll Us: +1 888-999-8231 Submit Ticket

Adding Unit Tests to an Existing WordPress Plugin

So far we’ve done little more than introduce you to the idea of building tests for your WordPress plugins and talk about a bunch of the extra terms you need to understand to dive deeper into testing your code. Today we’re going to make it practical by grabbing one of my free plugins and adding a few unit tests to show you how to put it together. 

You can find the plugin on Github or WordPress.org. Just like my previous post, I assume that you have WP CLI installed and can set up basic tests. If you can’t check out my post introducing you to unit testing in WordPress.

Unlike the last time, we only need to scaffold the tests so we can start with the following command in our WordPress installation.

wp scaffold plugin-tests wptt-ics-feeds

Now let’s get into writing a few tests.

The first thing I want to test is to make sure that the links a user sees in their profile with calendar feeds are correct. Specifically, we’re going to look at the get_subscribe_link function.

You can see the completed tests for this section here.

Let’s start by copying the default sample test file and renaming it to test-feed-links.php. I always like to create different files for the areas of the plugins I’m writing tests for, even if that means I have lots of files to deal with. It’s far easier to stay organized with clearly labelled files.

This plugin is a bit older and instantiates a global variable as it starts up. This allows us to call that global when in our setUp function so that we have access to the plugin code. We’ll also need to use the WordPress Factory to set up a new user so that we can test the links provided with that user. That means our setUp and tearDown functions should look like this.

public function setUp(){

    parent::setUp();

    // getting the plugin global

    $this->plugin = $GLOBALS['wptt_ics_feeds'];

    // make a fake user

    $this->editor = new WP_User( $this->factory->user->create( array( 'role' => 'editor' ) ) );

}

public function tearDown(){

        parent::tearDown();

        wp_delete_user( $this->editor->ID, true );

}

Now we can get to writing a test for our feed links. We’ll write two different tests to test both situations that the link function can find itself in. First, we’ll test get_subscribe_link() without any arguments.

   /**

     * Tests base feed link without author

     */

    public function test_base_feed_link(){

        $feed_link = $this->plugin->get_subscribe_link();

        $complete_link = site_url() . '/?feed=wptticsfeeds';

        $this->assertEquals( $feed_link, $complete_link, 'The feed links are not equal' );

    }

The first thing the code above does is access our plugin instance as defined in the setUp function and call the get_subscribe_link() function. Next, I hard code the expected output of the function so that I have something to compare against. Finally, we use assertEquals to compare the two values.

With that done I can head back over to terminal and run the tests with the phpunit command. If my tests pass I’ll see something like the output below. If they don’t pass then I’ll get a big red warning instead of a green bar, which means I need to figure out why they aren’t passing and fix the tests.

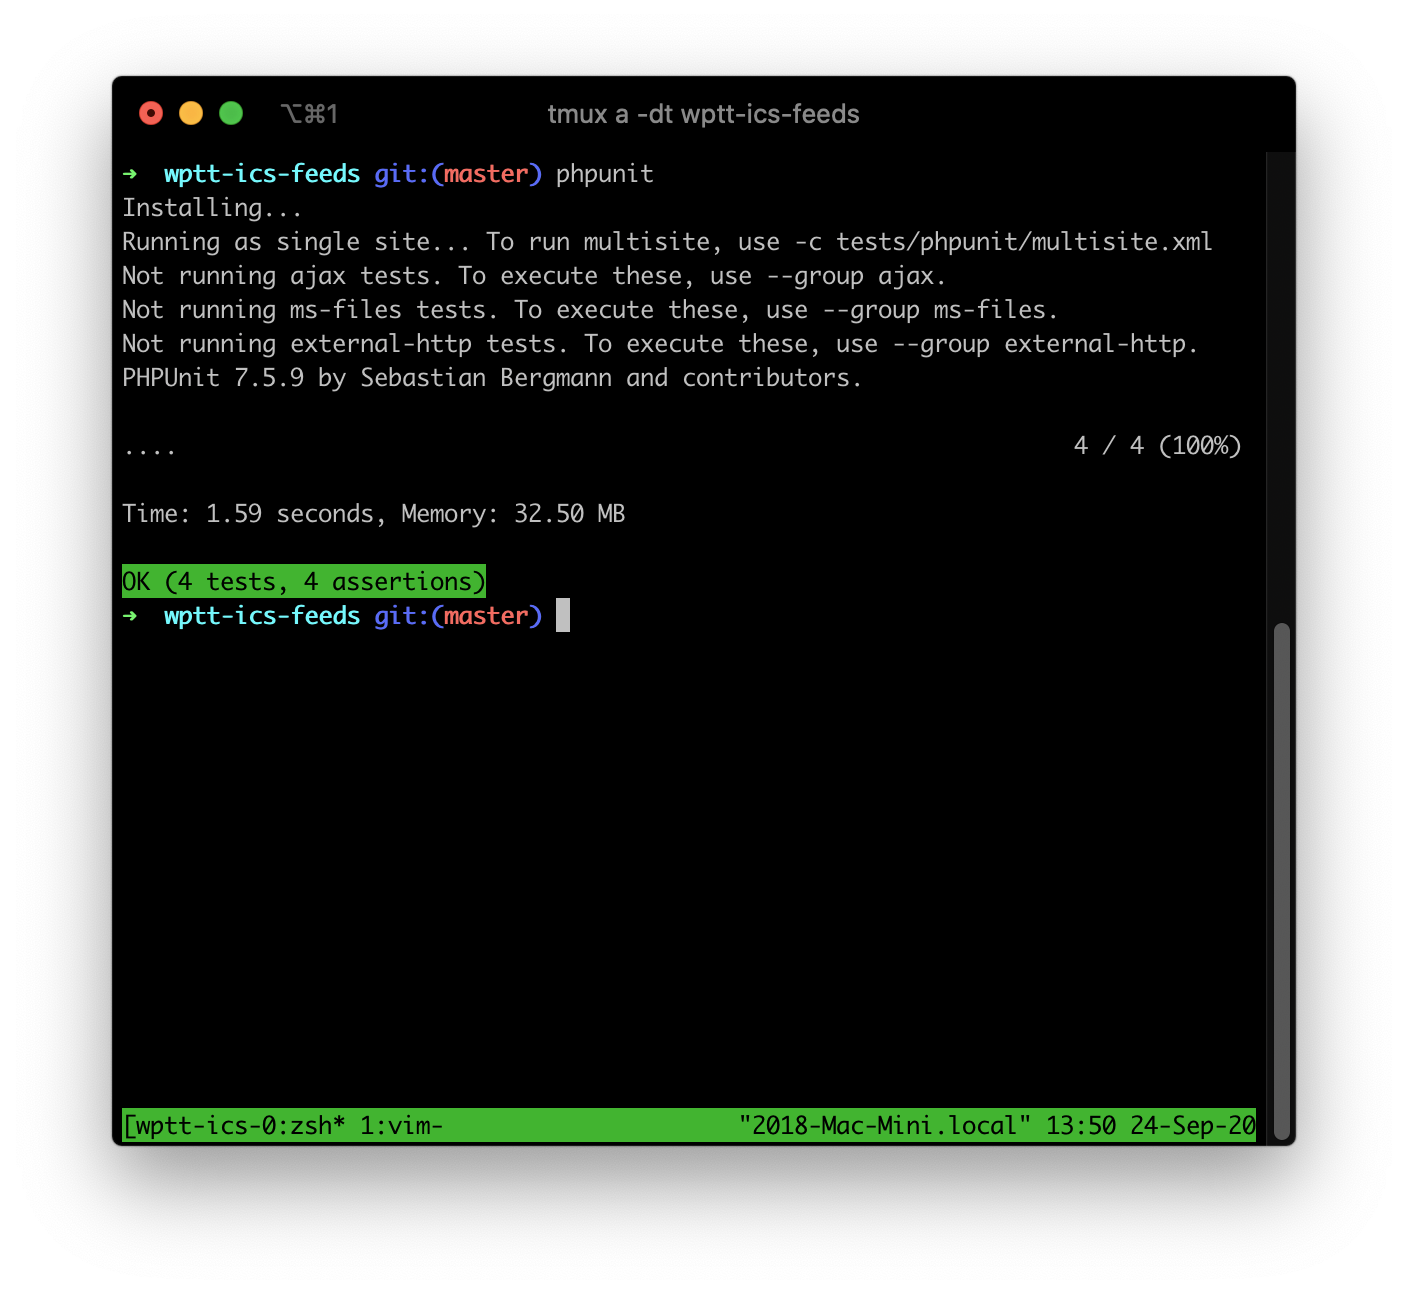
In this case, our tests passed and we can move on to testing the output of our link function if we pass in an author name. You can see this test below.

   /**

     * Tests feed link with author

     */

     public function test_author_feed_link(){

        $feed_link = $this->plugin->get_subscribe_link( array( 'author' => $this->editor->ID ) );

        $complete_link = esc_url( site_url() . '/?feed=wptticsfeeds&wpttauthor=". $this->editor->user_login );

        $this->assertEquals( $feed_link, $complete_link, "The feed links with author are not equal' );

     }

Here we do almost the same thing as we did when we tested our link previously. The change is that we pass in the user we created with our setUp function and then test to make sure that this link comes out as expected with assertEquals.

Now, let’s move on to testing the custom filter inside the plugin.

Testing a WordPress Filter with PHPUnit

I’ve had some disputes with other developers about testing filters in the past. Some don’t bother testing their internal plugin filters, but I think that you should be testing these filters. Sometimes filter names change and you forget about this so don’t document it anywhere or check for usage of the filter. Writing a simple test for your filter will highlight this because when you change the filter name a test error will happen.

For this test, we’ll add a new file to our tests folder called test-filters.php. I’ll use this file to test all future filters that need to be tested in the plugin. This time our setUp function only needs to instantiate an instance of our plugin and our tearDown function doesn’t need to do anything. See the code below.

   public function setUp(){

        parent::setUp();

        // getting the plugin global

        $this->plugin = $GLOBALS['wptt_ics_feeds'];

    }

    public function tearDown(){

        parent::tearDown();

    }

Next, we need to write the test for our filter which you can see below.

   /**

     * Tests that the post where time can be changed with a filter

     */

    public function test_posts_where_filter(){

        add_filter( 'wptt_ics_feeds_how_old', array( $this, 'new_where' ), 10, 2 );

         $output = $this->plugin->two_months( '' );

         $date = date('Y-m-d', strtotime( $this->new_where() ) );

         $this->assertStringContainsString( $date, $output, 'The date filter did not work' );

    }

    public function new_where(){

        return '-1 week';

    }

The first thing we do is call our filter and then pass it our new_where function. I always like to write a separate function for filter tests because I have ended up using them in multiple tests enough that I feel this saves work later. Our new_where function will pass the string -1 week to our filter.

Next we call our two_months() function inside the plugin. Then we use a standard PHP date function to get the format we expect for the date. Since I’m mostly concerned that the date is parsed properly in the plugin I use assertStringContainsString to check to see if the output of the two_months function contains the same date string as the $date variable.

Again, if your tests pass, then it should all be green. If they fail you’ll get a big red warning instead of the pleasant green bar.

Why Don’t We Test the ICS Feed Output

Note, that I didn’t test the final output of our ICS feed. While this is possible, it’s got a bunch of moving parts that could fail and have nothing to do with my code. I could send the ICS feed to an online validator and then receive the JSON response and parse it to check if it’s valid.

If the HTTP request fails, my test fails. If the online validation service shuts down, my test fails. There are a bunch of other scenarios that could also cause my test to fail for no reason that’s my fault. Because of this, I chose not to test the final feed programmatically and figured that I could test it by subscribing to a feed in my calendar and seeing that my posts were in fact on the calendar as expected.

This Isn’t Unit Testing

I’m sure that some of you are looking at this and saying that I’m not writing unit tests, and you’d be correct. I’m writing integration tests because my code is integrating with WordPress for the tests to work. Yes, you can use WP_Mock to fake WordPress to write true unit tests, but most of the time I care that my code works with WordPress.

Today, we looked at adding a few tests to an existing WordPress plugin as a practical example of how testing can work for your projects. To continue learning, check out the business case for adding testing to your process as a business owner. It can be hard to see past the upfront expense since development will take longer, but it does pay off.

Source link

Understanding WordPress Unit Testing Jargon

In our last post, we took a basic look at testing your code in WordPress. Today, we’re going to take another step towards writing well-tested code, by introducing you to (and helping you understand) all the jargon that gets thrown around when you talk about unit testing for WordPress.

Types of Tests

Yup, unit tests are not the only types of tests we can have for our application so let’s look at the different types of tests you may use in your work.

Unit Tests

These types of tests are the first stage in a testing system. They specifically test to ensure that the code you wrote performs as expected. Unit tests form the foundation of your tests because if your code doesn’t work properly, then later types of tests are built on a shaky foundation.

If I wanted to limit the editing of permalinks to site administrators for posts that are over two weeks old my unit test would use WP_Mock to ensure that I have a user of the proper type and a post with the proper date. Then I’d make sure that my function returned the expected true or false value.

Unit tests should have no dependencies outside of the code you’ve written. They should interact with no other system. That means our last post wasn’t a true unit test, it was an integration test because we interacted with the database as we created our user.

When you use unit tests as the foundation of your work, you help ensure that each method/function has a single responsibility because it gets progressively harder to test as you add more conditions to a single function.

Some of the tools you’ll encounter in unit testing WordPress projects are:

Integration Tests

This is the second type of testing you’ll do in your work. Integration tests make sure that the interactions between two systems function as expected. Unlike unit tests, the goal here is to see the interaction between multiple systems.

WordPress itself does more integration tests than unit tests because when most of the application was written best practices were different. The functions inside WordPress are much larger than many newer PHP CMS’s and do much more work. These bigger functions are hard to unit test properly because they do so much. That means we rely more on integration testing as we check how our code directly works with WordPress.

None of this is bad, it’s simply a product of an application that wasn’t built when testing was as common as it is now.

Another example of an integration test would be if you were building an integration with an email marketing platform. You may use unit tests to make sure you validate the email properly, and submit the form as expected. Integration tests would be used to ensure that when you submit your valid email to the email platform you deal with the response properly.

Tools for integration testing:

Mutation Testing

Mutation testing is only going to be used for projects that have some sort of test coverage already. This type of testing creates “mutants” of your code by introducing common coding errors. The goal is that your unit tests break when these errors are introduced which means you’ve caught and killed the mutant. Mutation testing tools will report back on how many mutants you’ve killed and the places in which you haven’t caught mutants.

Mutation testing can be used to measure the quality of your test coverage. If you’ve got lots of mutants alongside 100% testing coverage, you have a big problem. This means that your tests don’t catch common errors programmers make. You’ve got code breakage waiting to happen.

Essentially, you’re testing your tests.

Tools for mutation testing:

Acceptance Tests

These can also be called functional test or browser testing. Where unit tests start with your code and work outwards, acceptance tests take the view of the person using your software. With acceptance tests, you may automate the web browser to interact with your site to make sure that users see what they expect to see.

Acceptance tests are harder to maintain because a small wording change in the UI of your software can mean that the test breaks because the automation can no longer find the UI elements it expects to find. For that reason, only invest in acceptance tests for business-critical infrastructure, like the checkout process on your shopping cart.

Tools for acceptance testing:

Jargon

Now that we’ve covered the types of tests you can do, we need to make sure we understand the other language that developers will use as they write tests.

Test Doubles

The term test doubles is a generic term that refers to any time you replace a production object/function/thing for testing purposes. We did this in our previous post on Getting Started with Unit Testing in WordPress when we used WP_UnitTestCase to add a user that didn’t exist in our production database. It can be helpful to think of it like a stunt double who “stands in” for the actor when things get dangerous. Test doubles “stand-in” for our data and code to make testing easier. They should look and behave like their production counterparts but be simplified to reduce complexity when we’re testing.

Mock

Mocks are used when you don’t want to interact with the API or database. You use a mock to fake database interactions so you can test a single unit of code without adding the complexity of a database.

A mock doesn’t have to be data in a database. A tool like WP_Mock has the ability to fake the hook system inside WordPress. This lets you test to see if a hook was called in your function, without needing to interact with WordPress itself.

Below we can see an example in WP_Mock where we fake the get_permalink function. We provide the number of times we expect the function to be called, arguments we expect, and the value we expect returned.

WPMock::userFunction( 'getpermalink', array(

  'args' => 42,

  'times' => 1,

  'return' => 'https://theanswertoeverything.fourtytwo/guide

We’ll cover how to use WP_Mock in a future post.

Stubs

Stubs are hard coded values for our tests, like canned answers to the questions our test may ask. You would be using a stub if you instructed your test to assume that a user is logged in while running a test. Another test may assume that the user is logged out. Both tests would be making sure that your functions returned the proper values for the given branch in your code.

It’s very likely that you’re using stubs and mocks together. In the example above, you use a stub to assume the logged in value, and then a mock to make sure that the proper values are returned.

Dummies

Test dummies are used when you don’t care about what the code does. Maybe you use a dummy to fill in an array or parameter list so that the code works properly. Stubs are extra information that likely doesn’t matter in the context of the specific test you’re writing.

For a logged-in user, maybe part of the function your testing expects a name. Even if your current test doesn’t need that name, you need to make sure it’s filled in so that your test passes. Of course, you should also test the result of your function without that name so you’re sure that you handle failure conditions properly.

Factories

A factory is a tool that lets us populate valid objects in our data model so that we can test the data. In our last case we used a factory when we added a user to our code inside WP_UnitTestCase.

One thing to be wary of here is changing the data model in your code. If your user suddenly needs an extra field, then you’ll need to head into every test and make sure that you have added that extra field every time you’ve used a factory.

Monkey Patch

This is a catch-all term for dynamically replacing attributes and functions at runtime. WP_Mock is “monkey patching” by replacing the default WordPress functions for testing. This means that we don’t have to call into WordPress directly when we’re unit testing.

Assertions

An assertion is a boolean value which will be true unless there is an error. An example would be using assertFileEquals to check if a file has the expected content. It will return true if the file matches expectations, and you have a passing test.

BDD or TDD?

Now, what overall system are you going to approach your tests with? Does it matter more that individual functions are valid, or that the behavior the end-user sees is valid?

TDD

TDD or Test Driven Development is when you write tests to validate that the code functions as expected. Like unit tests, you’re starting with the expectation of the code and then working towards the customer/user as you go. TDD doesn’t care about the outputs, it’s only concerned that the tests function as expected.

Tests written under TDD are only going to be readable by developers that understand testing and what an assertion means.

BDD

BDD or Behavior Driven Development grew out of the shortcomings of TDD. Here you start with what the end-user expects to happen as a result of the code. You still write your tests first, but you focus them on the result of your code. BDD doesn’t care how you arrive at outputs, as long as the expected behavior is the result.

One big benefit to BDD tools like Cucumber is that the language used to write the test is easily readable by customers and developers. It’s easy enough to understand that customers can write feature requests using Cucumber after a brief introduction.

Now, which one should you use? The correct answer is probably a bit of both. TDD methods can be used to ensure that the code the developer writes runs as expected. BDD can be used to make sure that the output of that code is what the customer expects to happen.

That’s all, folks! Understanding unit testing for WordPress just got a lot easier. With all that jargon under your belt, you’ll be ready for the next post where we’ll build a plugin using TDD and BDD with all the tools at our disposal.

Source link

Introduction to Unit Testing for WordPress

While many of us have heard of unit testing, it’s not a big topic of discussion in the WordPress community. Yes, there are tests for WordPress core. Yes, many of the major plugins like WooCommerce have unit tests, but that doesn’t make it easy to jump on the unit testing train. 

While you can find lots of content about unit testing PHP applications, there aren’t many people talking about unit testing specifically for WordPress. There is precious little written about where to start for developers that are ready to increase their code quality and want to learn how to add tests to their work. Even worse, some of the tools for unit testing in WordPress don’t work as advertised, or are using older versions of PHPUnit. Problems you’ll have to discover on your own as you try to start testing.

That leaves many people who want to get started with testing on a multi-hour journey to get even the basic default tests running for their plugin.

Today we’re going to solve that problem by giving you an up-to-date look at how to start unit testing your WordPress code.

Things to Have Installed

Before we dive into unit testing, I’m going to assume you have Laravel Valet and WP CLI installed. I use these excellent directions from WP Beaches to install Valet, though I use the mysql instructions not the MariaDB ones. 

You can find the instructions to install WP CLI on the WP CLI site.

If you’re on Windows, you may have a bit of extra digging to do so you can run unit tests. The WordPress Handbook has some instructions on the extra steps you’ll need to take.

Install PHPUnit for WordPress on Laravel Valet

Our first step is to install PHPUnit. While PHPUnit is currently on the 9.x branch, WordPress only supports 7.5.x which means we’ll need to install this older version.

Open up the terminal and use these commands.

wget https://phar.phpunit.de/phpunit-7.5.9.phar

chmod +x phpunit-7.5.9.phar`

sudo mv phpunit-7.5.9.phar /usr/local/bin/phpunit

phpunit --version

The command above, download PHPUnit. Then we make the file executable so it can be run. Next, we use the sudo command to move the file to the proper location on our computer. Finally, we check for the version number, which should return 7.5.9 when we run the final command.

Now we’re ready to set up our plugin with WP CLI and take a look at our first tests.

Setting Up Our Plugin

We can make starting a plugin, and getting our unit test scaffold, easy with the WP CLI scaffold command. This command will create a plugin for us, and add all the files we need to have a foundation for our tests.

In the terminal, make sure you’re in the proper WordPress directory you want to use and then type wp scaffold nexcess-unit-tests. That should give you a folder structure that looks like this.

– bin

    – install-wp-tests.sh

– tests

    – bootstrap.php

    – test-sample.php

– .distignore

– .editorconfig

– .phpcs.xml.dist

– .travis.yml

– Gruntfile.js

– nexcess-unit-tests.php

– package.json

– phpunit.xml.dist

– readme.txt

If you want to build out the basics of a plugin but not include tests then you’d use the –skip-tests flag, which will skip the generation of test files. You can see all the options available for this command in the WP CLI documentation.

Depending on how your code editor and file system are set, you may not see the files that begin with a . because they’re considered hidden files. For our purposes today, they don’t matter so don’t worry about it if you don’t see them.

Now we need to hook our unit tests up to MySQL so that it can create dummy data for us to test against. Open up the wp-config.php file for your WordPress installation now because you’re going to need to find the db_user and db_pass for the next command.

To finish installing the tests change to your plugin directory and run the following command.

bin/install-wp-tests.sh <db-name> <db-user> <db-pass> localhost latest

Make sure you use a different db-name than your WordPress install. You don’t want your unit tests messing with your data, you want it creating its own test data in its own database. Otherwise, the db-user and db-pass will be the same as your wp-config.php file.

The final two parameters tell the testing framework to connect to localhost and to install the latest version of WordPress to test with. Unless you know better, just leave those settings as they are.

If we were to run phpunit now, we’d still have a few errors to resolve. First, for some reason WP CLI doesn’t add the name attribute to the <testsuite> block in the sample tests. Open phpunit.xml.dist and change <testsuite> to <testsuite name=”Unit Tests”> and save the file.

Also note here that inside the <testsuite> block PHPUnit is told to ignore the tests/test-sample.php file. Let’s duplicate that file and rename it to test-nexcess.php so that we have a file which will run. Then open the new file and change the class name to NexcessTest. The file should look like this now.

<?php

/**

 * Class NexcessTest

 *

 * @package Nexcess_Unit_Tests

 */

/**

 * Sample test case.

 */

class NexcessTest extends WP_UnitTestCase {

    /**

     * A single example test.

     */

    public function test_sample() {

        // Replace this with some actual testing code.

        $this->assertTrue( true );

    }

}

Now we’re ready to run phpunit from the terminal. Once you’ve done that you should see something like the image below.

Now that we’ve confirmed that PHPUnit is running our tests, let’s dive a little deeper and write a test to make sure that WordPress is adding users properly.

setUp and tearDown

Most unit tests will require specific data to be added to the testing database. Then you run your tests against this fake data. To do this you use the setUp and tearDown functions in your testing class.

Let’s create a user and then make sure that the user has the edit_posts capability. Add the following function to the top of your class.

   public function setUp(){

        // make a fake user

        $this->author = new WP_User( $this->factory->user->create( array( 'role' => 'editor' ) ) );

    }

Then add this tearDown function to the end of the class.

public function tearDown(){

        parent::tearDown();

        wp_delete_user($this->author->ID, true);

}

This adds a user with the role of editor before we run our tests, and then removes the user after we’ve run our tests.

Now let’s write a simple test to verify that the user was added properly and has the proper capabilities.

   public function testUser(){

        // make sure setUp user has the cap we want

        $user = get_user_by( 'id', $this->author->ID );

        $this->assertTrue( user_can( $user, 'edit_posts' ), 'The user does not have the edit_posts capability and they should not' );

        $this->assertFalse( user_can( $user, 'activate_plugins' ), 'The user can activate plugins and the should not be able to' );

    }

Above we start by getting the user object based on the fake user we created. We’ll need this object to test our capabilities which we do next with the assertTrue and assertFalse statements.

In this instance assertTrue is expecting that our user_can( $user, ‘edit_posts’ ) returns true. We’re testing to make sure that the user object provided is given the edit_posts capability, as an editor should have. If this were to return false, we’d see the message provided in our unit test output in the terminal.

Next, we test to make sure that the same user doesn’t have capabilities of an admin user. Here we use assertFalse while checking for the activate_plugins capability. This should return false because activate_plugins` is for the Admin role in WordPress not for Editors.

Once you have that code added after your setUp function, head to terminal and run phpunit. You should see 2 tests are okay, with 3 assertions.

PHPUnit considers our testUser function to be a test, and the assertTrue/assertFalse statements inside to be assertions.

What does that factory thing mean?

Before we finish here, let me draw your attention back to our setUp function. Specifically the factory section when we create a new user. 

When you use the WP CLI scaffold, it gives you access to the WP_UnitTest_Factory class. This class is there as a helper to create the data you’ll need to run your tests properly. You can use this factory to create posts, attachments, comments, users, terms, and some other things for WordPress Multisite.

This is not the only tool you can use to mimic WordPress for your tests though. In a future post we’ll look at WP_Mock to test parts of WordPress that the built-in factory doesn’t reach very well.

Today, we covered a fair bit of complex ground as we looked at unit testing your WordPress projects. I know when I started unit testing it looked daunting, but it’s worth it if you want code that works, and lets you know when you’ve broken something, so your customers don’t have to find the problem for you. Over the long-term, you’ll save time and headaches by writing testable code and aiming for decent test coverage in your projects.

Further Resources

Source link