If you’ve never been to a WordCamp before you’re missing the best part of the WordPress world. While the software is great – it’s the size and giving nature of the community that makes it special.
I sat down with my friend Nathan Ingram – who has been to 50-60 WordCamps – to discuss what virtual WordCamps are like, some of the advantages of WordCamps going virtual, some of the things to watch out for, and our best advice to get the most out of attending a WordCamp.
Maximize Your Screen Size
Virtual WordCamps are great but there’s a few things you might not expect. One of the first is what they actually look like. For WordCamp Denver, we tried to show the speaker, their title, and their slides.
While these aren’t strictly WordPress related, they’re a great way to connect with your community. The chat was very active during both sessions and people happily shared non-WordPress things with each other.
Tip: You’ll always have another email to answer. Instead, take the opportunity to connect with your community both before, after, and during the event.
Bookmark Your Favorite Sessions
For WordCamp Denver we had three tracks going on both days. There is always a ton of great content and you won’t be able to watch it all.
I’ll admit it – I’m lazy and if I don’t have to prepare for an event I won’t. But if you can spend even 10 minutes reviewing the schedule & speakers ahead of time, you should be able to find the sessions most relevant to you.
And since this is a virtual event you don’t have to go all day. You can conserve your energy and pop in for the sessions most relevant for you and then go back to regular work or life.
Tip: Bookmark your favorite sessions and schedule your day around them.
Ask Your Questions As They Come Up
One thing you might not realize is that there’s a 20-30 second delay between the speaker talking and you seeing the video on your end. That means it can be really hard to come up with good questions when the speaker asks.
Instead you can ask questions throughout the talk by dropping them in the chat. A moderator will collect them, prioritize them, and ask them at the end. This makes asking questions really efficient and you won’t forget a great question if you drop it in the chat immediately.
As a side benefit sometimes the attendees will answer your questions or help you elaborate.
Tip: Ask questions as soon as they come up. It helps the dialogue in the chat & will make sure those questions won’t be forgotten.
Feel Free to Check Different Tracks
One thing that’s hard to do at a physical event is to switch tracks. I don’t want to step over someone, open doors, or maybe even step in front of the camera.
I kept three tabs open almost all day and had all three live streams running and I flipped back and forth muting & unmuting the different tracks. It let me hear a little bit from each speaker and then join the session that made the most sense for me.
Tip: You’re allowed to watch all of the tracks and pick your favorite. You won’t hurt any speakers’ feelings by switching tracks and you won’t disturb anyone – so do it!
Focus on One Or Two Changes
There’s a lot of really good sessions at a WordCamp and I think Nathan sums it up perfectly:
“WordCamps are like a firehose…”
People often leave WordCamps with notebooks full of ideas. But those exciting ideas can easily turn into procrastination because you don’t know where to start.
Tip: After you’ve finished watching a WordCamp, focus on implementing just 1 or 2 things. If you focus on 1 or 2 things you’ll be able to get them done.
Getting The Most out of a Virtual WordCamp
Virtual WordCamps are still sorting themselves out and the format will likely change as we move forward. While some things aren’t as easy to do as they were before – there are also a ton of benefits for virtual events.
With these tips we hope you can get the most out of the WordCamp near you!
When you think about blogging, it’s easy to pick a theme and immediately focus on creating content. Unfortunately, because the newest content is typically displayed first, as a blog post gets older, it slowly disappears into the archives—and very few people think about their blog archives.
Here’s the problem: Most of those older blog posts still have value! They are evergreen content that visitors would find helpful, it’s just hard to find them.
Lucky for us, WordPress has default taxonomies—categories and tags—that are used to classify and organize blog posts with relevant terms. Each category and tag creates an archive of all content assigned to it. This is how many websites organize their blog posts.
What is a taxonomy?
“Taxonomy” is just a fancy way of describing whichever system you use to organize and classify information.
While categories and tags work great for most sites, if you’re a content creator, chances are, you can do better. You can create custom taxonomies in WordPress that use terms relevant to what your blog is about. For example, if you have a podcast, instead of using categories and tags to sort episodes, you might want to use taxonomies like guest, topic, industry, or type.
How does it work?
Clear taxonomies sort your content, create high-value archives, and improve site search results, especially when paired with solutions like Search WP or ElasticPress.
Here are a few examples to show you how it works:
Example 1: Recipe Blogs And Food Blogs
Food bloggers are a perfect use case for custom taxonomies, as they write about and share recipes for specific meal types, diet types, and ingredients. With custom taxonomies, instead of generic categories and tags, you can use classifications relevant to food-related content.
Three sample custom taxonomies for food bloggers would be:
Ingredients: eggs, tomatoes, bell peppers, onions, sausage, cheddar cheese
Example 2: Travel Blogs
Travel sites can also benefit from custom taxonomies by using them to classify content with travel-specific terms. From city, state, county, and country, to types of trips like road trips or resort vacations, there are a plethora of classifications to choose from.
Three sample custom taxonomies for travel bloggers would be:
Activities: hiking, biking, camping, fishing, rock climbing, dining, beach combing
Places: restaurant, museum, national park, state park, beach, hotel, amusement park
Like food blogs and travel blogs, another type of blog that should be using custom taxonomies are fashion blogs. From brands and retail stores, to pieces of clothing and accessories, fashion bloggers are already classifying their content. Custom taxonomies just make it even easier.
Four sample custom taxonomies for fashion bloggers would be:
Occasion: business, casual, cocktail, formal, on the town, athleisure, workout
Custom Taxonomies Classify Content With Relevant Terms
As you can see, categories and tags are perfectly fine general form of content classification, but when you leverage custom taxonomies, you can sort and organize your blog content with relevant tags that are specific to the content you are creating, which will in turn, improve your visitors’ on site experience and help them find the content they are looking for quickly.
If you publish new blog posts regularly and you have a good amount of traffic, you know that site speed and performance are critical to your long-term success and search engine rankings. With Hostdedi Managed WordPress hosting, your blog will run lightning fast so users & search robots can access your content quickly.
Founded 20 years ago, Hostdedi managed platforms have always provided agencies with the ability to deliver the site experiences their clients expect. Built on the four pillars of speed, security, scalability, and service, our solutions are designed to help your website realize its potential. Visit Hostdedi.net today and see how we can help.
In the last 8 weeks, the world has been turned upside down. Major sports seasons were cancelled, summer concerts were cancelled, you can’t see or hug your friends, and business as we know it has been put on hold.
Many industries are completely shut down, but if you’re in ecommerce you can still do the vast majority of your job from home. The opportunity is massive.
US Bank released the percent of all retail transactions that happen online and ecommerce sales jumped from 16% in 2019 to 27% in April 2020. That’s an incredibly steep incline. There’s a massive demand for online shopping.
The trick is getting users to your site before they go to Amazon or Walmart. Luckily, a new service makes it easy to attract a whole new audience. A few weeks ago Google Shopping announced that they’re now allowing merchants on their platform even if you don’t pay for ads. In this post, we’re going to show you how to connect your WooCommerce Store to Google Shopping and list products on their marketplace.
What is Google Shopping?
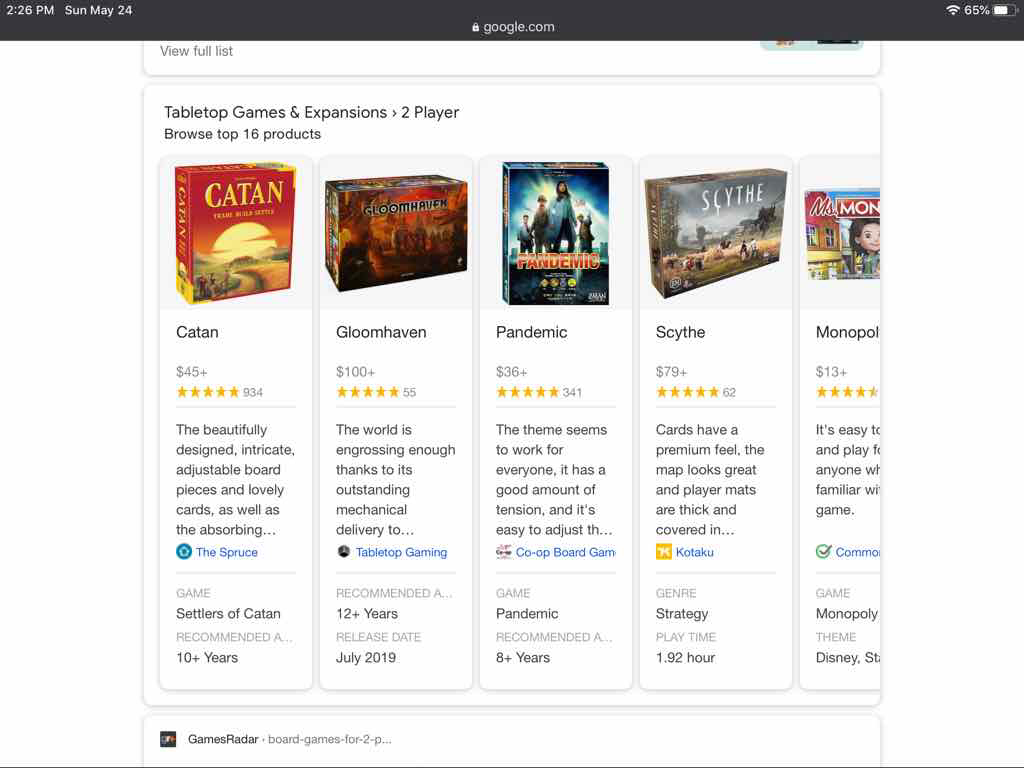
If you’ve ever typed in the name of a product or type of product into Google, you’ve likely seen Google Shopping even if you weren’t familiar with the name. Let’s say you’re stuck at home and you’re looking for a 2 player board game on Google. You’ll see Google Shopping in two places:
The first is right beneath the organic search results. You’ll see:
A product image
Product title
Price
Star rating
Description
The online store where you can buy this product
And sometimes you’ll see even more. If you’re looking for clothes or paint you might see a filter for color and extra contextual tools.
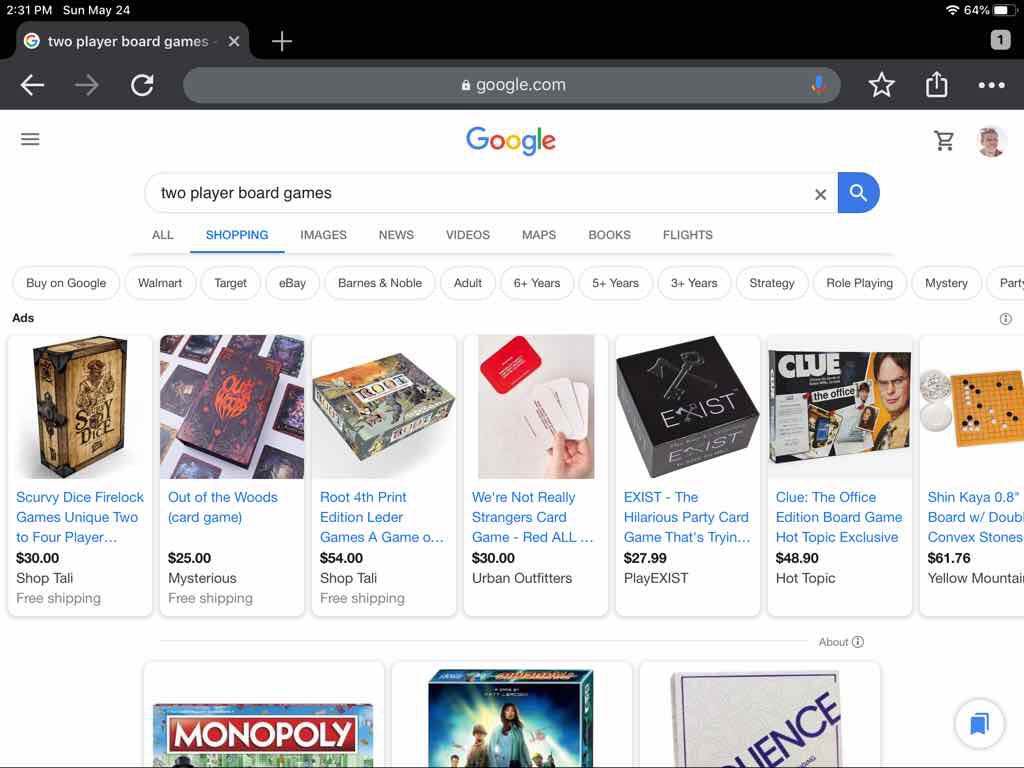
The second place you’ll see Google Shopping is on the “Shopping” link at the top of the page.
If you click this shopping link, you’ll see the full Google Shopping view.
This view shows us Google Shopping ads at the top followed by a list of products. You can click on any of these products to get more information and then visit the store who sells the product to checkout.
Google Shopping is Now Free
As mentioned earlier, Google Shopping is now free. That means if you have any type of online store you can upload your products and have them show up in the shopping results.
What’s great about Google Shopping is it’s still wide open. A few big retailers with a Google ads strategy are already on their platform but many small retailers are not, which means yours could be one of the few products in a search making it more likely you’ll be able to make the sale.
Connecting WooCommerce to Google Shopping
Google Shopping works with any online store if you manually upload a CSV file or create an XML feed for your product information. Which is great but I’m lazy… and I’m guessing you are too. 🙂
We’re going to use a direct integration between WooCommerce and Google Shopping. You can choose the official Google Product Feed ($79/yr) on WooCommerce.com or use one of the free plugins on WordPress.org.
Since we’re in the middle of a pandemic let’s go with one of the free plugins, Product Feed Pro, so you can get the most bang for your buck – of course, if you need help setting up the plugin or have advanced needs the official plugin is likely a better choice for you.
Create a Google Merchant Account
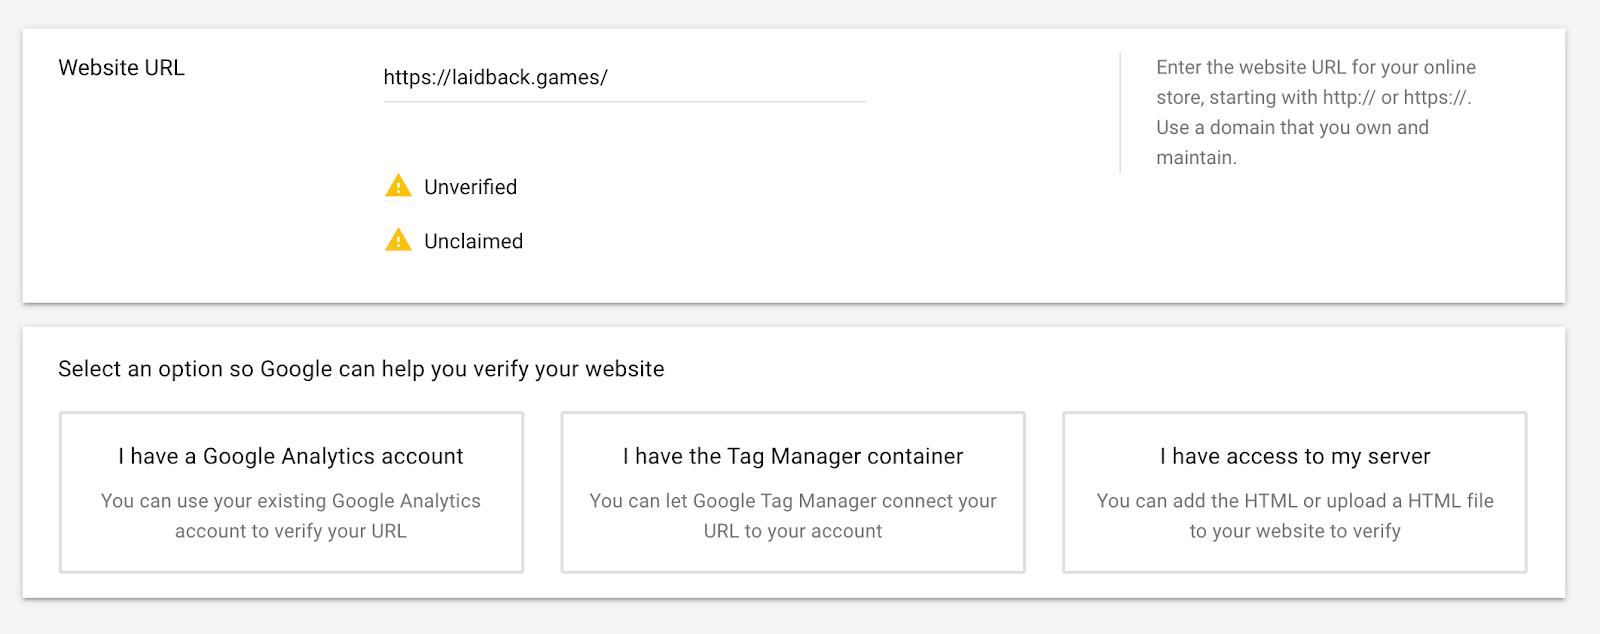
The first step is to create a Google Merchant account. This will let you configure settings related to your store such as shipping, taxes, and a target country.
Once you create this account, add your store’s website and verify it using one of the methods Google suggests. If you already have Google Analytics installed and configured it only takes a few button clicks to verify your store in Google Merchant.
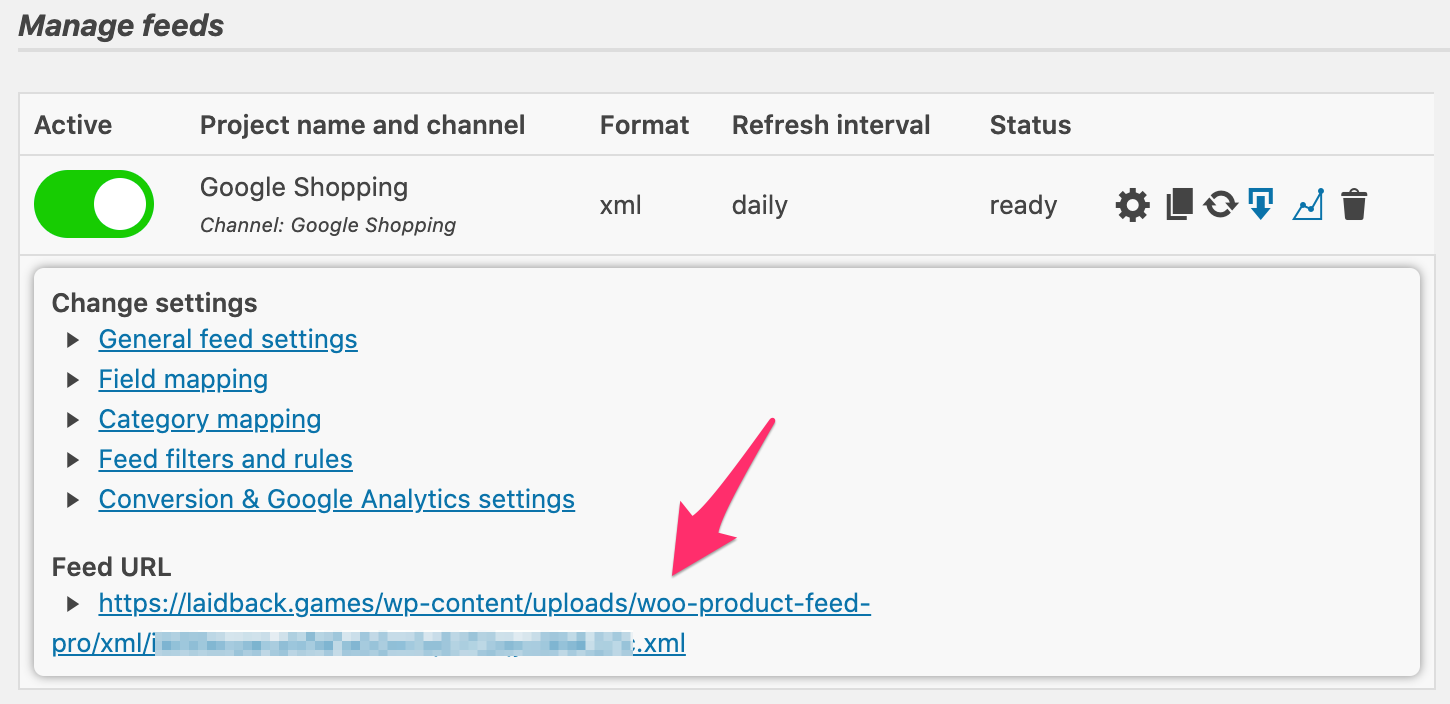
Get a Feed URL
In your WordPress admin you should be able to find your feed URL. Each plugin will do this a little differently. I had to create a feed, assign it as a Google Shopping feed, and map WooCommerce fields to Google Shopping fields. It took less than 5 minutes and even if you don’t know what you’re doing it will probably only take 10 minutes.
Once you’re done you should see your feed URL.
Add Product Feed to Google Merchant
Now we can add this feed to Google Merchant.
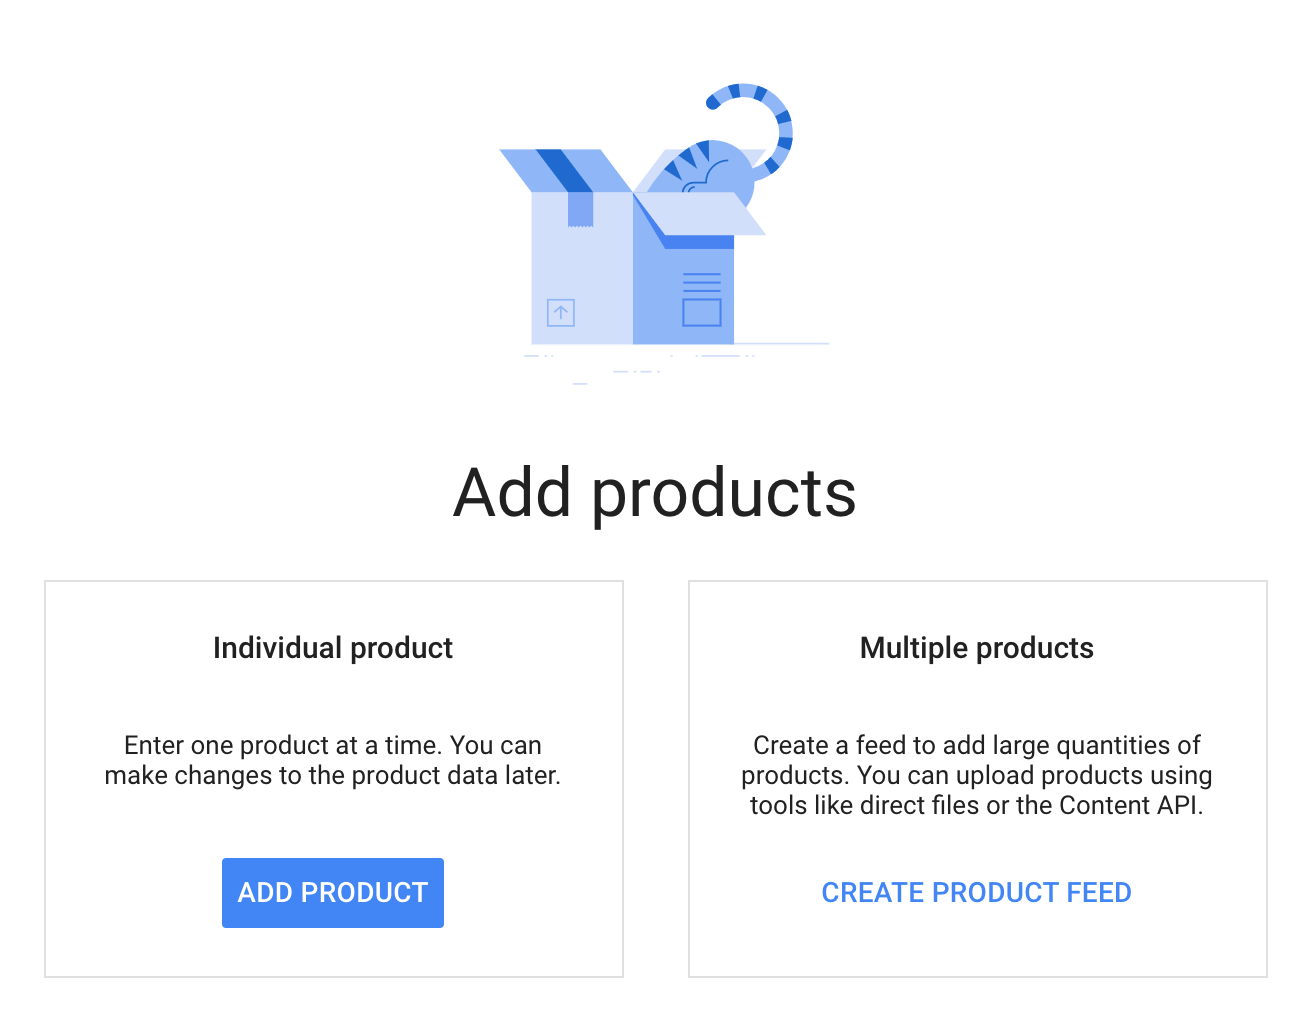
Choose Products from the admin menu
Click on “Create Product Feed”
Then you’ll see a page where you can configure your feed.
Select your target country and language
Click continue
Name your feed – I recommend the name of your store
Configure a “Scheduled Fetch” so Google checks your store for product updates periodically
Enter the name & URL of your file
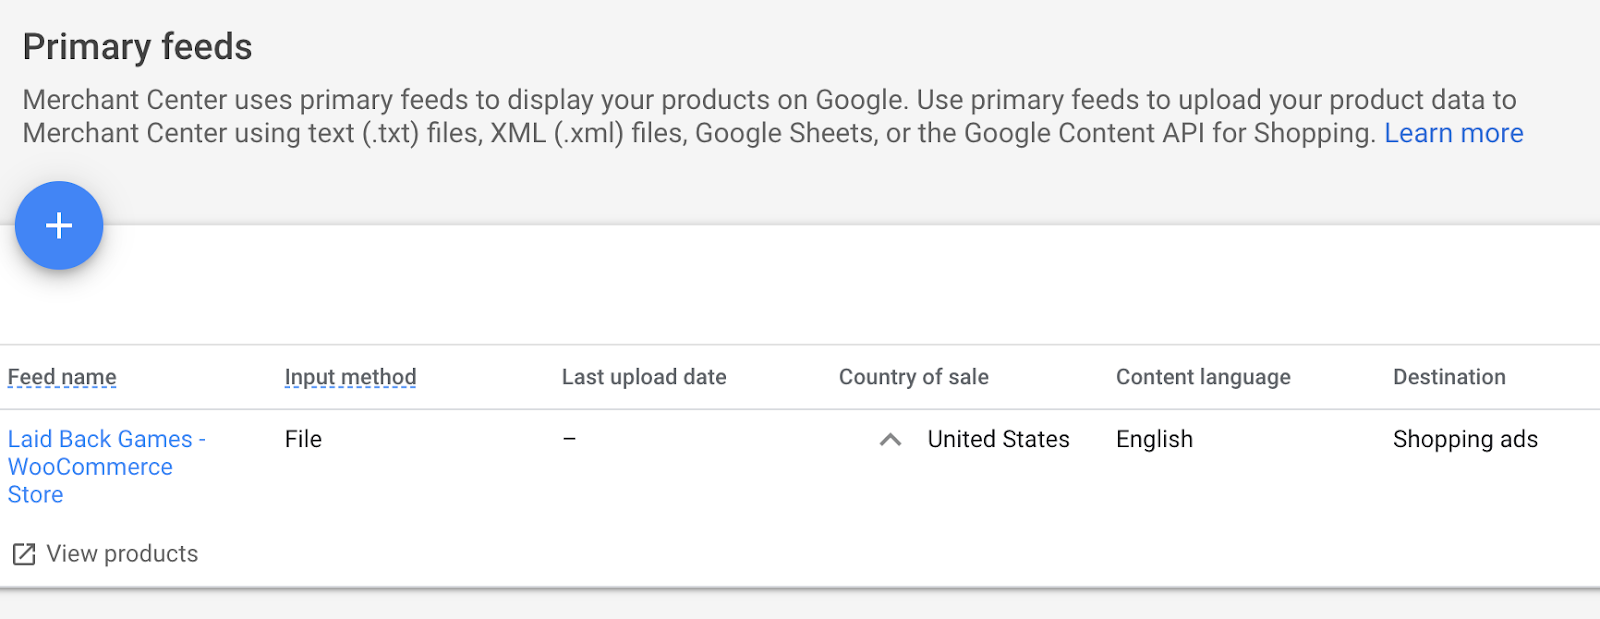
Continue filling out the details for your product feed (we won’t show all of them here). Once you’re done you should see your feed under Primary feeds.
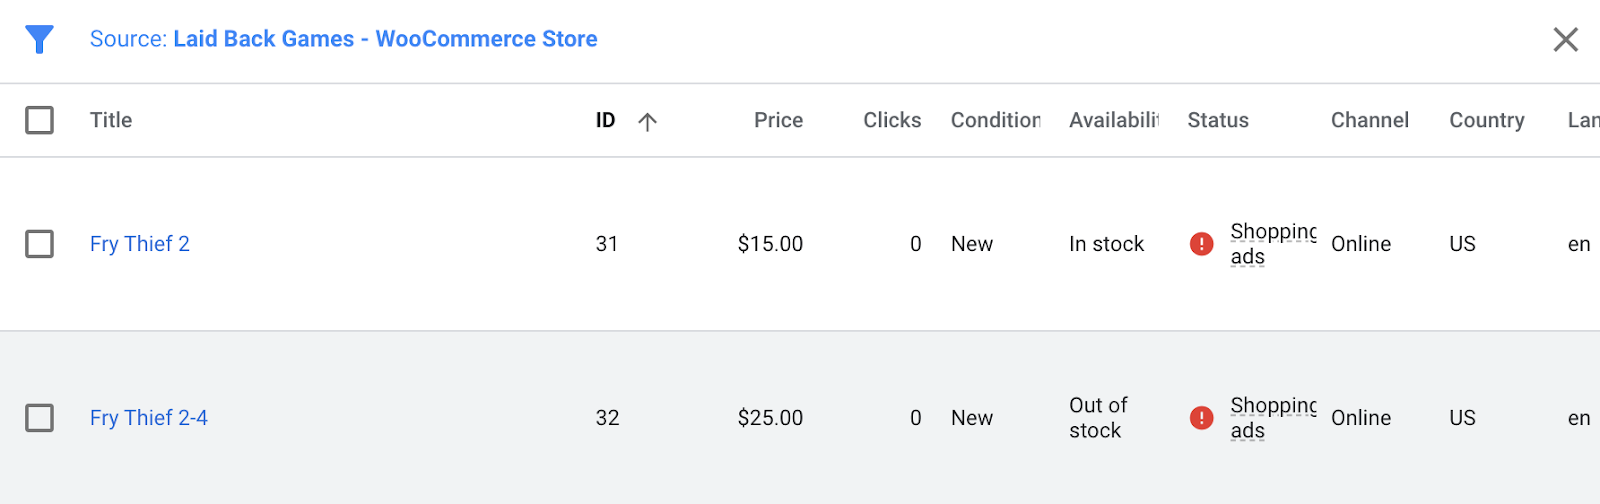
And if you click “View products” after waiting a few minutes you should see your products.
Note: this took maybe 10 minutes and I only uploaded two products. If you uploaded hundreds or thousands it could take much longer.
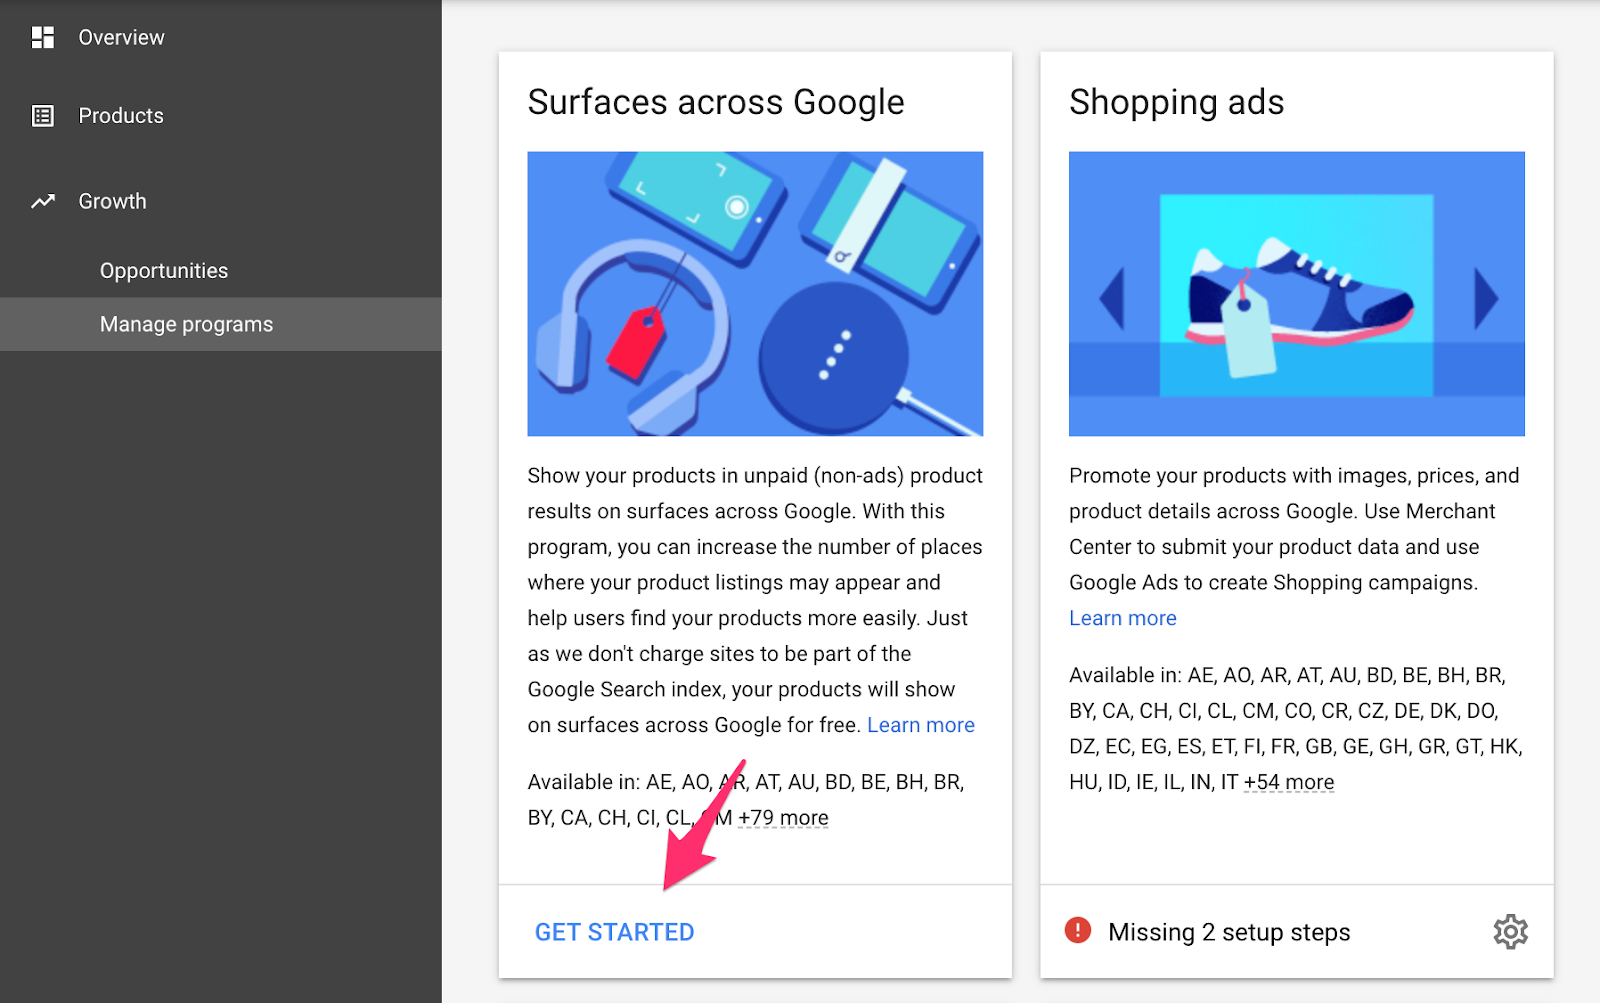
Enable Free Display
You might assume that any products you upload are automatically going to be displayed in Google Shopping. You actually have to enable this.
Begin by clicking Get Started
Fill out tax & shipping information
Add a link to your refund policy
Add a link to your shipping policy
The tax information is pretty easy since Google can determine that for you. Filling out the shipping information will take a few minutes.
Google Merchant has to process your feed and verify that your products have the correct information, so you may want to come back and do this step the next day.
And now if you search for your product it should show up in Google Shopping. Pay day!
Strategies for Google Shopping
Getting listed in Google Shopping is now relatively simple. From here you can do some keyword research and optimize your listings so that you show up before your competitor.
But before you dive down the SEO rabbit hole, let me give you a simple piece of advice. Google Shopping is a very visual service. Make sure you have great product photography. If your competitors have clear, clean, and appealing photography it doesn’t matter if you rank slightly above them. Your audience is going to click on your competitors listing.
Now is a great time to reshoot some products and touch up the primary image for each product. With a huge population stuck at home all day, every day, now is the time to get in front of those people. If you don’t make it easy for them to find you they’ll turn to Amazon or Walmart. So get out there with your products and grab a slice of all that brand new online shopping activity.
—-
Getting traffic from Google Shopping is great. You can also get more traffic through organic search by speeding up your store. See how much Hostdedi can improve your store with our 15-day performance challenge.
Patrick Rauland is obsessed with ecommerce. He’s built ecommerce websites for clients, worked for WooCommerce doing support, development, product management, and helped plan their yearly conference (WooConf).
Let’s begin by answering the question – what is PWA? PWA stands for Progressive Web Apps. Progressive Web Apps are a pattern for building web applications using HTML, CSS, JS and modern web browser APIs to bring a native-like experience. PWAs combine the best of 2 worlds: web and native apps. Like other mobile applications, PWAs are easily installable and make development work simpler for any merchant trying to reach as many customers as possible.
While the feature parity between Progressive Web Apps and native apps is not 1:1 just yet, PWAs have come a long way since inception. Features like instant loading, push notifications and offline navigation/purchase are now widely available no matter which PWA implementation you choose.
They won’t be the right approach in every case – for example, if you need a feature that’s not available on a Web browser or through an API, you will likely need to go the native route. But PWA capabilities are continuing to expand and what may require a native app today, might be PWA-worthy tomorrow. Project Fugu is a good place to see what’s coming and what’s being worked on right now.
Why are PWAs such a big deal?
PWAs come with an incredible set of features that were once reserved for native mobile apps alone. While regular web apps have tremendous reach in every device with a browser, at the end of the day these apps are just a webpage in a browser.
Native apps are another way to reach mobile users but they must be developed for one platform / operating system at a time. PWAs enable development of a single app for multiple platforms. This streamlined approach is something mobile developers have been anxiously waiting for – easily reaching every potential customer no matter what operating system they are using.
They also solve one of the most challenging issues developers face: distribution. Since you don’t need to publish these apps in a marketplace, you can just add a few lines to your manifest and make PWAs easily installable with a couple of clicks. Results drive a consistent customer experience that they expect through a native application but with PWA, they get a standalone experience, completely separated from the Web browser.
This means a full-screen experience with no URL bar, the ability to install the PWA and dock it to your device home screen instead of visiting a regular webpage plus everything a Service Worker has to offer.
Instead of the legacy way of updating via form submission and waiting for approval and publishing of the new version to the App Marketplace, changes made into any PWA are immediately available the next time you are connected to the Internet and open the app. PWA installation is now a standard feature available in all major mobile browsers, as well as Chrome and Edge on desktop.
How does PWA help Magento merchants?
Let’s face it: the Magento 2 frontend was already old when it was released and we’ve seen how that plays with frameworks like Prototype.js and Knockout.js.
The JavaScript ecosystem evolves quickly and constantly following the hottest frameworks, developer trends, and updated best practices. This makes it challenging to keep up when having to maintain separated codebases.
PWAs are particularly attractive to merchants using Magento 2 because it reduces front-end development complexity, giving you flexibility, extensibility, and opportunity to deploy resources to develop new features. Developers can implement almost everything in the regular Magento 2 frontend at a fraction of the cost and time by using any of the available APIs.
How can customers run a PWA on Hostdedi?
We’ve made it easy to run PWA on the Hostdedi platform. We’ve created a step-by-step guide for how to install Magento’s official PWA PoC, Venia storefront. This resource outlines how to build, compile and transfer this PoC to one of our servers without the need to start and maintain middleware services.
Who is Miguel? If you’re part of the Magento community, chances are you already know. As a Magento Master and open source Community Maintainer, Miguel can be found traveling the world imparting his Magento wisdom at events and approving pull requests everywhere else.
If you’ve never heard of WordCamp before you might think it involves playing lots of Scrabble in tents in the woods. But WordCamps actually have nothing to do with camping & nothing specific to do with words or spelling.
A WordCamp is (in non-pandemic times) an in-person gathering of WordPress fans in a specific geographic region with the goal to learn more about WordPress.
Who is WordCamp For?
WordCamps are for anyone who wants to learn more about WordPress. You could be a blogger looking for the best ways to edit, schedule, and update your posts. Or you could be a plugin or theme developer seeking information on security, performance, and best practices. Or you could be interested in starting a business on WordPress – like someone who wants to start their own WooCommerce store.
In short: if you want to use WordPress, you can go to a WordCamp. There’s no secret handshake and no entry test. Just come to a WordCamp and mingle with fellow WordPress fans!
What Topics are Covered at WordCamps?
WordCamps truly cover anything and everything related to WordPress. If you want to browse some of the content yourself, you can check out WordPress.tv where most WordCamps upload their videos. But to give you just a taste, here are talks you might see at your local WordCamp:
Beginner Topics
Blogging / Writing / Content Marketing
Business
Development
Design
WordCamps are Locally Organized
Every WordCamp is a little different and can have a different focus. That’s because they’re locally organized by volunteers. Each local community will have a different focus. So your local WordCamp will focus on issues that matter in that community.
Meet Your Local Community
WordCamps also feature speakers from your local community. You won’t be learning from a plugin developer from New York City or San Francisco. You’ll be learning from someone who lives down the street.
That way, it’s much easier to reach out to them, partner with them, or even hire them. To share a personal story, I met Brian Richards at WordCamp Chicago in 2013. We kept in touch for years, shared advice back and forth, and in 2018 when the stars aligned, we launched a collaborative project called WooSesh which we’re still running today.
How Much Does It Cost To Attend WordCamp?
If you’ve been to other tech conferences you know they can cost hundreds or thousands of dollars. Tech conferences are great but incredibly expensive.
Something that sets WordCamps apart from other events is that it’s organized by volunteers and there’s no corporation trying to make a ton of money. That means they’re incredibly cheap for attendees. WordCamps are limited to $25 per day, so if you have a three day WordCamp the maximum it costs is $75.
One of my first technology conferences was three days and it cost $2,000! Clearly, you get incredible value from a WordCamp.
WordCamps in a Pandemic
Up until this point I’ve focused on what WordCamps are like in typical times, but we’re in the middle of a global pandemic, so WordCamps have become virtual.
Obviously, an online conference feels different. You don’t have those hallway chats like you do at an in-person event. But they’re also more flexible. You can view the schedule, and jump in for just a session or two if you like.
And of course you don’t have to drive or reserve a hotel room. This means they’re a lot cheaper. And virtual WordCamps are entirely free.
That’s right – a big fat zero dollars.
Find Your Local WordCamp
Are you ready to try a WordCamp? You can find a schedule of WordCamps on the WordCamp Central website.
You can also try WordCamp Denver which is virtual (and free) June 26-27.
Patrick Rauland is obsessed with ecommerce. He’s built ecommerce websites for clients, worked for WooCommerce doing support, development, product management, and helped plan their yearly conference (WooConf).
Ready to add new products to your WooCommerce store? You can import WooCommerce products from any CSV or XML file with any file structure. Here are the steps to import any product with WP All Import:
Create an import with WP All Import and select WooCommerce Products.
Drag & drop the data from your import file.
Choose to import new WooCommerce products, update existing ones, or both.
Run the import to create products, import images, categories, etc.
WP All Import is a powerful tool that allows you to import any XML, CSV, or spreadsheet into WordPress. Read on for an in-depth guide to importing WooCommerce Products, including price, stock, categories, and product image galleries.
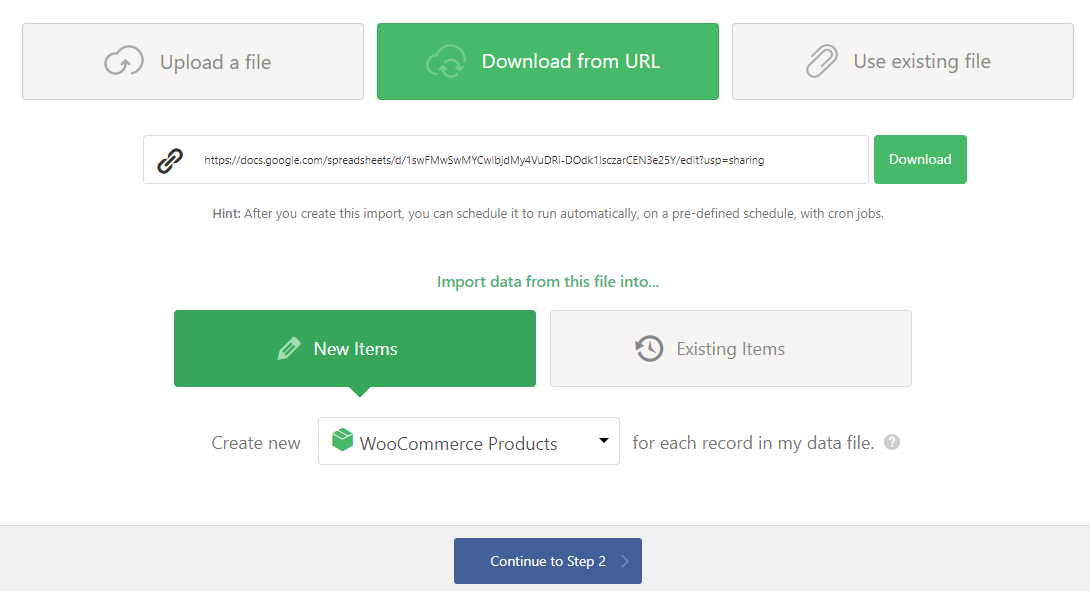
Create a new import and choose your import file. You can either upload a file from your computer, download an import feed via URL, or you can use a file that already exists on your server.
Google Sheets is readily available, so we’ll use the share URL of our sheet in the “Download from URL” field and select “WooCommerce Products” from the drop-down:
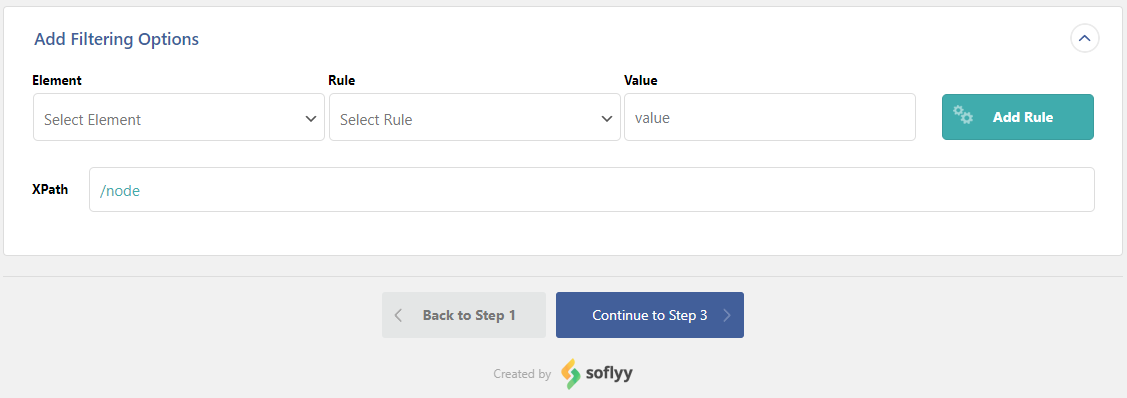
Filtering Options
WP All Import has the ability to filter imported products based on pretty much any criteria. For example, only products with a sale price, products with a certain brand, or anything else. This is all done using drop-downs and pre-built rules.
We don’t need to filter anything from this feed, so let’s continue.
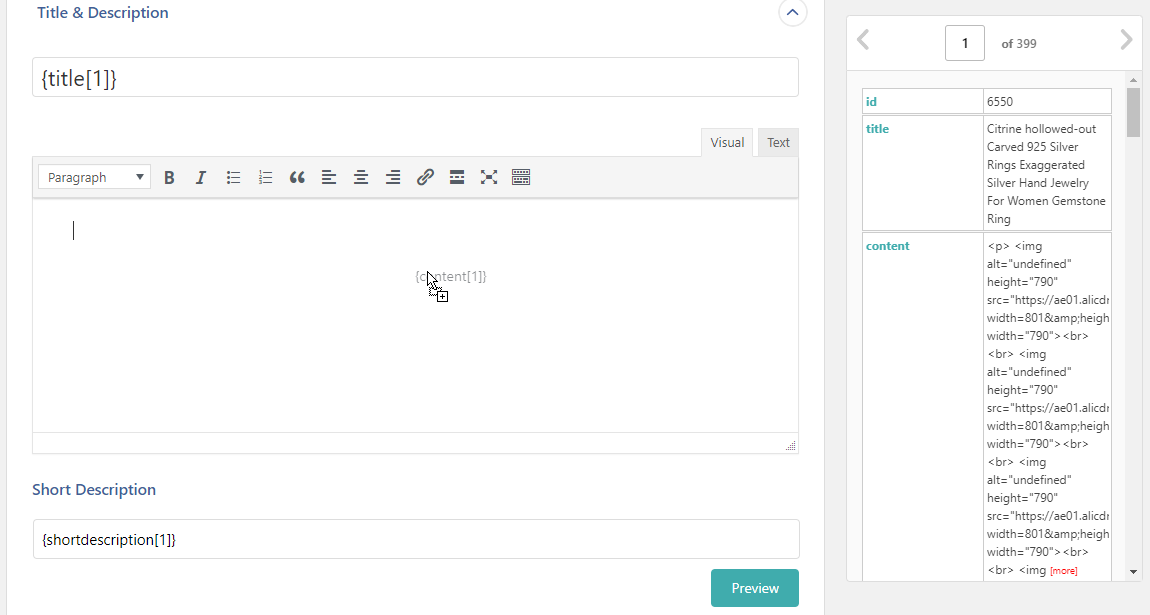
Drag & drop to import WooCommerce product data
Now we need to map the data from our import file to our WooCommerce Products. The data from your import file is displayed on the right, and the import template is displayed on the left. To set up your import drag & drop your data from right to left.
First, we’ll map the product name, product description, and product short description.
Next, we can populate the product information inside the “WooCommerce Add-On” section.
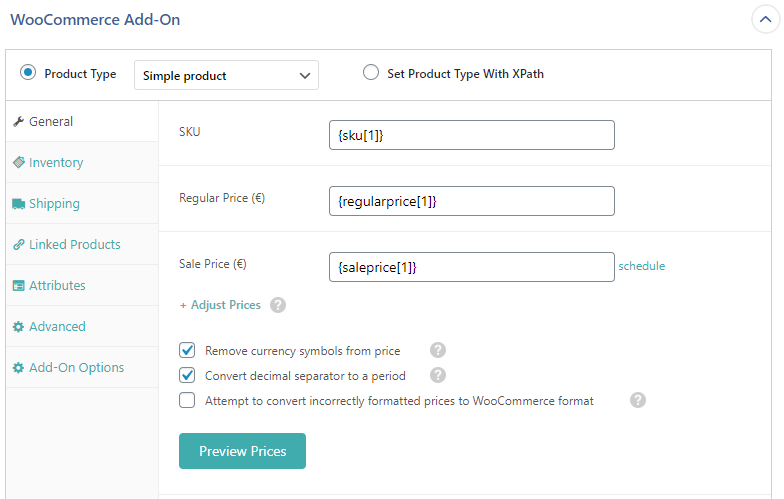
Import WooCommerce Product Prices
In the “General” tab, the first thing you’ll want to do is decide which product type to import. WP All Import supports all of the built-in product types in WooCommerce: Simple Products, External/Affiliate Products, Subscriptions, Grouped Products, and Variable Products.
If you’re importing Variable Products into WooCommerce, WP All Import has several different options to connect parent products and their variations. We’ll go over those options in a separate guide.
First, drag in your SKU and Prices. If you do not have a SKU, WP All Import will create one for you.
In this section, there are some options that give you complete control over your pricing:
Click the “Adjust Prices” text to open a section where you can adjust your prices on-the-fly by a percentage or a set amount.
Next to the Sale Price field, you can click “schedule” to schedule sale prices.
And, you can use the options below “Adjust Prices” to attempt to automatically reformat your prices to match WooCommerce’s requirements.
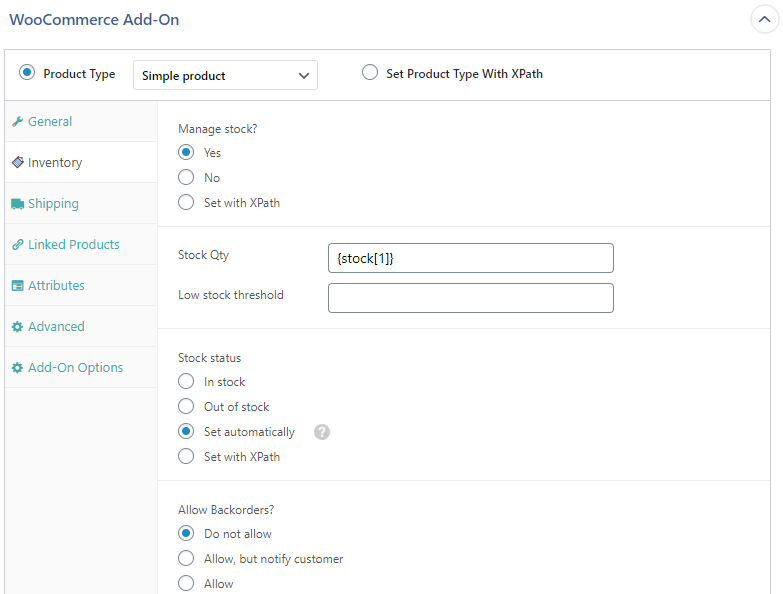
Import WooCommerce Product Stock
In the inventory tab, you have full control over the stock settings for your imported products. You can choose to manage just the stock status, or to set the stock amount and let WP All Import set the stock status automatically. You can also decide to set a low stock threshold, whether to allow backorders, and more. These settings can be applied to all products in your import, or you can set them on a per-product basis depending on the data in your import file.
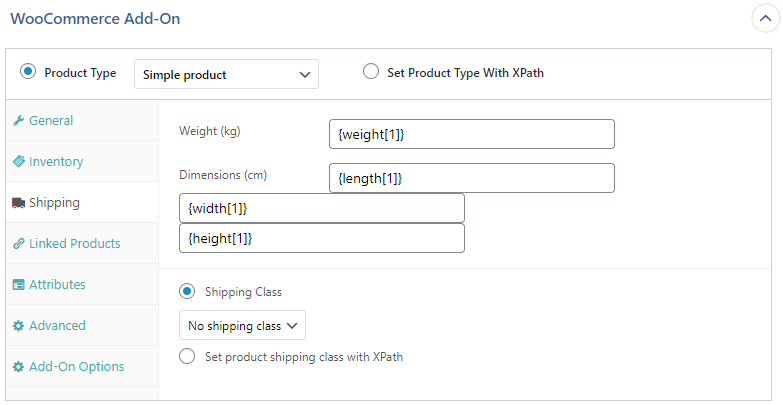
WooCommerce Shipping Class
Next we’ll import the weight and the dimensions of your products, as well as the shipping class. Like everything else, you can choose to apply the shipping class option to all products in this import, or you can set them individually for each product.
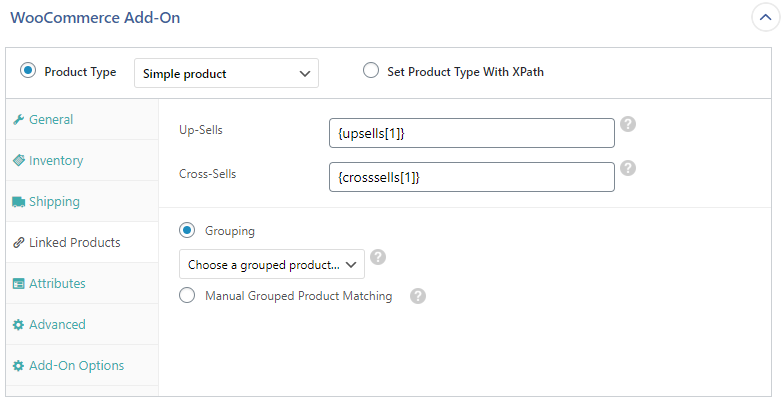
Product Up-sells and Cross-sells
In the linked products tab, you can import the up-sells and cross-sells for each product. You can match up-sells and cross-sells by SKU, ID, or Product Name. WP All Import will search for the products in your WooCommerce shop and automatically add their IDs to these fields for you.
If you’re importing multiple up-sells and cross-sells you just need to separate them with commas.
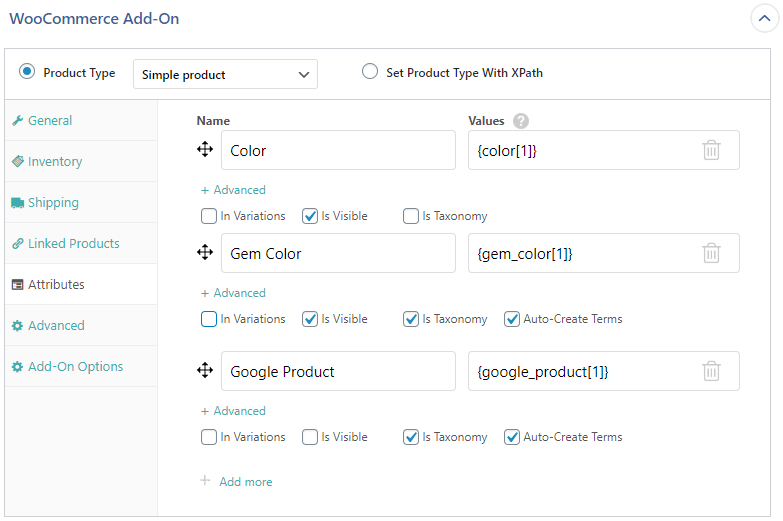
WooCommerce Product Attributes
WP All Import has full support for Global Attributes and Custom Attributes in WooCommerce. You can choose to use these attributes for variations, and determine if they should be visible on the product page or not.
For Global Attributes, WP All Import will avoid duplicates by using existing attributes when possible. If no existing attributes are found, new ones will be created for you.
If you’re importing products with a different amount of attributes per-product, that’s fine – WP All Import will only import attributes that have attribute values for the products and ignore the rest.
Importing WooCommerce Product Images and Galleries
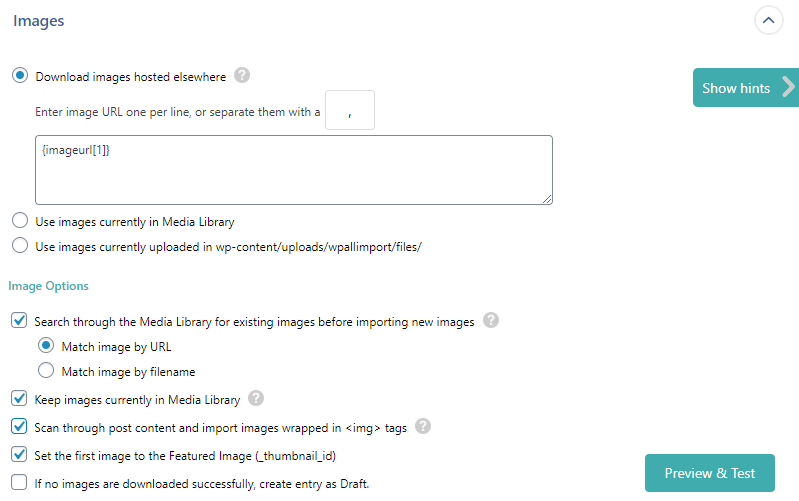
Next, decide how we want to import our product images. You can download images from an external host via URL, use images that already exist in the Media Library, or use existing images from your server. WP All Import has a wide range of options to cover pretty much any scenario.
If your images are hosted somewhere else and your import file has URLs linking to each image, WP All Import can download those images directly into WordPress and add them to your imported posts and image galleries. You can also match your imported data to images that are already in the WordPress Media Library, or those that have been uploaded to wp-content/uploads/wpallimport/files/.
You can also choose to have WP All Import scan through the post content of each product and import images that are wrapped in <img> tags. They’ll be imported into the Media Library and their old URLs will be replaced by the new ones in the post content.
In the “SEO & Advanced Options” section, you can choose to import image metadata, including the Title, Caption, Alt Text, Description, including the file name and extension.
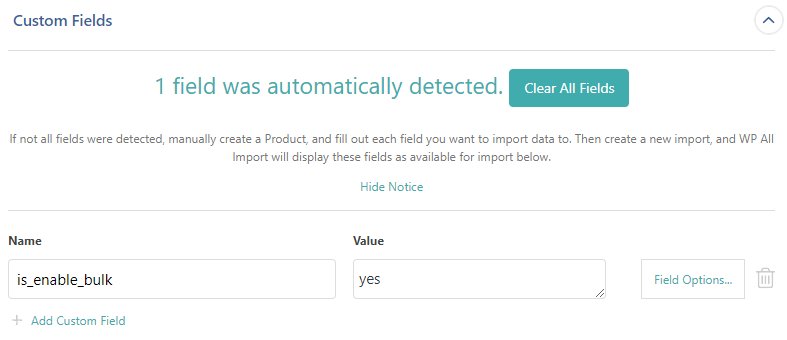
Custom Fields
WP All Import can auto-detect custom fields in your products that have been added by your theme or other plugins. You can import data to these custom fields, or define new ones here in the import.
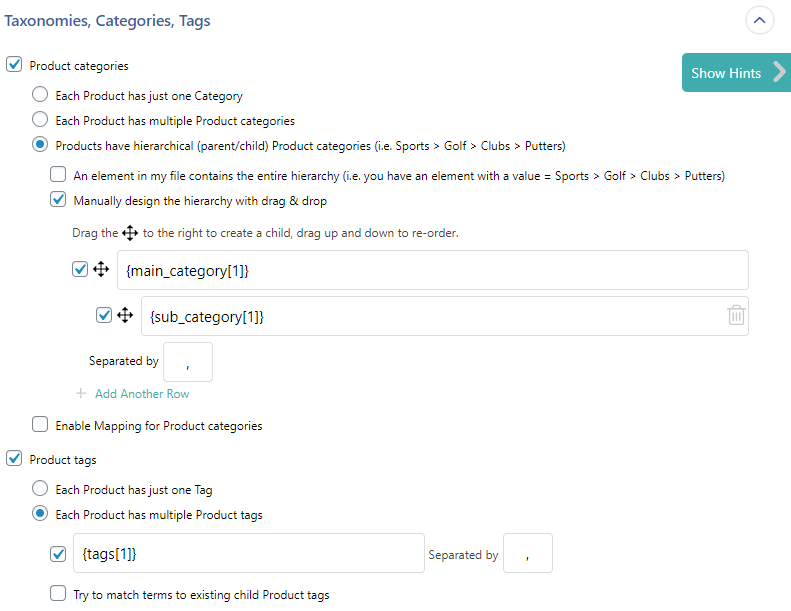
WooCommerce Product Categories and Tags
WP All Import offers full support for Product Categories, Product Tags and custom taxonomies in WordPress. There are a few different ways to import nested categories to WordPress.
No matter the settings you choose, WP All Import will always search for and use existing categories and tags to prevent duplicates from being created. New categories and tags will be created only when no match is found.
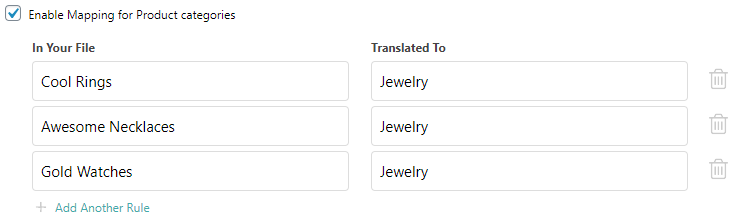
You can also use the mapping tool to translate category or tag values from your file to whatever you need them to be. That means you can convert your suppliers categories and tags to the ones on your site and avoid a bunch of redundant ones getting created in your shop.
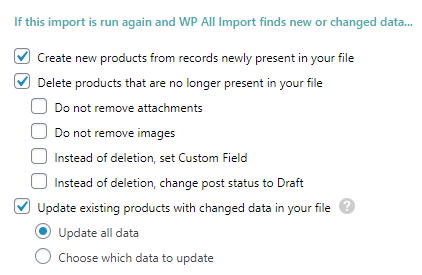
Import Settings
Any time you use WP All Import to import data to your WordPress site, the settings on this page will determine exactly what’s done with the data as it’s being imported. You can create new products, delete products that you remove from your file in subsequent runs, and update existing products on subsequent runs.
You can also enable the “Choose which data to update” option if you only want to update specific fields for existing products. For example, you can use these settings to limit your import to only update the prices and stock for existing products.
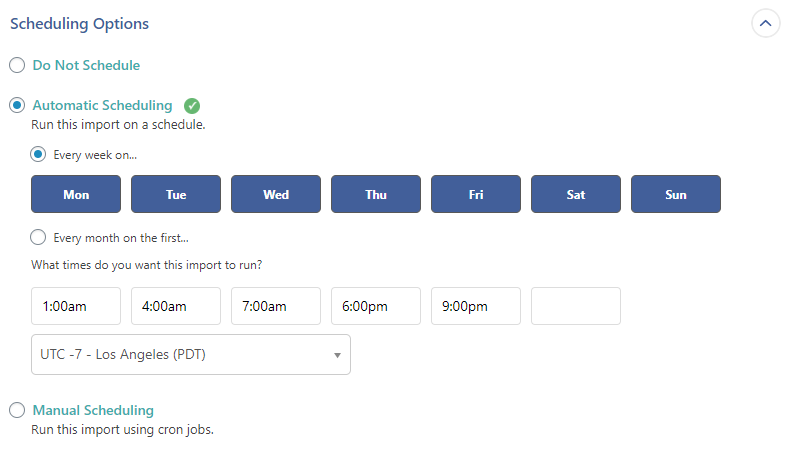
Scheduled WooCommerce Product Imports
Imports can be set to run automatically on a schedule. At the scheduled time a fresh version of your import file will be downloaded and the import will run to create, delete, and update products based on your import settings. Schedules can be created manually using cron jobs, or automatically using WP All Import’s Automatic Scheduling service.
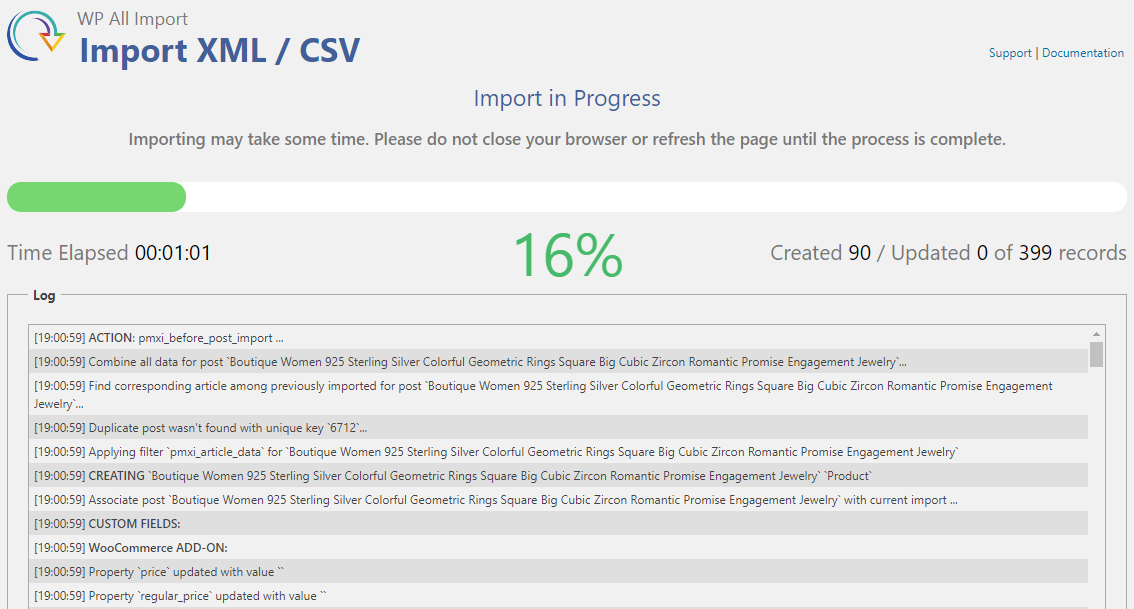
Running the Import
Now it’s time to run the import.
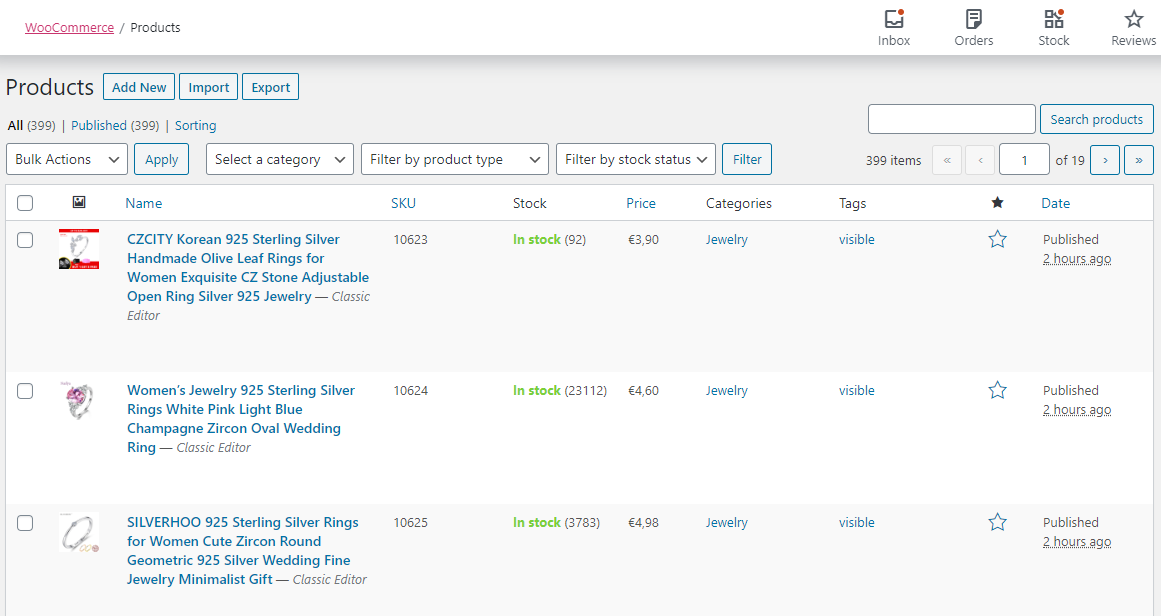
Finishing Up
After the import is complete, go over and take a look at the products that have been imported.
In just a few minutes we’ve imported hundreds of products, including their product images, attributes and taxonomies into our WooCommerce Shop. WP All Import is a powerful tool that allows you to import any XML, CSV, or spreadsheet into WordPress.
Founded 20 years ago, Hostdedi managed platforms have always provided agencies with the ability to deliver the site experiences their clients expect. Built on the four pillars of speed, security, scalability, and service, our solutions are designed to help your website realize its potential. Visit Hostdedi.net today and see how we can help.
WordPress popup plugins are a must for savvy website owners who want to catch visitors’ attention quickly. Fortunately, popup plugins are also cheap or even free for users to install on their sites.
With the large selection of free WordPress popup plugins has to offer us, it can be hard to make the right choice. We’re here to spare you the frustration of testing every free WordPress plugin out there — use our list to simplify your research.
What Is a WordPress Popup Plugin?
A plugin adds functionality to your WordPress website. Popup plugins allow you to customize, deploy and manage plugins to help with your marketing.
Many different software publishers have created their own popup plugins and made them available for direct download and installation to your site.
How Can I Find the Best WordPress Popup Plugin Maker?
To find the right popup plugin for you, think about how you’ll be using popups. Refer to the list below to learn more about some of the free popup plugins available for WordPress and decide on one to try out yourself.
Sumo
Grow your email list with the free Sumo popup plugin. Create timed plugins and view metrics for your popup’s performance from inside Sumo to see how well your marketing is doing and make adjustments.
Sumo has a free version offering most of the tools you’ll need including access to all of the apps inside the platform (as long as your site has less than one million visits per month). If you’re interested in premium support, you’ll need to pay $20 or more a month for access, depending on your website traffic. Traffic beyond one million visits per month requires an enterprise account.
For site owners who don’t necessarily want premium support and who still want advanced apps and analytics, the free Sumo plugin is tough to beat.
Popup Maker
Although it’s free, Popup Maker offers unlimited popups and includes user targeting via cookies and trigger conditions. This plugin provides startups with many of the same tools and tricks that many people would expect only large enterprise websites to have. For your business, it may give you a helpful edge against your competition.
The $16 per month Extensions Bundle and $15 a month Individual Extensions accounts offer extras such as use on unlimited websites, advanced integrations with other helpful apps, and more.
Mailchimp Popups
There are many different types of Mailchimp popup options, so we’ll review a few of the more common choices here.
Mailchimp’s Own Popups
From within the Mailchimp platform, you can create a popup form and have Mailchimp automatically install to your page or you can generate HTML code that you can paste into your WordPress page. Which option you choose may depend on whether or not you want to do this part yourself.
MC4WP
MC4WP allows you to design your own forms and popups or link to existing forms on your site. This plugin gives you a variety of different options for how you use Mailchimp and WordPress together, giving sites more flexibility. You can create an unlimited number of forms and direct visitors anywhere on your site after they respond to your popup.
MailChimp Forms by Optin Cat
Optin Cat has a free plugin that lets you create and use Mailchimp popups. You can use analytics with the free version, but the premium version allows you to unlock more design choices so you can customize your popup to your site.
Icegram
Icegram gives users a lot for free — unlimited campaigns, unlimited popups, and zero branding. This plugin does a lot more than create and manage popups. It has helpful templates and analytics tools to enable you to get the most from your popup marketing.
From there, Icegram also offers you the tools to collect leads, essentially giving your site a light version of a CRM. For $97 a year, you can upgrade to the Pro version and get additional analytical tools and themes.
GetSiteControl
A variety of different popup and widget styles are available with GetSiteControl, making it easy to find a format that will fit your website.
To unlock the full features of GetSiteControl beyond a free trial, you’ll pay $9 and up per month, depending on your website traffic. Many features are available with all of the GetSiteControl plans — in contrast with other popular popup plugins which typically don’t include things like exit-intent popups and unlimited users.
Optin Forms
Create, customize, and design popups that integrate with popular email software such as Mailchimp, GetResponse and iContact. When you’re ready to post, create a shortcode or have the plugin post your popup form for you.
The Optin Forms plugin is a good choice if you’re creating a popup to help you build your email subscriber list. It’s also completely free.
Hustle
Hustle is a versatile popup plugin that lets you collect leads, build your email list, and target popups to user intent. Even if your visitors are using ad-blocking software, Hustle has popups that can reach your customers.
The Hustle plugin works without a hosting membership from Hustle’s developer, WPMU DEV, but a $49 a month membership unlocks full Hustle features and other apps and bonuses you may use with your website.
Yeloni Exit Popup
Make widgets and exit popups while still keeping the user experience positive for your visitors. Yeloni has a lot of advanced features (with a low price tag) which let you use unlimited contacts and even receive support from the Yeloni team with the free version.
Upgraded plans cost $10 a month and up, depending on the version you use and whether you need a license for a large number of sites.
Layered Popups
Layered Popups for WordPress lets you create animated, multi-layered popups. If you want to create exquisitely-designed animated popups or craft layered popups that are more a part of your site’s content than the usual ad or slider, Layered Popups may be for you.
A standard license for the Layered Popups plugin is $21 and gets you access to design, popup creation, management, and analytics features.
How to Use WordPress Popups in Your Marketing
Popups in WordPress can have different uses, and with advanced user targeting, new uses for popups are developed by site owners all the time. Many websites use a popup to collect email addresses to build subscriber lists for newsletters and special offers, although use for email marketing is by no means the only way you can put popups to work.
How to Build a WordPress Popup
If you want to know how to add a simple WordPress popup to your website, then the tutorial or walkthrough for your plugin will likely have the answer for you.
Generally, all you have to do for a simple popup is designate which inputs you need from users (such as name and email address) and which design choices fit your needs (like popup text, size, color, shading, graphics). These popup plugins are generally straightforward to use without advanced technical skills, making them ideal for WordPress beginners.
Here are a few ideas for how to use your popup plugin more effectively.
Contact Forms
Create contact forms for your website that allow visitors to quickly get in touch with you. These popups forward user information directly to your email so you have a stream of new leads when you’re ready for them.
They work best if you give people an incentive to get in touch — a newsletter, free offer, digital download, discount code, or another carrot to encourage them to hand over their information and request contact from you.
Email Lists
As you build your business, you’ll probably also be putting your email newsletter or email list together. Including a popup on your site for this purpose makes it easier to start collecting opt-in subscribers to your list.
You could connect this popup to user tracking and exit intent rules, allowing your site to present this popup at precisely the right time.
A/B Testing
As you develop your marketing strategy with popups, you can use a/b testing to compare the results of different popup designs and copy combinations. Many popup plugins include the ability to test two different popups with the same target demographic. This helps you make a clear decision and have an obvious winner.
For instance, let’s say your two popups say “Contact Us Today” and “Let Us Help You.” Which one gets a better response? Run them both and find out. Then, pick the best one and run it full time. Keep testing new designs this way and you’ll learn more about your website visitors and what really makes them tick. Change up design, rewrite copy, use different offers, etc. until you get the results you want.
Is Your WordPress Popup Working?
With analytics, you’ll know very soon. Be sure to keep your WordPress popup plugin working properly by updating it whenever the developer releases a new version. Review the built-in analytics with your software to determine if your popups are resonating with your audience.
Compare data with traffic and other website analytics, and you’ll be ready to start troubleshooting trends or fine-tuning your popups to get better results. The important thing is to see this as a continuous improvement project. Test, refine, and keep going.
Founded 20 years ago, Hostdedi managed platforms have always provided agencies with the ability to deliver the site experiences their clients expect. Built on the four pillars of speed, security, scalability, and service, our solutions are designed to help your website realize its potential. Visit Hostdedi.net today and see how we can help.
Have you ever wished you could test an alternate a call-to-action or an ad placement on your site without the risking a negative effect on your conversion rate? You don’t have to make decisions blindly when it comes to your marketing. A/B testing gives you the hard data you need to make informed decisions regarding your conversion optimization strategies. As a result, you can lessen the risk that your changes will have a negative effect on conversions.
Today, we’re answering your biggest questions about content experiments: What is A/B testing in marketing? What does an A/B test look like? And what are the best WordPress A/B testing plugins that you should be using on your WordPress site?
What Is A/B Testing in Marketing?
A/B testing is when you compare two or more versions of a webpage, app, or piece of content to gauge which performs better. In marketing, A/B testing gives you the ability to determine what the outcome of your optimizations will be before you apply them.
There’s one important reason to use A/B testing: marketing is often a matter of trial and error, but A/B testing means you can test changes before applying them. This allows you to be certain the changes will deliver the desired results, and effectively eliminate the guesswork.
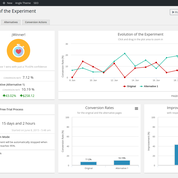
What an A/B Test Looks Like
Consider a hypothetical example. You have a landing page, and you want that page to convert more subscribers.
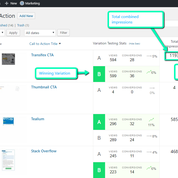
If you used an A/B testing tool, you could create a variant of that landing page by making one single yet significant change to the page. From there, the tool could run both pages — original (or “control”) and variant — by delivering them to your traffic at random and with equal frequency. Meanwhile, the tool would monitor how many conversions each page generates. If the variant page has an increased rate of conversion, then the change you made was effective and can be applied to the actual page.
A/B testing can be done with multiple variants (multivariate testing) but test results are clearer with just one variant. When there’s just one variant with one single change from the original page, you can conclude that change is the source of the performance difference.
What You Can Split Test on Your WordPress Site
A/B testing — also called split testing — on WordPress primarily entails testing your landing pages. Since the goal of a landing page is to convert leads, you can use split testing to compare different iterations of the landing page and find out which generates the most conversions.
Besides landing pages, split testing on WordPress can be used to compare variations of on-page elements like content headings or the location of your social sharing buttons. Another common use for A/B testing is to compare different sign-up form implementations. This test lets you determine whether you get more subscribers when the form is served in a pop-up or when it floats in from the side of the page.
Some of the common elements used in split testing include
Landing pages
Product pages
Buttons
Calls-to-action
Ads
Content headlines
Graphics and visual elements
Signup forms
Best WordPress Plugins for A/B Testing
There are many great plugins for WordPress A/B testing. Whether you’re looking to test your on-page elements or want to do split testing for a landing page, here are the best plugins for your WordPress A/B tests.
Nelio A/B Testing
As one of the most widely used A/B testing plugins for WordPress, Nelio A/B Testing is an extremely versatile tool that will help boost your conversion. Nelio can do split testing for your product pages (in addition to your landing pages, on-page elements, and blog posts) with all your experiments tracked right from your WordPress dashboard. As a bonus, the tool supports experiments with multiple variants.
Nelio offers additional features like multi-site support, a heatmap feature, and experiment scheduling across its three subscription plans starting at $29 per month for up to 5,000 pageviews.
Split Hero
Split Hero is a split testing tool that keeps things simple. It lets you create up to four variants of your page using either the Split Hero plugin for WordPress or your preferred page builder. From there, it’s as simple as inputting the details of your experiment — i.e., name for the experiment, length of time for the test, destination page for after conversion — and running the test. Then the plugin serves those pages to your audience and monitors the data.
A Split Hero subscription costs $27 per month for unlimited testing capabilities after a free 14-day trial. And if you run a web store, Split Hero supports WooCommerce.
Thrive Headline Optimizer
Click-through rate on posts and articles is largely dependent on the strength of your headlines. If you want to boost the click-through rate on your content, consider trying Thrive Headline Optimizer. Not to be confused with Thrive Optimize, Thrive Headline Optimizer is an A/B testing tool for headlines. With this tool, you can test different titles for your content to figure out which generates more engagement.
Popular and highly-trafficked outlets like Forbes, Huffington Post, and Buzzfeed use Thrive Headline Optimizer because it’s easy and effective; just input your variant titles, launch the experiment, and monitor the results right from your WordPress dashboard. It’s included in the Thrive Suite of WordPress tools for $19 per month (paid annually), or you can buy Thrive Headline Optimizer separately for a one-time payment of $67.
Simple Page Tester
Simple Page Tester is an A/B testing tool that lives up to its name. Available for free with a premium version available for a one-time payment of $59, Simple Page Tester simplifies split testing with its user-friendly test setup wizard.
Installing the plugin is the most difficult part. From there, just tell the plugin what you want to test e.g., a blog post or page, and when (or whether) to declare a winner. Simple Page Tester has native integration with Google Analytics for conversion goal tracking and offers variable traffic controls between variants. With the premium version, you also get comprehensive analytics which let you monitor your tests from your WordPress dashboard.
A/B Press Optimizer
Testing a post or page is pretty standard for split testing tools, but A/B Press Optimizer lets you more easily test variations of specific on-page elements. You can test different graphics, button or link styles, subscriber form locations, and even headlines for your content. The plugin allows for unlimited experiments and unlimited variations in those experiments which makes A/B Press Optimizer essential if you plan on doing lots of split testing on your site.
Between the limitless number of tests and ability to compare specific on-page elements, A/B Press Optimizer is great for granular conversion and engagement optimizations. You can start using A/B Press Optimizer after a one-time payment that starts at $49.
WordPress Calls to Action
Similar to how Thrive Headline Optimizer focuses on split testing for headlines, WordPress Calls to Action is a split-test plugin made by Inbound Now for your calls-to-action. A call-to-action is designed to convert subscribers and customers, and WordPress Calls to Action Plugin can be used to test different versions of your call-to-action so you can find out which converts the most traffic. But it’s not just limited to calls-to-action. In fact, you can also run A/B tests for your ads, posts, pages, and other elements. WordPress Calls to Action even has templates that you can use to quickly create your variant calls-to-action.
As a freemium tool, WordPress Calls to Action has a “lite” version available for free, or a premium version is available as part of the Inbound Pro Marketing Suite for $59.99 per year.
WordPress Landing Pages
Also made by Inbound Now, WordPress Landing Pages is a split testing tool for your landing pages. It includes a robust page builder so you can design different landing pages to use for your experiments. There are a number of templates available to use for your landing pages; these templates are built on the Advanced Custom Fields framework.
In addition to all those useful features, WordPress Landing Pages supports multivariate testing, meaning you can test multiple variant elements on each variant page. There are also in-depth reporting options that can be accessed right from your WordPress backend. Like WordPress Calls to Action, WordPress Landing Pages is a freemium plugin, so the “lite” version is available for free, and the premium version is part of the Inbound Pro Marketing Suite for $59.99 annually.
Marketing Optimizer
Marketing Optimizer is an all-in-one marketing plugin that is completely free to use. It can meet many of your marketing needs with marketing automation, call tracking, and customer relationship management capabilities. However, Marketing Optimizer is arguably most robust as an A/B testing tool. The built-in builder makes it very easy to create high-converting landing pages, pop-ups, calls-to-action, and emails as well as variant versions for your tests.
Although it has its own builder, you can use elements created with your preferred builder(s) in your Marketing Optimizer split tests. Once you’ve designed and initiated a test, Marketing Optimizer tracks the results and generates visual reports which you can view from your WordPress dashboard. It supports both caching plugins and server-side caching.
Google Optimize
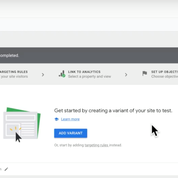
Unique from other plugins on this list, Google Optimize — previously known as Google Content Experiments — is an A/B testing tool that doesn’t require a plugin. Just embed a small amount of code in the header of your site and use the external Google Optimize platform to build and run your split tests. Since it’s a Google-made tool, it integrates fully (and automatically) with Google Analytics, so your tests will generate a ton of valuable and actionable data.
Google Optimize can track up to five simultaneous split tests consisting of up to 16 variants for free, or you can upgrade to Optimize 360 which supports up to 100 simultaneous experiments consisting of up to 32 variants. For pricing on Optimize 360, you must contact the Google Optimize sales team for a custom quote.
Do You Need A/B Testing for Your WordPress Site?
No matter what type of website you run, the search for ways to convert more subscribers, leads, or customers is never ending. But there aren’t any default tools to do conversion testing in WordPress. Testing site conversion is something you’d need to do manually, and even so, it would be complicated, cumbersome, and lack the in-depth reporting.
An A/B testing tool for your WordPress site gives you the opportunity to more easily find tweaks and make improvements to your site so you can achieve your goals. Most importantly, these tools make the process of conversion optimization something that’s based on real historical and experimental data rather than a game of guesswork. A/B testing tells you what’s working and what’s not, so you can make smarter and more informed decisions.
Hostdedi Can Provide the Performance You Need for Robust A/B Testing
Before you can run an A/B test on your landing page, you need a great hosting plan for your website. That’s where Hostdedi can help.
Hostdedi is your premiere web hosting provider, offering plans for Managed WordPress hosting & Managed WooCommerce hosting. With a Hostdedi hosting plan, you get fully unlimited and unmetered traffic, built-in optimizations for fast loading, automated framework, and plugin updates, and so much more. Once you’re ready to start split testing your landing pages, Hostdedi’ performance-oriented hosting will give you the peace of mind that your site can handle just about anything.
Founded 20 years ago, Hostdedi managed platforms have always provided agencies with the ability to deliver the site experiences their clients expect. Built on the four pillars of speed, security, scalability, and service, our solutions are designed to help your website realize its potential. Visit Hostdedi.net today and see how we can help.
Have you ever felt stressed about the amount of time that tedious, repetitive marketing tasks require every single day? Trust me, you’re not alone.
Today, we want to give you the gift of two magical words: marketing automation. Whether you run a basic WordPress site or a full-fledged online brand, marketing automation will help streamline your marketing efforts and free up your time for other important tasks.
And once you know how it works, you may actually believe it’s magic!
What Is Marketing Automation?
Marketing automation executes marketing campaigns across numerous sales channels with no action needed by a marketer. In practice, it accomplishes two things.
It lets you unload repetitive tasks that usually fall under your marketing purview.
It lets you maximize your marketing efficiency.
What Is Marketing Automation Primarily Used For?
Marketing automation has three main uses: sales, workflow optimization, and marketing intelligence.
Sales
Sales is the most important use for marketing automation. With an automated campaign, you can engage (or re-engage) leads passively. Meanwhile, you’re capturing sales that might otherwise have fallen through the cracks. So marketing automation is a tool to boost sales as well as your return on marketing investment.
Workflow Automation
Marketing takes a lot of your time and energy. But with marketing automation, you can streamline your marketing efforts so that things like budgeting, digital asset management, and other marketing tasks can run independently. Then you can put the time you’ve saved into other aspects of your business.
Marketing Intelligence
Automated campaigns often rely on customer ID numbers and URL tracking codes to monitor a customer’s conversion journey. Additionally, most automated campaigns are trigger-based, meaning your marketing materials are delivered after a customer meets a certain behavioral trigger. When combined with A/B testing, automated marketing campaigns can tell you a lot about how customers and leads are engaging with your brand and inform new marketing campaigns.
What Is an Automated Campaign?
An automated campaign is a trigger-based marketing campaign built with a marketing automation tool. An example would be an automated email campaign that sends an email to a subscriber when new content similar to content they’ve already read or shown interest in is published.
There are several different automated campaigns with common ones being email, social media, and live chat.
What Do Marketing Automation Tools Do?
Marketing automation tools are meant to offload some of the more repetitive and tedious aspects of marketing. Every tool has its own function, or set of functions, depending on what the tool was designed to do. For instance, Mailchimp and Drip are marketing automation tools for email, allowing you to set up automated email marketing campaigns. Similarly, Buffer is an automated marketing tool for social media, giving you the ability to schedule social posts and monitor their engagement data.
What Is the Best Marketing Automation Tool?
The best marketing automation tool is the one that addresses your most critical marketing challenges. So let’s go over some of the most useful tools for the key aspects of marketing automation.
WordPress Marketing Automation Tools for Email
Marketing automation can be particularly useful when you have a mailing list, subscriber list, or if you frequently send emails to your customers. With email marketing automation, you can more effectively generate and warm leads for your website or business.
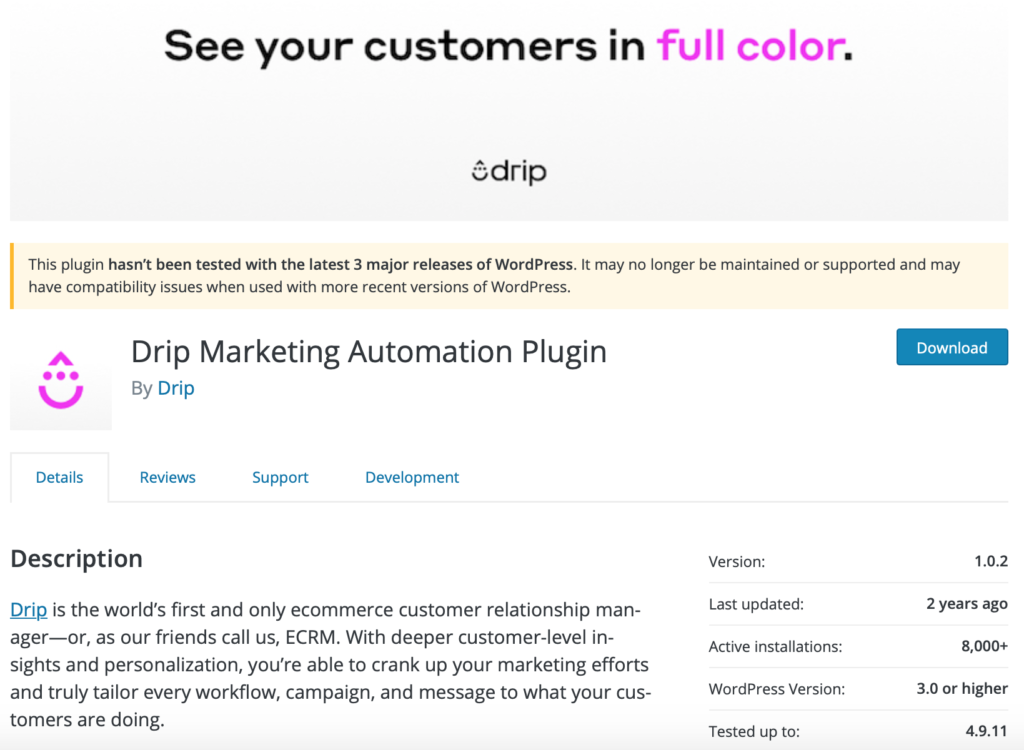
Drip Marketing Automation Plugin
Offering a highly popular plugin, Drip was conceived as a comprehensive eCommerce customer relationship management platform. However, the Drip Marketing Automation Plugin is focused primarily on automating your email marketing campaigns. The plugin can be used for free with up to 100 subscribers, after which you’ll need a Drip subscription starting at $49 per month for unlimited emails and up to 2,500 subscribers. The platform for notable for the in-depth customer data it collects and analyzes.
MailChimp for WordPress
Mailchimp can help you build your audience and automate marketing without needing a plugin. But with a third-party plugin like MC4WP, you can more easily take advantage of Mailchimp’s more diverse features and integrations. For instance, with the MC4WP plugin, you can integrate Mailchimp with such tools as Ninja Forms, BuddyPress, and WooCommerce. Mailchimp itself is free to use, although some features (email templates, A/B testing, etc.) require a subscription starting at $9 per month.
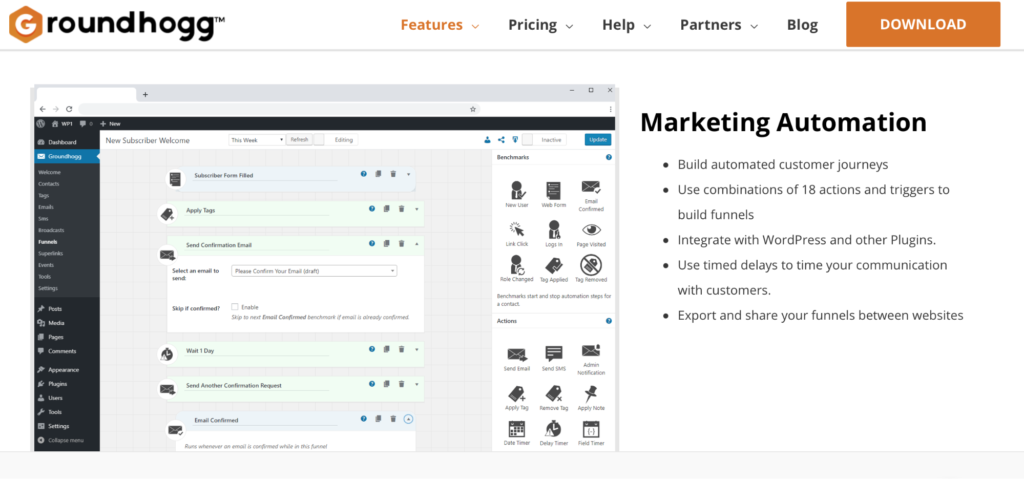
Groundhogg
As an all-in-one WordPress and eCommerce marketing automation platform, Groundhogg lets you craft compelling emails without leaving your WordPress dashboard. It also lets you build automated customer journeys just as you would with an expensive analytics tool. Using custom combinations of 18 different Groundhogg actions, you can convert leads more efficiently. With plenty of add-ons and integrations, Groundhogg’s core features are free although a Groundhogg subscription starting at $7 per year, is necessary for certain integrations.
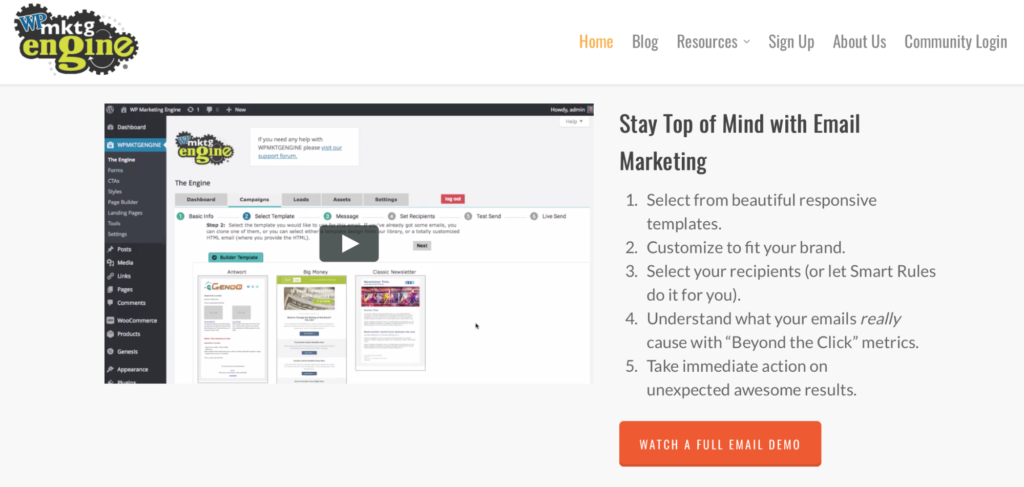
WPMktgEngine
WPMktgEngine is half email marketing automation tool and half customer relationship management platform. It excels at both, and offers tons of configuration options for your automated email triggers. Meanwhile, the plugin continuously collects customer data to provide you with an in-depth understanding of what’s driving conversion. It even lets you craft engaging emails from your WordPress dashboard. WPMktgEngine requires a subscription that starts at $44 per month (paid annually) for up to 2,500 leads.
WordPress Marketing Automation Tools for Live Chat
Traditionally, live chat tools require someone to be actively monitoring incoming messages. But a live chat marketing automation can help mitigate those shortcomings while directly your audience in real time.
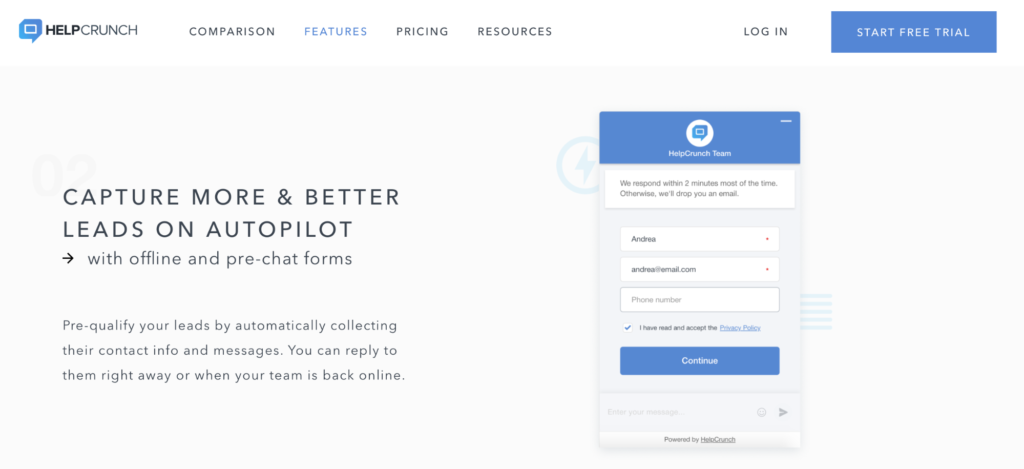
HelpCrunch
Though billed as a comprehensive sales and customer support platform, HelpCrunch’s standout feature is its live chat widget. You add the chat widget to your site, and then HelpCrunch routes messages from customers to the corresponding messaging app so you can respond anytime, anywhere. A feature called AutoPilot ensures that when you’re unavailable, a bot will respond to your leads, collecting their contact info for a follow-up. To use the live chat feature, you need a HelpCrunch subscription which starts at $15 per month per team member.
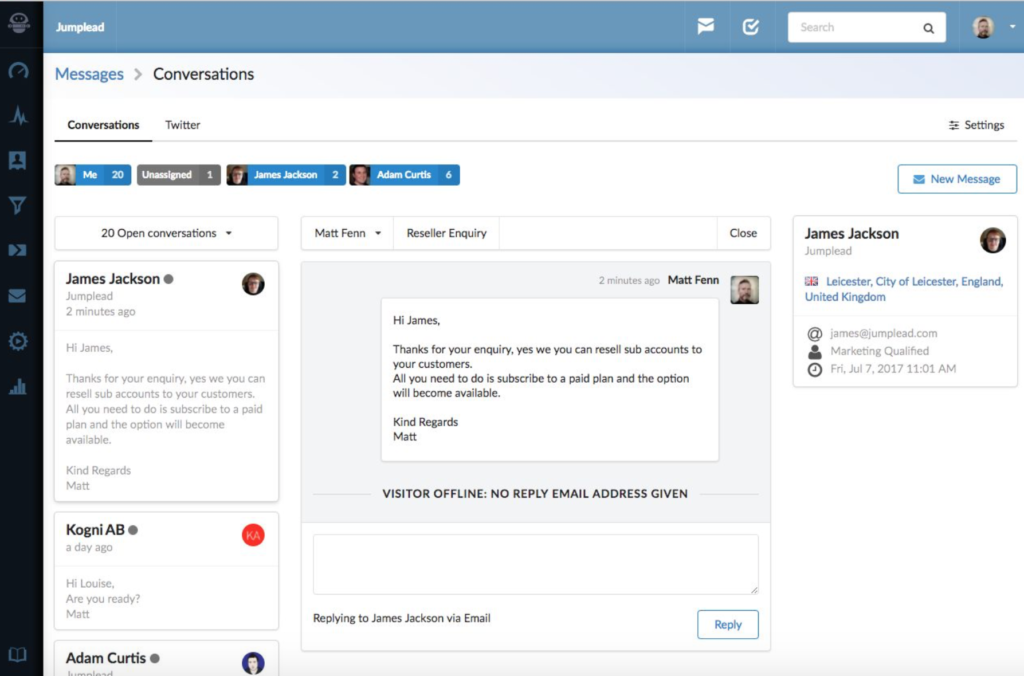
Jumplead Marketing Software
Jumplead is a live chat service with a WordPress plugin that is well suited to WordPress marketing automation. It shows you who is on your site so you can engage them directly. The plugin also collects contact information so that those you chat with can be integrated with your mailing list and other marketing efforts. After a 14-day free trial, a Jumplead subscription starts at $49 per month for up to 3,000 monthly visitors and up to 2,000 contacts.
Marketing Automation Tools for Social Media
Building an audience on social media requires a large investment of time and energy. Social media marketing automation is a way for you to get the most out of that investment by automating social shares, re-shares, and other related capabilities.
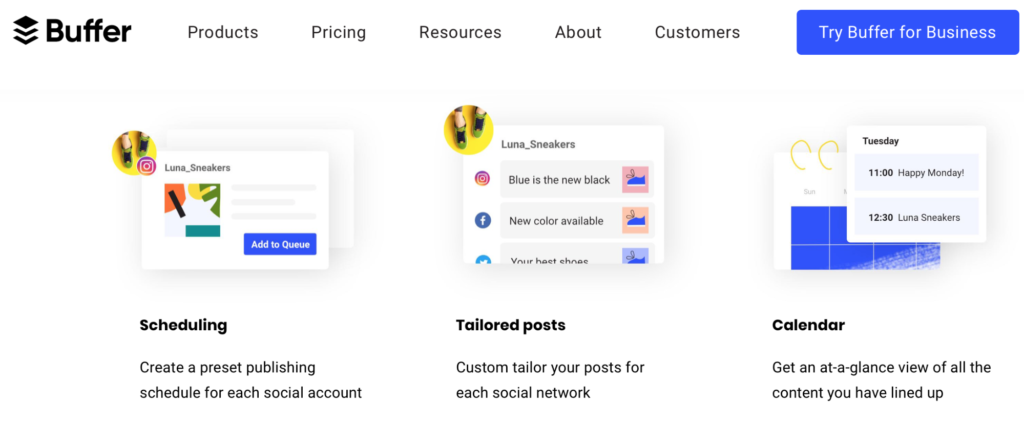
Buffer
The purpose of Buffer is to reduce time spent sharing content on social media. Automatically add new posts to your Buffer queue using the Buffer-recommendedthird-party WordPress plugin, or by using Zapier to connect the two platforms directly. With a free Buffer account, you can automate up to 10 posts between up to three social accounts per month. If you need more social accounts and posts, Buffer subscriptions start at $15 per month for eight social accounts and up to 100 posts.
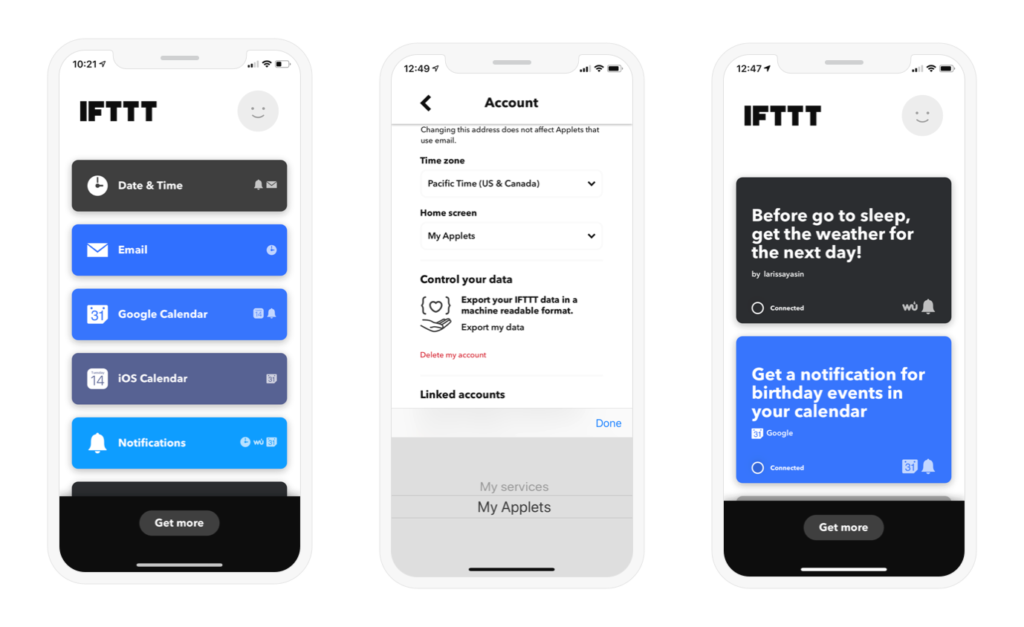
IFTTT
Even though it doesn’t connect to WordPress, IFTTT provides a ton of useful applets with which you can set up triggerable events between different platforms. It even offers a collection of applets for marketing. With IFTTT, you can make sure the profile photo for each of your social media accounts is the same across, document all your Instagram posts in a Google Sheets spreadsheet, and track tweets using a specific hashtag. It’s a lot of power in a tool that’s completely free to use.
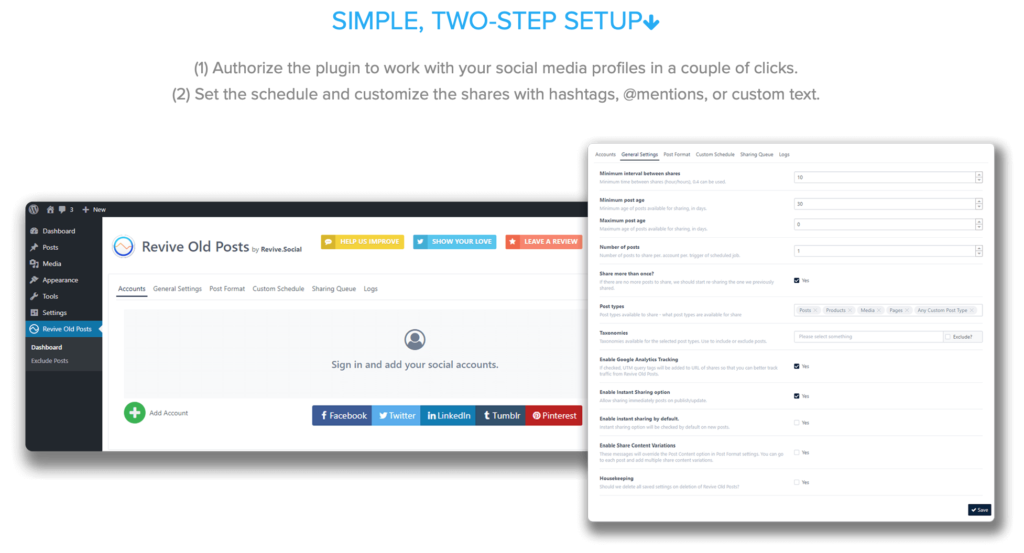
Revive Old Post
Revive Social offers two great plugins for lead generation, one of which is Revive Old Post. The purpose of the plugin is to periodically re-share existing content on social media so that it continues to drive traffic to your site. Besides periodically re-sharing existing content, you can also set it to share your content immediately after publishing on up to 50 different social accounts. Revive Old Post requires an annual subscription that starts at $75 for a single site.
Is Marketing Automation Right for Your Site?
Whether we’re talking about the investment of your own time or a paid employee’s time, marketing can quickly become quite expensive. Especially when you’re looking to grow or scale your business. As the saying goes, time is money.
With marketing automation, you gain back some of the expense of marketing while maximizing your return on investment.
Make Hostdedi Your Partner for WordPress Marketing Automation
Founded 20 years ago, Hostdedi managed platforms have always provided agencies with the ability to deliver the site experiences their clients expect. Built on the four pillars of speed, security, scalability, and service, our solutions are designed to help your website realize its potential. Visit Hostdedi.net today and see how we can help.