Start Your First eCommerce Store
 There are over 2.3 million eCommerce stores hosted on the WooCommerce platform, and for good reason. WooCommerce makes creating your own eCommerce store quick and easy. Great functionality and an intuitive interface come together to create a powerful eCommerce platform. First you just have to complete the WooCommerce setup.
With a combination of additional plugins and options from the get go, getting through the beginning stages can seem like a daunting task. Don’t worry, with WordPress, it’s easy. This guide will take you from a clean WordPress install, through to creating your first product and customizing your storefront.
What This Guide Covers:
Step 1: Installing WooCommerce
Step 2: WooCommerce setup
Step 3: Creating your first product
Step 4: Adding images, product galleries, categories, and tags
Step 4: Customizing your WooCommerce setup
Note: If you choose the Hostdedi Cloud to host your WooCommerce store, we will install WooCommerce for you, meaning you can start from step 2.
What You Need:
- A hosted WordPress or WooCommerce solution
- An active internet connection (unless you’re going to be testing on a local account)
- Around 20 minutes of your time
- A fiery passion for eCommerce (optional)
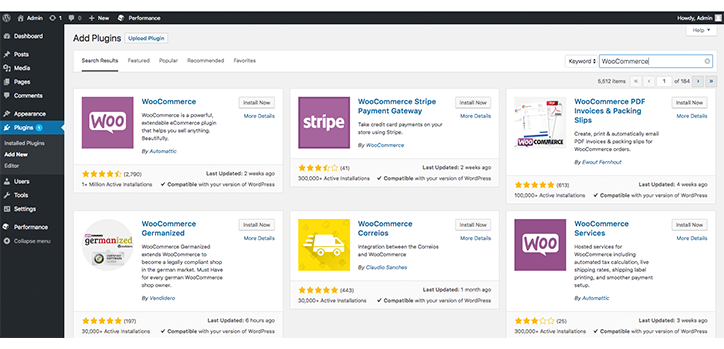
Head to the Add Plugin section of WordPress to find Woocommerce (and a lot more)
The first thing you’re going to need to do is to load up WordPress and head to the admin panel. From here, look down the left hand panel and find Plugins. Clicking here will expand the options you see. From these new options, you’ll want to click Add New.
Next, head to the top right of the screen and type WooCommerce (as we’ve artfully done above). The first result should be WooCommerce. If you’re unsure, just take a look at all the incredible reviews – or read the description. Click Install Now and wait. Make sure you stay on this screen.
Once it’s installed, that Install Now button will change to Activate. Click this ASAP and you’ll now have a fully functional WooCommerce install on your WordPress site. It’s time for the eCommerce magic to begin.
How to start the WooCommerce Setup
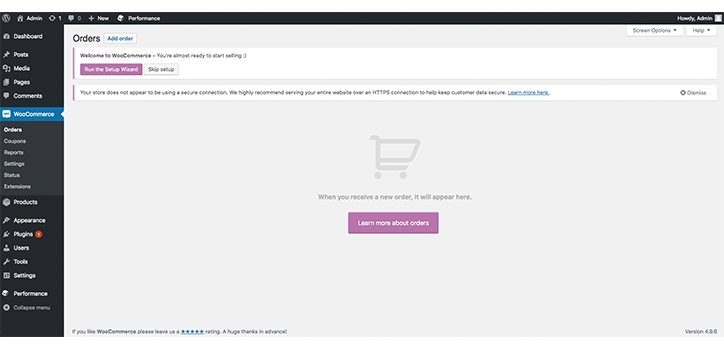
Once you’ve installed and activated WooCommerce, you’re going to need to go through a short WooCommerce setup wizard. To do this, look back at the left hand panel and find WooCommerce. Click it. If it’s not showing up, refresh the page and it should appear. If it’s still not there, head back to Step 1 and repeat.
After you’ve navigated to the WooCommerce page, you’ll find a button under the page title called Run the Setup Wizard. Click this and prepare to let WooCommerce know everything you want your store to be (almost).
Begin WooCommerce Store Setup
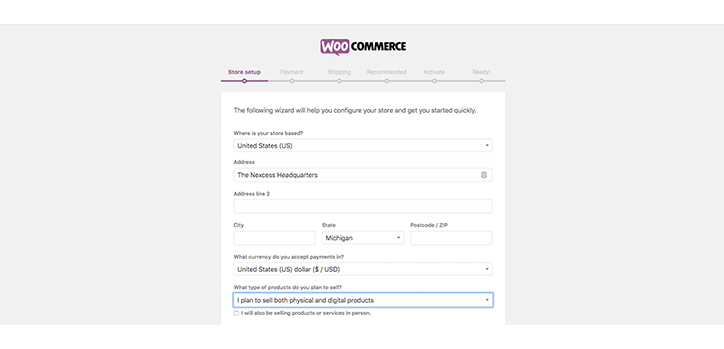
The WooCommerce Setup Wizard’s basic information screen
The first group of information we need to let WooCommerce know about is where we are, who we are, what type of product we’re selling, and what currency we’re going to be charging in. If you have multiple currencies then don’t worry. We’ll cover this later. For now, just go with your local currency.
The information here doesn’t have to be entirely accurate, although it will help at a later date if it is. Once you’re finished, click Continue to be taken to the Payment page (for configuring how people will be paying you).
Set up Your WooCommerce Payments
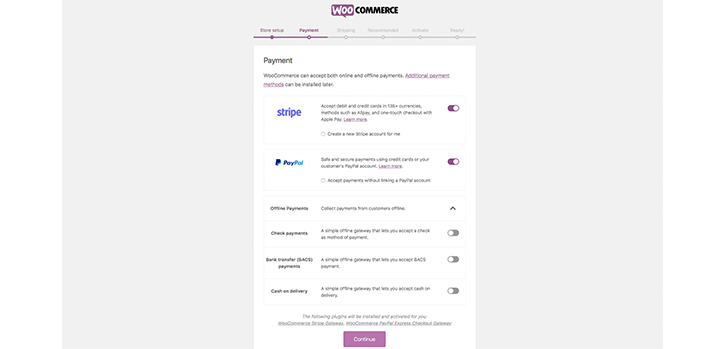
Setting up Woocommerce payment options
Before we go any further, while the options above may seem limited, you can install your own payment gateway after setup in the form of a WooCommerce plugin.
However, if you do use one or more of those listed above, then it’s just a case of moving the slider to the “on” position. Once you’ve selected your payment gateways, click continue.
Setting Up Shipping
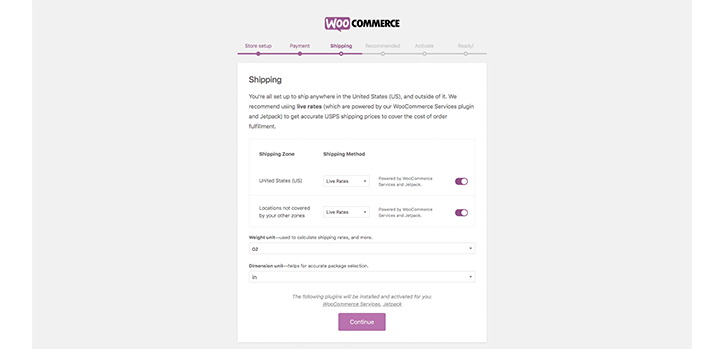
The WooCommerce shipping setup
It’s now time to set up your shipping information. Here, you’re going to need to input your shipping zones and how rates are calculated. If you’re a beginner, we advise leaving these as their default options. Remember, these options can all be edited at a later date or expanded upon with additional plugins if you need.
You’ll also need to input the weight unit you’re using and the the dimension unit. We recommend going with the most frequently used unit in your primary demographic location. For instance, if you are running a store in the US, oz and inches are likely the best fit. If, however, you’re running a store in the UK, it’s better to opt for kg and cm. Metric or Imperial, you decide.
Once you’ve finished with this screen, again, click continue.
A Few Extra Things
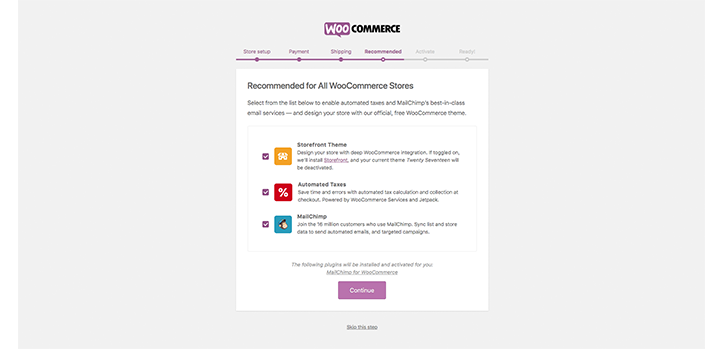
WooCommerce provides some extra recommendations on what additional plugins to install.
The final stage of the setup offers some optional plugins to install if you think they may fit your store. We’ll leave this up to your better judgment on whether you think they are suitable. If you’re unsure, we recommend getting in touch with a developer to see how these plugins will benefit you.
Once you’ve finished, you can then activate your WooCommerce install at the next screen and you’re ready to go.
What use is an eCommerce store without products?
This step will help you to create your first product so that it’s ready to go live on your WooCommerce site.
We’ll be covering the areas of:
- Product name
- Product description
- Product pictures
- SKU
- Inventory
- Shipping costs
Remember, WooCommerce has a lot of added functionality over just plain WordPress, designed specifically for the purposes of eCommerce. We’re going to want to use as much of this as possible.
Before you get started with this step, there are a few things you’re going to need:
- Some product photography – WooCommerce have a great blog post on how to create inexpensive product photography, or maybe you’re already as photography expert or have the photos from suppliers.
- Content and copy for product descriptions and names.
- An idea of what SKUs you’re going to use (if you’re running a big store)
Now that you’ve gotten all of that sorted, head to WooCommerce down the left sidebar => Products => New Product.
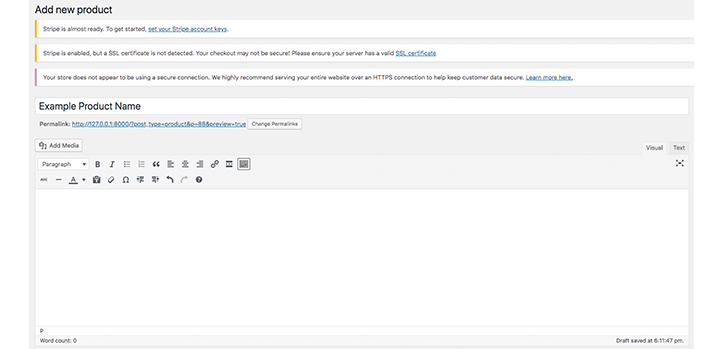
Getting started adding a new product in WooCommerce
This top section of the page will be very familiar to WordPress users. That’s because it’s basically the WordPress WYSIWYG editor.
You can enter your product name at the top and a product description at the bottom. Note that the product description here will be the long product description located below the product – not the short description located next to the Image.
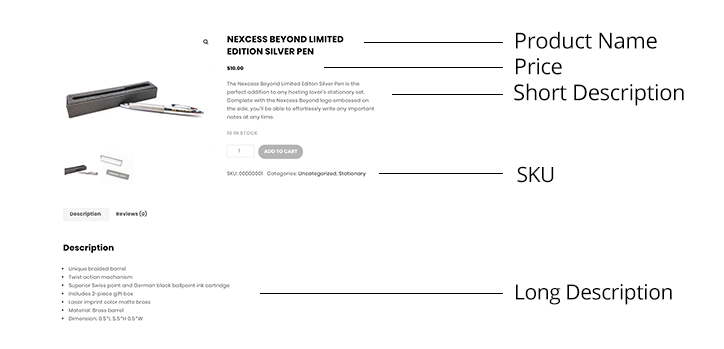
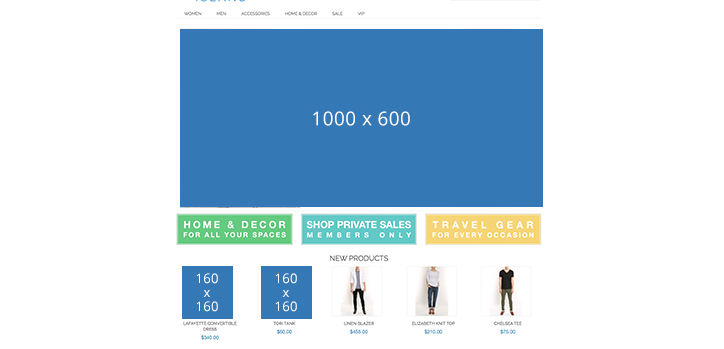
How these different elements will look in the stock theme.
Once you’ve finished loading your content here, you’re ready to move onto some of WooCommerce’s finer product setup features.
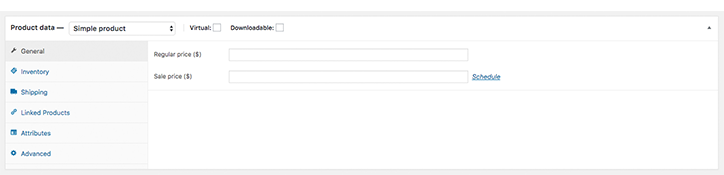
Advanced product data
Advanced product data gives you a chance to select the price for your item, set inventory, organize its SKU, and more.
Along the top, you’ll notice two tick boxes for Virtual and Downloadable. If you are selling items that don’t require shipping, you can tick these and WooCommerce will ignore shipping rates.
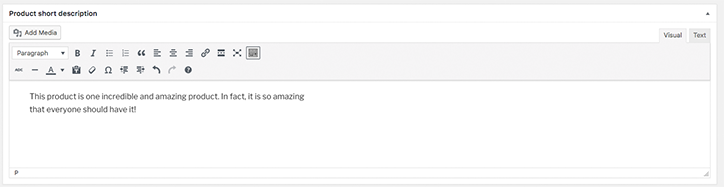
Short product description
This is where you can set the short description as shown above. You can enter whatever information you wish to enter here. It’s advisable to keep this section short and it will act as one of the first things a prospective buyer will see. Keep it catchy and fun – product specifics belong in the long description below.
The next step for adding your first WooCommerce product to your catalog is including images and categories. To do this, you just need to head to the right side of your WYSIWYG-like WooCommerce editor.
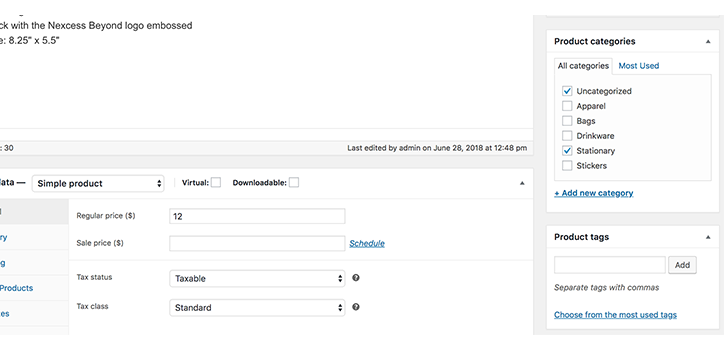
Categories and tags
Here you’ll find the category options. You can add new ones if you wish to. These are incredibly helpful for aiding customers in their conversion journey and making sure they enjoy an easy and intuitive user experience. Tags can also be used to help with this and, once again, we highly recommend you use them – especially if you are running a large store.
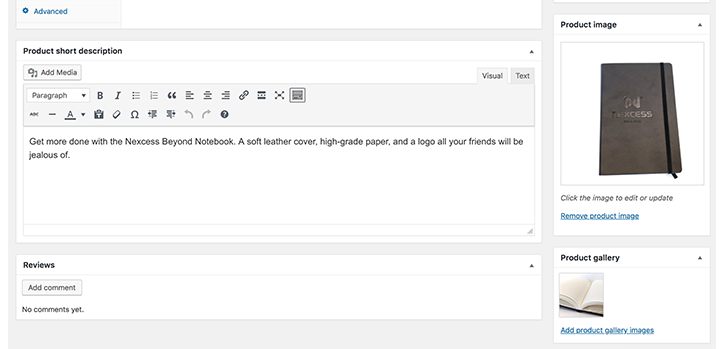
Product Images
Once you’ve done this, you’re ready to input pictures. WooCommerce has put together a great guide on how to go about improving product photography for your eCommerce store. We highly recommend making sure your products photography is of a high quality, it’s one of the most significant page elements involved in affecting conversions.
To add your primary product image, scroll to where it says Product Image and upload and select your image. Below this, you can add additional images to be featured in the product gallery, this way you can exhibit different aspects of your item. In creating a page for the incredible Hostdedi swag notebook, we’ve shown what it looks like from the front in the product image, and then a look at the inside in the product gallery.
If you’re going to be taking your WooCommerce store live, you’re probably going to want to see the range of different themes already available – or possibly customize your own.
This guide will not go into how to create your own WooCommerce themes – that’s for another article – but we will direct you to where you can change theme settings and choose from a selection of pre-built ones.

A WooCommerce theme already set up
To do this, head to Appearance down the left side of your WooCommerce dashboard. From here, you can select Themes to look at a range of different pre-built WooCommerce themes, or you can select customize to change elements on your site easily. This includes repeat elements like site titles, logos, and more. You can also take a look at Plugins, below Appearance, for a list of extensions you can add to your WooCommerce store to expand functionality.

Posted in:
Hostdedi