CAll Us: +1 888-999-8231 Submit Ticket

Who Offers the Fastest WooCommerce Hosting?

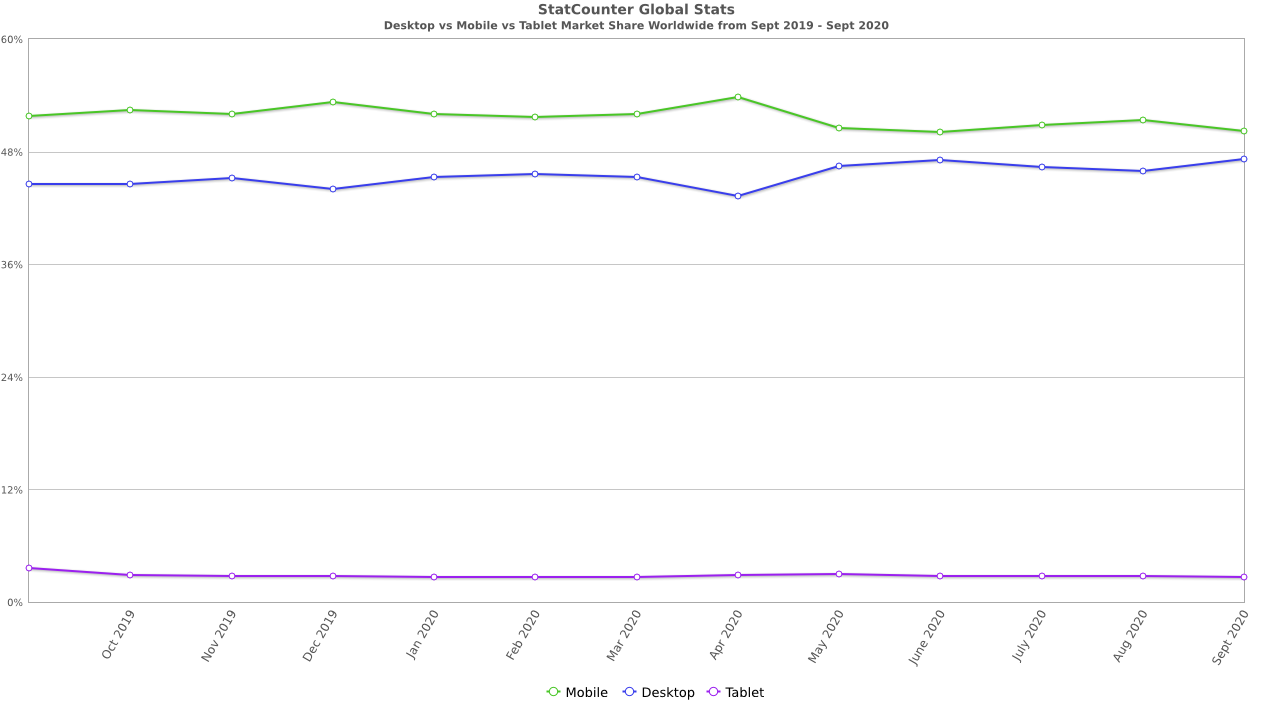
In today’s online landscape, if your site is slow, you’re forgotten.

Site visitors will bounce if your site takes too long to load. Slow sites hurt your rankings on Google too. Faster sites are rewarded with higher positions on the search engine results pages.

And when it comes to online stores, a slow site can really cut into your sales.

Website performance matters. And a good host can make all the difference in the speed of your site. That’s because the greatest factor affecting site speed is your host. But not all hosts are created equally.

A good WooCommerce host can provide the speed you need. Keep reading to learn what to look for and who offers the fastest WooCommerce hosting.

Understanding the Unique Needs of WooCommerce Hosting

Many hosts provide managed WordPress options. A number of hosts also provide Managed WooCommerce hosting. Proceed carefully here.

You need to examine hosting providers closely. Many focus on WordPress and also offer WooCommerce hosting. You’ve probably heard of Bluehost, GoDaddy, and WP Engine, just to name a few. The primary focus of these companies is WordPress — not WooCommerce.

But the resources they’ve spent on WordPress may not translate well over to WooCommerce when it comes to hosting. While WooCommerce is built on WordPress, it comes with its own unique needs in hosting.

For example, caching layers may work for WordPress sites. But when it comes to the ecommerce experience, it just doesn’t work the same. You can’t cache a site for someone who needs to browse your products and add them to their cart. These interactions can’t be cached.

That’s why you need to find a WooCommerce hosting solution that is uniquely dedicated to the ecommerce experience.

But where to start?

We ran an experiment to find the fastest WooCommerce hosting. See what we found.

Running a Test to Find the Fastest WooCommerce Hosting

To find the fastest WooCommerce hosting, Hostdedi ran an experiment.

Creating the Sample Store

First, we created a sample store with 2000 products in it. For this test, we loaded 37,000 orders in the sample store. We also added 9,000 customers.

Selecting Different Hosts to Test

From there, we tried out hosting plans at different hosting companies and imported our store into each of them. Here are the hosts we tested.

  • BlueHost
  • GoDaddy
  • WP Engine
  • SiteGround
  • Kinsta

Testing Different Ecommerce Interactions

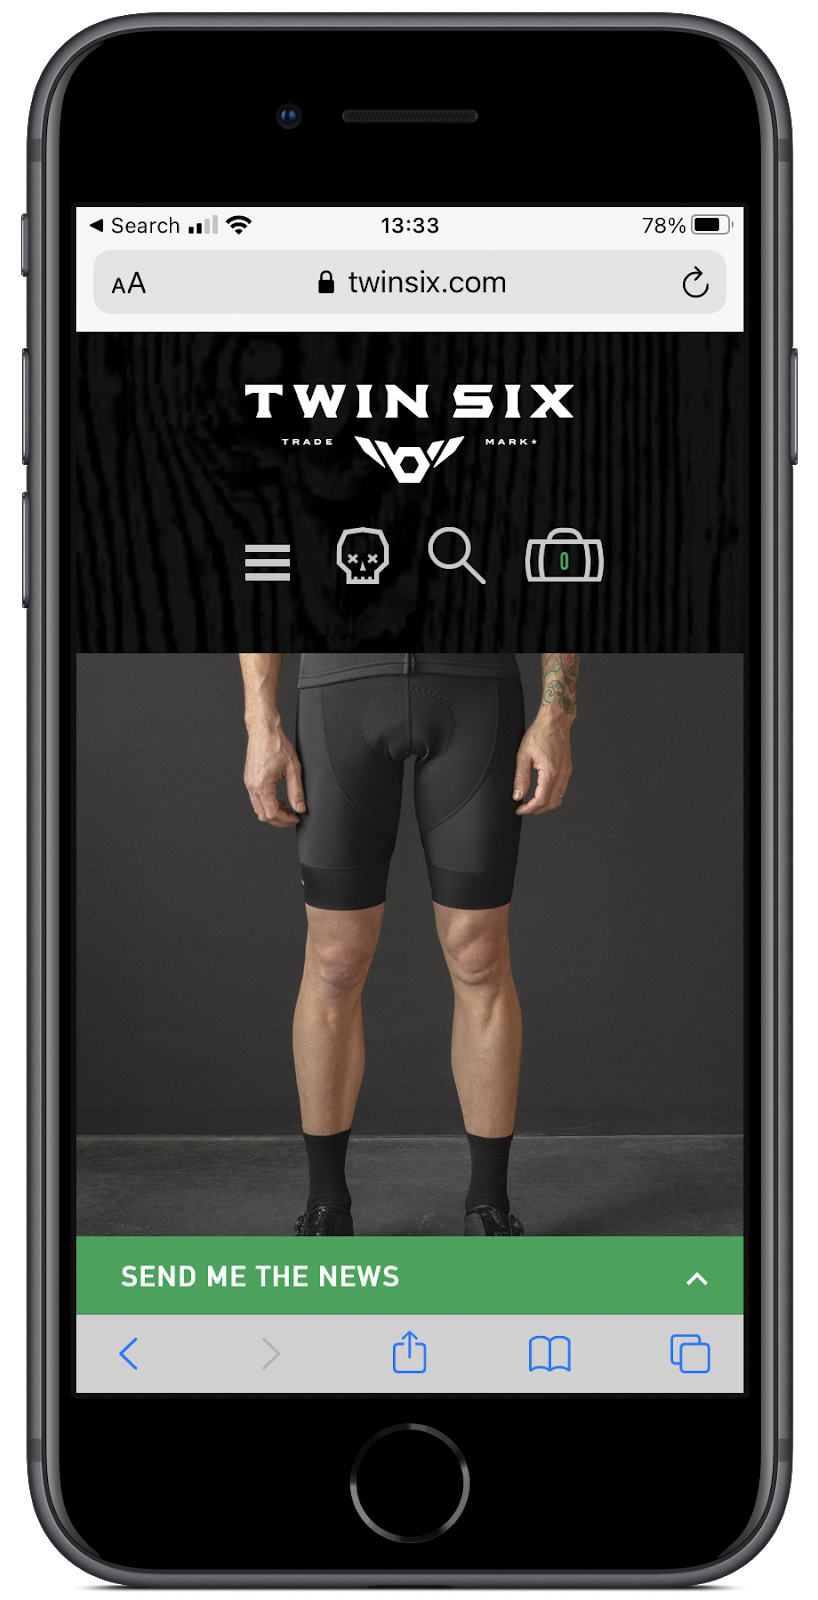
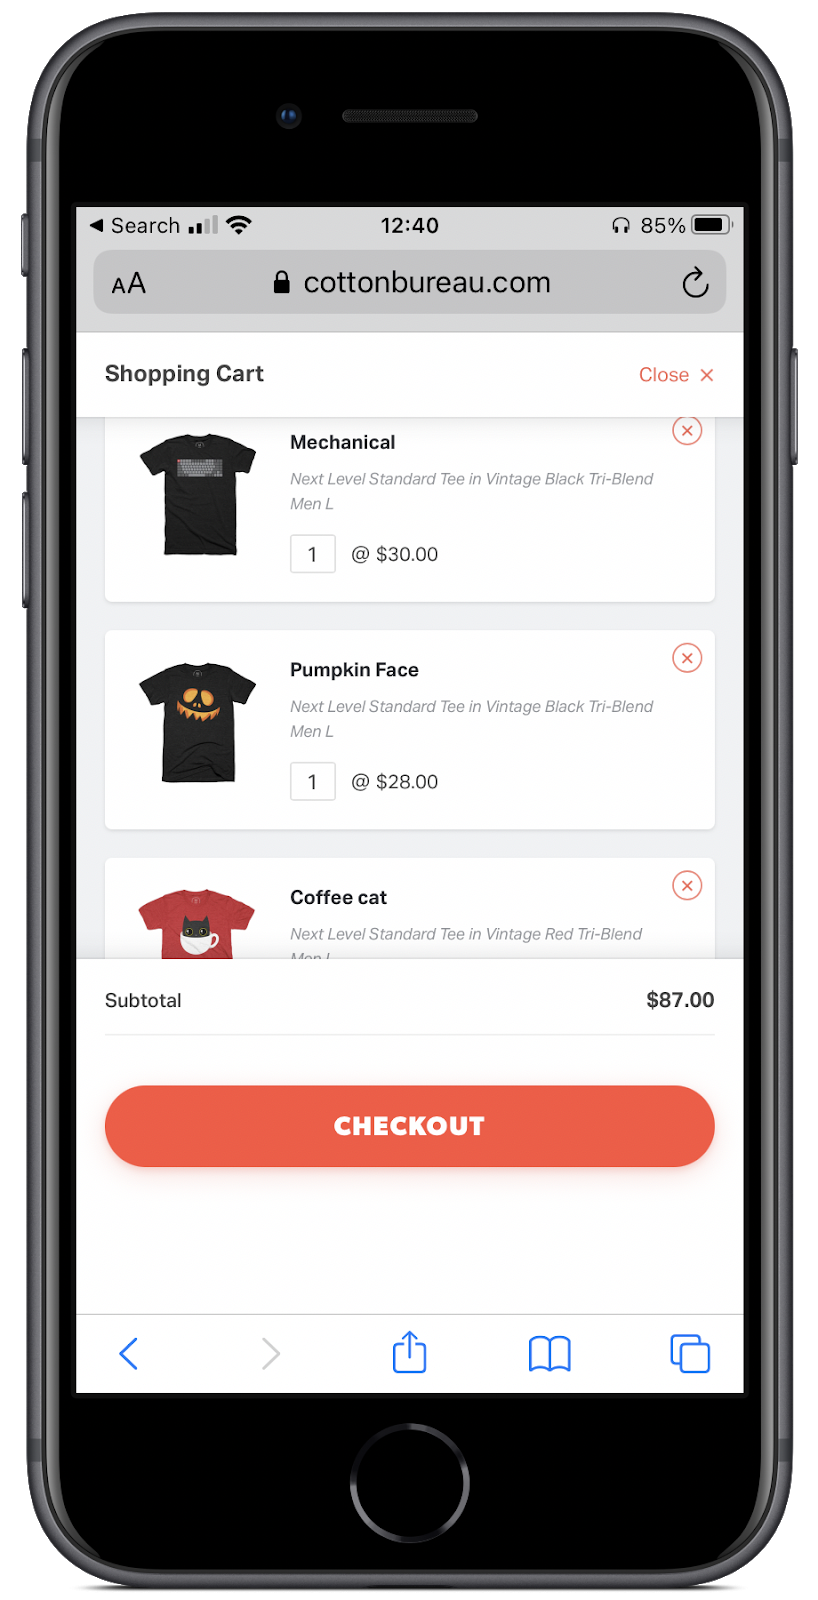
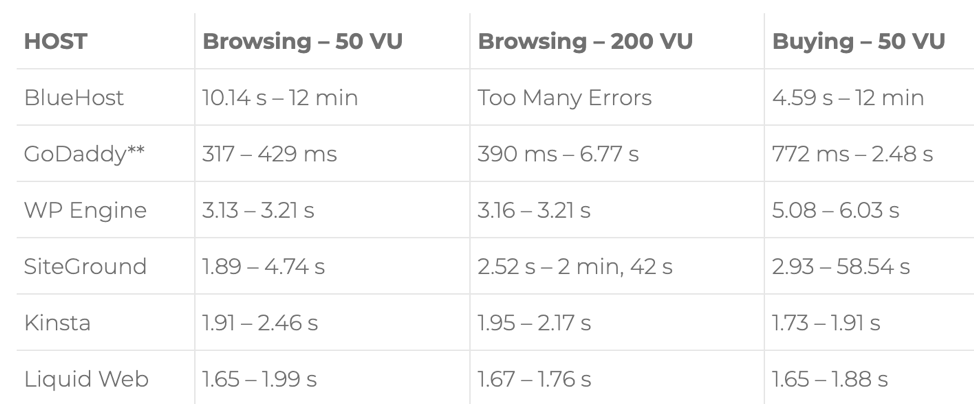
Next, it was time to test a few different user journeys: store browsing and store buying.

Store browsing included navigating between the main pages as well as the individual product pages. For store buying, we tried adding items to the cart and checking out.

For these tests, we used 50 to 200 VUs (virtual users). To keep things consistent, the same store and steps were tested in the same way for each host.

The Results

As you can see, Hostdedi by Liquid Web was the clear winner.

Hosting Comparison Graph

Here’s how we provide the fastest WooCommerce hosting.

How Hostdedi Provides the Fastest WooCommerce Hosting

Unlike hosting providers who mainly focus on WordPress, Hostdedi provides a very specific setup and plans truly optimized for hosting your WooCommerce store.

PHP Workers

Hostdedi providers have much higher PHP worker levels than a number of other hosting providers. Think of PHP workers as different checkout lanes. The more checkout lanes there are, the more customers can check out in the store. If the store offered only a couple of checkout lanes, it would take forever. That’s why it’s important to have enough PHP workers to keep your site fast.

Dedicated Hosting

Other hosts might end up hosting your store or stores on high-density shared hosting, which means you are sharing resources with other customers’ stores.

Site Optimization

Hostdedi provides site optimization to your store after it has been migrated and is love. All you have to do is submit a support ticket. We’ll make sure that your store is fast for customers.

Scaling & Caching

Hostdedi provides high-performance Managed WooCommerce plans which include many performance features, like higher PHP worker levels, auto-scaling, Redis object caching and a built-in full-page cache.

Full-page caching will help reduce the number of PHP workers that are used on your store’s server. That’s because the static HTML version will be served out for customers with cart, checkout, and “My Account” pages being excluded from being cached.

Built-In CDN

Hostdedi provides fast WooCommerce hosting as well as an easy-to-use portal. Hostdedi even provides its own in-house CDN. This ensures that site assets are served out quickly to customers. The Hostdedi CDN can be integrated using a number of full-page caching plugins.

Optimized Front-End and Back-End

It’s one thing for a site to be fast just on the front-end when browsing through the site.

It’s a whole other thing to be fast when you’re adding products to your cart or checking out — and also for shop owners to manage the store in wp-admin.

Hostdedi hosting helps improve the front-end and the back-end performance of your WooCommerce store.

Get Fully Managed WooCommerce Hosting with Hostdedi

The higher number of PHP workers, solid platform, built-in full-page caching, cloud accelerator, Redis object caching and in-house CDN are all built into Hostdedi’ hosting plans.

All of these elements work together to load your WooCommerce store fast for customers. Whether they’re browsing products or checking out, you can be sure they’ll have a great experience on your site when you host with Hostdedi.

One of the easiest ways to improve performance for your existing WooCommerce store is to move your store to Hostdedi. Hostdedi has plans designed specifically for hosting high-performance fast optimized WooCommerce stores.

Hostdedi offers fully managed hosting for WooCommerce designed for fast, high-performing stores. Hostdedi also:

  • Offers high performance and site speed.
  • Dynamically scales and optimizes.
  • Secures your store with always-on monitoring.

See why we have a 4.3 out of 5 star rating on TrustPilot.

Start your free two-week trial of fully managed WooCommerce from Hostdedi today.

Explore WooCommerce Hosting

Related Content

Source link

How to Make Your Website Secure in 2021

As technology goes through rapid changes, it becomes more and more challenging for companies of all types to keep their data on the web secure.

A proactive security strategy reduces the risk of spreading and escalation of malware attacks on other sites and any IT infrastructure out there. If a hacker gets malware into your software, it can easily spread from computer to computer, without knowing the exact origin.

Keep reading this blog to learn why security is so important, how to make your website secure, and how Hostdedi can help.

Why Security Is Critical for Any Website

30,000 sites are hacked on a daily basis. And more than 60% of companies all over the world have had at least some form of cyber attack.

These numbers are getting bigger every day, which is why it’s getting even more important for companies to secure their websites and the data they hold at the moment. Here are a couple of reasons why website security is so important.

When Your Website Is Hacked, It Can Affect Your Visitors

Hackers use malicious software to infect sites, collect data, and sometimes even get to the computer resources to hijack them. There are plenty of different ways to do that and most of them are performed by automated hacking tools.

Hackers don’t go for your business or site specifically, but for the software you use. When an attacker gets access to the software, it can use your website to redirect traffic and target your customers. That way, they can install malware on their computers.

Your Business Can Lose Reputation

There are more than 1.5 billion sites on the internet today. When looking for relevant information, people mostly rely on search engines. Therefore, search engine optimization (SEO) is crucial — it’s a set of practices to increase both the quality and the quantity of traffic to your site through organic search results.

Search engines give a warning to your visitors and restrict them from entering your site if it doesn’t recognize it as safe. For instance, Google marks every website without SSL (HTTPS) as insecure, which can negatively affect the position of a certain website in the search results. Without SSL, your company will struggle to reach users.

In other words, proper website security builds a better reputation, which is vital for your business. If your visitors see your website is safe, they are more likely to come back to repeat the purchase. On the other hand, if they get hacked and experience safety issues, they probably won’t come back. That way, not only will you lose the existing customers, but you’ll be less able to reach new ones.

Your Website Can Get Blacklisted

Not only will you fail to rank in the search engine results, but Google can put your site on its “blacklist” if they find it’s not secure. What does that exactly mean?

Google marks at least 10,000 sites as suspicious on a daily basis. Google warns visitors to stay away from insecure sites with their message, “This site may harm your computer” in the search results.

In most cases, a site will get blacklisted when it contains something that might be harmful to the visitor, like malware.

Protection is Cheaper than Website Clean Up

You’ll find many articles and blog posts on cleaning up a hacked site, but most of them will recommend you use a professional to help you solve the problem.

It’s not easy to clean up a website and it’s not cheap either — it can cost you more than $150 per website.

Malware is mostly hidden from the database and the original files because hackers want to make sure you won’t be able to remove it so easily. That means that, even after the cleaning process is finished, you still can’t be entirely sure that your website was properly cleaned.

How to Make Your Website Secure

Get an SSL Certificate

What is an SSL certificate? A Secure Socket Layer (SSL) is one of the first steps to making sure your website is secure. With an SSL certificate, the site’s URL starts with HTTPS instead of HTTP.

It’s a standard security protocol that ensures any data transferred between sites and users (or even between two systems) remains secure and impossible to read.

In other words, SSL creates an encrypted connection that stops hackers from reading the transferred data. This can include sensitive information like addresses, names, credit card numbers, etc.

Use Security Plugins

Security plugins are another way to secure a website. Let’s say you want to get a WordPress security plugin. How exactly does it work? Well, it covers three main tasks — scanning, cleaning, and protection. Scanning is a process where the software detects malware on your site.

After it finds it, the plugin starts the process of cleaning and removing all instances of malware. The final step, protection, includes taking security measures to make sure no one breaks into your site.

Keep Your Software Updated

Don’t ignore those little pop-up windows that remind you it’s time to update your operating system. They can be annoying when you’re in the middle of work tasks, but it’s crucial for the safety of your computer to keep it updated.

The newest updates usually contain advanced features that repair security holes, fix or remove computer bugs, and protect your data.

Use Complex Passwords And 2FA

One of the ways to make your website secure is by using strong passwords and two-factor authentication, or 2FA. Don’t create a password using your name, date of birth, simple sequential numbers and letters (1234, qwert), or some other information that’s easy to guess. Try to make it more complex.

Still, even a strong password is not enough to keep your website safe, which is why it’s recommended you enable 2FA too. It can be a combination of two or more elements such as:

  • “Something you know,” like a PIN or password.

  • “Something you have,” like a smartphone where you can receive confirmation codes or some sort of hardware-based security device.

  • “Something you are,” like a fingerprint or some other way of biometric ID check.

Use Antimalware Software

Antimalware is software created to protect you from hacker attacks. It scans all incoming data and can even detect advanced forms of malware. Antivirus software remains focused on viruses and similar threats, while antimalware covers a broader spectrum of things threatening your website, such as trojans and ransomware.

Use a Web Hosting Service With Security Built In

It’s essential to choose secure web hosting for your website to protect any type of private information you may have on your site.

Not every host offers the same level of security or type of protection. Whichever hosting plan you choose, look for CDNs, firewalls, SSL certificates, and hacker attack protection.

Make Your Website Secure With Hostdedi

Founded 20 years ago, Hostdedi has provided companies with the ability to deliver quality user experiences online. Safety comes first, which is why our hosting plans primarily include:

  • 24/7 monitoring & alert response.

  • Premium SSL certificates.

  • PCI-certification for compliance.

  • Proactive patching & updates.

We’re here to handle your website, so you can focus on further improving your business.

Give it a try. Start your free two-week trial today of fully managed WordPress or WooCommerce.

Related Content

Source link

WordPress.com vs WordPress.org: Understand the Key Differences

Creating your very own website used to be reserved just for those who were familiar with programming languages like HTML and CSS, but as the world goes forward, the online world evolves too. We have reached the point where anyone can have a fully functional website with just a few clicks.

One of the most famous Content Management Systems (CMS) is WordPress. Why choose WordPress? The main reason is that it’s incredibly simple and easy to use. The simplicity of use helped it rise to the top. With a long and rich WordPress history, it’s become the largest CMS today, running more than a third of all global websites.

You may be wondering, what is WordPress used for? Users can get confused as there exist two instances with the same names, wordpress.com and wordpress.org.

Even though they have the same name, there are many differences between them. Keep reading to understand the differences between wordpress.com and wordpress.org.

WordPress.com

WordPress.com is, in short, a service that will take care of hosting your WordPress website for you. With WordPress.com, a user can create a website, and then relax and focus on other tasks at hand, such as marketing or content creation.

You may be wondering, is WordPress a hosting site? In this case, it is, as it is actually hosting your website.

One of the biggest advantages of WordPress.com is that it is completely free to use. Anyone can sign in and start creating a fully functional website. It will, however, be necessary to upgrade from a free plan to a personal plan if you wish to use a specific domain name and remove the WordPress marketing from your website.

👉 Why Do You Need Hosting for WordPress? >>

If you are, however, in need of a more complex website with more features, you will need to upgrade to a more expensive plan. Some of the features are only available with a more high-priced plan. For example, one of the more handy features that a user can get with WordPress Business plan is to purchase a WordPress theme elsewhere and install it on the website.

Overall, WordPress.com is more suitable for those that are new to the world of websites and hosting, and it is also an appealing option for those users that simply wouldn’t like the responsibility of running their website to fall on their shoulders. It is guaranteed that the site will be up and running at any time.

WordPress.com offers the user a simple way of installing the software and it provides its users additional maintenance of the website.

When you are first accessing WordPress.com interface, you will be greeted and encouraged to create an account.

After signing in, you can choose your domain name, and if you plan on registering your domain name elsewhere, you can simply choose the WordPress free option, for-example.wordpress.com. If you already own a domain name, you can connect it to your WordPress.com site through mapping or transfer. That option will be presented to you on the right side of the screen.

Once you are finished with setting up a domain name for your future website, WordPress.com redirects you to choose a payment option. Aside from a free option that you can choose, the cheapest one is a personal plan for $4 per month. With that plan you can get a free domain name for an entire year. Your website will be free of WordPress advertising, and you will get unlimited email support. 

Of course, as the price goes higher, the possibilities multiply. With the $45 ecommerce plan, you can have more advanced features such as SEO (search engine optimization) tools and even earn ad revenue from your site.

👉 The Essential Guide to WordPress Plugins >>

And now, the fun can begin. After choosing the payment plan, you will be redirected to an interface where you can create your very own website. You will be given an option to name your website, update your homepage, confirm the email address, and edit the site menu.

From there, you have several convenient options available. For example, you can use the WordPress app for both Android and iOS mobile phones, which enables editing your site on the go. You can also access a large WordPress knowledge base, which can be tremendously helpful. Furthermore, WordPress.com has a large library of copyright-free photos you can use when creating a website.

On the left side of the WP-Admin Dashboard, you can find some account-related functions. If you wish to change your payment plan, you can manage that under the Upgrades section. All the comments users leave on your website can be conveniently found in this section when you click on the Comments link. The appearance of the website, as well as plugins that you have installed or are available to you, can also be accessed from this section.

Everything is simple and ready to be used. For example, if you wish to install a plugin on your website, simply click on the Plugins link. You will be taken to an interface where you can easily install any plugin you want with the click of a button.

It’s really as simple as that — and it’s easy to understand why WordPress.com became so popular in the world of user-friendly web development. But what about WordPress.org? 

WordPress.org

WordPress.org is open-source software — its code can be accessed and modified by anyone. WordPress.org is known as self-hosted WordPress. That means that the user has more control over the creation of his or her site.

You can install themes and choose from a variety of plugins to make your site. The user is not limited in any way when choosing from a variety of themes and plugins, which can be significant if you are trying to stand out from the crowd. You will, on the other hand, be responsible for the hosting of your site.

👉 Learn How to Use WordPress With Our Most Helpful WordPress Resources >>

With WordPress.org, you can customize any theme you want, and you can even build your own theme from scratch with the help of CSS and PHP.  WordPress.org can make your life easier with features that take care of security, analytics, and more.

If you’re wary of being self-hosted, know that there really isn’t much to be afraid of. There are many WordPress communities and forums dedicated to finding help for any issues that may occur. There are also a number of available resources on WordPress.org as well, both in the form of workshops and articles. 

Additionally, hosting companies offer Managed WordPress services that can relieve you of some of those duties.

How to Use WordPress.org to Create a Website

If you choose to create your website with WordPress.org, the first step in the process would be an installation. WordPress is software which you can download from their official WordPress.org website on your device for free. If you already have a cPanel account, you can download and install WordPress in cPanel using Softaculous or Fantastico.

After installing the software, You will be looking at an interface that resembles the one of WordPress.com. On the left, in a darker box, you can access administration functions, such as updates for your WordPress account, plugins, and themes. From there the user can also review all of the comments from his or her WordPress website, which can vastly improve interaction with the visitors of your website.

Installing a plugin or changing its appearance is effortless. In only a few clicks you can completely change the appearance of your website without worrying about losing your content. The possibilities are endless here — creating the content is complicated enough, and with WordPress you can easily decide what looks best for the content of your website simply by trying various themes. It’s as painless as choosing a pair of pants in a dressing room.

You may be wondering, what is the difference between WordPress.com and WordPress.org? And how is all of this significant to me?

There are advantages and disadvantages with both WordPress.com and WordPress.org, and in the end, all that matters is what kind of website you are building and what are you expecting from your CMS.

One of the main polarities in WordPress.org vs. WordPress.com is that with WordPress.org you can host your own website, while if you are using WordPress.com, it will be WordPress.com that is hosting your website. That makes WordPress.com painless if you are just getting started, but it gives you less freedom than its counterpart. 

👉 Beginner’s Guide to WordPress Performance Optimization >>

With WordPress.com you can have a simple website in a couple of clicks, but for more complex themes and plugins, the user will have to upgrade his or her payment plan. Besides that, there are not a lot of themes the user can choose from if he or she does not upgrade to a higher payment plan. This can raise some concerns if you are trying to make a distinctive website that will be instantly recognizable. 

If you care about the appearance and the variety of plugins, but you would not like to spend a lot of money, then WordPress.org could be a better solution for you. But if you don’t mind that your blog or a website has the same theme as possibly thousands of other websites, and the simplicity of it all is appealing to you, then WordPress.com might be the way to go.

Either way, with either one you get to create a fully functional and great looking website from scratch, without any experience.

However, there is also the option of Managed WordPress. This option lets you have it all — simplicity and a trouble-free experience paired with as much creative freedom as you need.

Consider Managed WordPress Hosting from Hostdedi

Combine the freedom and convenience of WordPress software with a carefree experience of managed website hosting. But what is WordPress hosting? And what is managed WordPress

Essentially, the term managed hosting describes a service where your hosting provider takes care of the administration and security of your website, as well as keeping it up and running steadily. As we already know, WordPress websites make up more than a third of all websites on the internet, and a convenient option for WordPress users is to have managed WordPress hosting. 

Some features that make Hostdedi fully managed WordPress so convenient include:

  • Security monitoring that is always on.
  • Support from WordPress experts 24/7 every day of the year.
  • A built-in Content Delivery Network (CDN) with 22 locations.
  • And advanced caching for ultrafast loading of the website.

Hostdedi also offers image compression which can significantly improve the browser loading time. Premium tools with Hostdedi managed WordPress plans include Visual Compare, WP Merge, iThemes Security Pro, iThemes Sync, TinyPNG, and Qubely Pro.

What Hostdedi doesn’t have are overage fees, traffic limits, and metered pageviews. 

Hostdedi offers a variety of fully managed WordPress hosting plans, and with every plan you choose, you have a staging environment, 30-day backups, and unlimited email accounts. You also have an option of a 30-day money back guarantee, so you can be confident when choosing your plan.

Give it a try. Start your free two-week trial of managed WordPress today.

Source link

Doing Product Pages Right – Hostdedi Blog

How much effort have you put into your product page? Yes, I know you found information and images from the manufacturer and added them. Sure, you named the product and maybe if you were really working on good product pages, you took an extra picture of the product in use to highlight what it really looks like to your customers.

But I know most ecommerce sites don’t even go that far.

About 10 years ago I worked in retail and one of my jobs was to add products to our site, but only after everything else was done and if the boss couldn’t find anything extra for me to do. This was shortsighted and meant that they didn’t see much business from their online store. But if you don’t put any effort into your product pages, the natural outcome is little traction with your site.

It’s important to remember that your online users can’t touch your product. They can’t ask a salesperson a question or get specific feedback on how the product worked for someone they can talk to. Customers are reliant on the information you provide them to help them make a purchase.

Today we’re going to talk about how to design a great product page. Remember, from the product name to the reviews, your product page is a landing page. Its job is to sell your products to your customers.

Product Name

If your product page is a landing and sales page, then the first thing you need to look at is the name of your product. This is the title of your page and you should spend just as much time thinking about this as you would for any blog post you want to rank well in search engines. The more descriptive your product name is, the better it is, at least up to a point.

We’ve all seen ridiculously keyword-stuffed Amazon product titles. We want to use a descriptive product name, but not crossover into the realm of these overloaded titles.

Take a look at these Mpow headphones on Amazon.

If you’re looking for waterproof Bluetooth sports headphones with controls on the headphones, the title is a great match. I think it’s getting close to being a bit long, but just by reading the product name, you get a summary of all the features that the headphones provide.

When you’re looking at your product names use the Google Keyword Planner to investigate what terms are ranking well for your product. Use these terms to help you craft a well-optimized title that will bring customers to your landing page.

Description

When it comes to your product description, the first thing to ask yourself is “what questions will myom customers have”. A description that answers your customer’s questions poorly will mean they make a purchase they’re not happy with. Then they’ll want to return it, and you may get a poor review on the product.

According to Nielsen Group, 20% of missed purchases were because a product didn’t have the information a customer was looking for in the description. If users don’t see the information they’re looking for in your product description, they’re going to turn to Google. That means you risk having them find the product at a better price elsewhere. Making your customers search to get more information is just like losing the purchase and all future purchases from your customer.

As you write your product description ask yourself what questions the customer will have about your product? Your goal is to answer the questions and deflate the objections that customers will have so that they feel confident in their purchase.

Good product descriptions are jargon-free. They’re not heavy on marketing text, but are to the point and clear. If you’re talking about 5 different feature highlights, use bullet points so that readers can scan to get the information they need quickly.

If you’ve got many of the same types of products, say dishwashers, then take the time to standardize the language across suppliers. Don’t list measurements in inches for one product and then centimetres for other products. Standardize on one method, or if you deal with international clients let them choose what measurement they want to see. You can see a great example of this with Apidura Cycling bags. They let users change between inches and centimetres for their bag measurements. This puts their users in control.

Product Images

After your product name and description, it’s important to focus on the images you provide to your customer. Remember, they can’t touch the product. They can’t tell how big it is, or exactly what shade of blue it is. They are relying entirely on you to provide this information with your images.

There are two ways to go with product images. You can choose to use a backdrop with other stuff that matches the product, or you can go with a flat white version. Keep the style consistent including the dimensions used with the final images. I think the best option is to have a combination of both of these options.

Bellroy is a great example of both methods combined. They show you several images of their products on a flat white background. They also add it with known items, like physical bills and blank cards that are the same size as credit cards. You get to see high-quality uncluttered photos to judge colour and texture, then clean photos that help you get an idea of the size of items you’re looking at.

Bellroy also provides high-quality images for each color option for a product. You don’t have to guess based on a color swatch, you can see exactly what you’re choosing as you make changes.

While this may look like a lot of work, it’s just a bit of work and a small investment. You don’t need a fancy camera. Any smartphone in the last few years will do. If you don’t have natural light, then you will need to purchase a consistent light source. You can usually find the Godox SL60W for under $200. If you’re dealing with small products and want to have an extra clean background, then look at a softbox. You can find these on Amazon for as little as $30.

With a light source and a softbox, all it takes is a bit of practice. Take a bunch of test images from different angles. If you spend a weekend playing around you’ll improve greatly so that you can get good images for Monday.

If you’re looking for a great walkthrough on product photography, check out the video below by Peter McKinnon.

Once you’ve got the images, take a few minutes to edit them for color and contrast. Most people use a sized template so that every image on the site is the same size. 

If you’re not sure what this means, it’s like having a company letterhead you always use. In this case, it’s a Photoshop file that’s 2000X2000 and every image you take goes on the same template so that your site images look uniform. 

Then once you have your images on the template looking how you want them, save them out in a web format. Look to keep them under 700kb if possible. To help with this at the final stage you can use tools like Kraken to optimize the images as you upload them.

Putting some effort into your product images will help your store stand above the competition.

Adding To Cart

Next, your add to cart button. There are a few mistakes that many sites make with this crucial interaction. First, make sure that users can see the button without scrolling across all devices. It should be obvious and a contrasting color from the rest of your site so that it stands out. You can see a good example of this on MEC below.

Note that they have a nice product image, and the purchase button is in a vibrant green and stays with the customer as they scroll on a mobile device.

You also need to make sure that it’s clear to the user something happened when they add something to the cart. Luckily WooCommerce has this as a default with a banner being displayed to a user after a product has been successfully added to the cart.

The second most important interaction after your main purchase button may be the option to add a product to a wishlist. A good spot for this is just below the main purchase CTA. I have many wish lists on Amazon for when I’m ready to revamp parts of my office. I already have my desk video setup all picked out in a wishlist. When it’s time to purchase I just need to add all those products to my cart, and then checkout.

Showing your product in use can show how easy it is to use to customers that are concerned about that. Yes, it might mean some duplicate information, but highlight the benefits and deflate the objections with your videos, just like you do with your marketing copy. Some studies suggest that a good product video increases conversion to sale by 84%. Videos are also known to have higher click through rates in search.

You can see this if we head back to Bellroy. The first thing that comes up with their products is a video of their product in use. 

Just like good product photos don’t have to be a huge investment, decent video doesn’t have to be a huge investment. The light I recommended above is a great video light. Your recent smartphone is a decent video camera. Add a lavalier microphone to this setup for $50 and you’ve got a good video setup.

Pricing

When it comes to pricing, it’s pretty straight forward. Make sure you don’t hide any price increases from your users. If the blue version is more expensive, change the price when the user selects the blue version (don’t worry both WooCommerce & Magento do this out of the box). Just under the price is also a good place to add product availability information. Don’t let your customers try to add something to the cart only to find that the product isn’t available in their chosen combination of size and color.

Social Proof: Reviews

Did you know that user reviews are 12 times more powerful at convincing people to purchase than your marketing copy is? That means you need to employ ratings on your site. Display the overall rating, usually stars, at the top near your product title and description. Then after all the product information your customers want, display the reviews you’ve gathered from users.

It’s important to make your reviews filterable, and don’t censor bad reviews. I’ve often read the bad reviews for a product to find the pain points and then purchased because I don’t care about any of the major issues with it.

One great plugin to help enhance the reviews on your site is WooCommerce Product Reviews Pro. This plugin will let you add product photos and user videos to your reviews to supercharge your social proof.

Remember, your product page is a landing page and should be optimized for search engines and to convert visitors to customers. As I said when I talked specifically about mCommerce, make sure that you A/B Test the changes you’re making to your product pages to help ensure that they’re having the effect you expect. If you can put a bit of effort into your product pages, you’ll see big rewards in your sales.

Source link

How to Build an Affiliate Marketing Website

One thing 2020 has taught us is the importance of an online presence. And many people have taken the extra time at home to start side hustles. The Internet is the way to do it.

So much of the buying process has moved online which means there is a larger pool of searches and potential customers. Affiliate marketing is positioned just right to capitalize on this increased web activity.

Building a website and designing a website are different things. The process below will help you build without needing to write any code. The good news is there are many tools available to everyday people, and we will point out which ones are worth choosing to save you time and money.

As an entrepreneur, your time is most valuable, so let’s get started.

7 Steps to Build an Affiliate Marketing Website

1. Choose your Niche

One of the first rules veteran affiliate marketers point out is finding your niche. Narrow down your focus to a single industry with only two or three affiliate products you promote.

“Choose a niche and work with companies within it. You can be an affiliate for just about anything, but readers won’t trust your opinions or click your links if you’re not an authority. Similarly, a reader might even write off your entire site as spam if it’s stuffed with irrelevant links. Do your best to select affiliate programs that fit naturally with our content.”

Kyla, WP Explorer

Your objective will be to create as much content as you can about the topics within your niche. So be sure to pick something you enjoy and have knowledge about – otherwise it will become a chore to you and eventually you will stop.

Some examples of niches:

  • Travel
  • Finance
  • Web Hosting
  • Fashion & beauty
  • Video games
  • Outdoors
  • Fitness & nutrition
  • 3D printing
  • Science experiments
  • DIY crafts

Some niches are more profitable and competitive than others, so be sure to do some research before committing to a niche. You should look at what other content creators have published to get an idea of what you could create. Perhaps there is a topic that is not covered, or topics you know much more about.

If you can create content that is updated with new information, or in a format that is more engaging, then it is an opportunity to explore.

The list goes on and almost every category has a way to implement affiliate marketing. Often the key to winning is finding ways to be creative in how you deliver your content.

2. Pick a Domain Name

First, you need to name your website by picking a domain name. For example, nexcess.net.

This can be changed later so don’t feel stuck if you can’t decide just yet. Most hosting companies will let you use a temporary domain as a placeholder.

It’s common practice to find a domain name that is the same name as your business name or your personal name. You can also select from different TLDs (top level domains) like .com and .net.. For about $15, you can register a new domain for a year.

Try to avoid using hyphens and keep the length as short as possible. This helps visitors more easily type and find your website. Make it memorable and easy to say.

Also, take the time to check social media platforms to see if the matching username is available.

3. Choose WordPress

WordPress has now become the leading CMS (Content Management System) for building websites of all types.

It doesn’t matter if your site is a blog, store, membership site, or forum. WordPress is very versatile because it is free and open source. 

With WordPress, you are the owner of your website content, which means you can use affiliate links to monetize. This makes WordPress unlike other platforms that restrict what you can have on your site and even delete your work if they choose.

Many independent developers have already created themes and plugins you can add to your site to make it look unique and function exactly how you want. That sounds technical, but it’s actually very easy to install and remove plugins with only a few clicks. The good news is that most plugins are free to install.

WordPress sites need to be hosted in order to be accessible on the Internet. Hostdedi has built specific hosting plans optimized for WordPress sites to be fast and secure. With Hostdedi, it is very quick and easy to set up your hosting, so you can focus on building up your site.

We host your websites on our servers where our experts manage the routine tasks of security and performance. This is called “managed hosting” because unlike shared hosting, you would normally be responsible for the maintenance of your sites.

Daily backups, automatic updates, and uptime monitoring is taken care of when you host your site with Hostdedi. But if you do need help, we are always available 24/7 by phone, chat, and email.

We also offer hosting plans optimized for WooCommerce stores, which is a specific type of WordPress site that utilizes the WooCommerce plugin to turn your site into a streamlined online store.

4. Get Hosting for Your Site

Next, it’s time to set up your hosting account. Hostdedi offers various plans for the needs of all types of websites. And if you already have a website, our team can migrate if for free to Hostdedi.

For this guide, we will use the Spark plan. It is a great option for new websites and beginners, while still getting amazing performance. There is even a 14-day free trial (no credit card required) if you want to test it first.

There is the option to save by prepaying annually for your hosting, or to pay on a monthly basis. There are no contracts, and you can always upgrade once your website has started growing.

Once you have selected your plan, you will create your Hostdedi account. Just enter your name, email, and create a password.

Select which of our data centers should host your website. We have locations all over the world:

  1. Southfield, Michigan
  2. London, UK
  3. Sydney, Australia
  4. San Jose, California
  5. Amsterdam, Netherlands

Then create a nickname for your hosting plan. For example, “My Travel Blog”.

Enter your personal information.

Enter your payment details. If you have a coupon code, you can apply it here and see your discount. Click purchase.

Next, you will receive a welcome email with your receipt and a link to login to your account. It will also provide contact information for our support team if you ever need some help.

From your Hostdedi dashboard, you will have access to your domain names and website settings.

To login to your WordPress dashboard for your site, click on Environment. Your login credentials are found there. Next, click App Admin. Alternatively, you can type your domain’s login URL in the browser. For example, https://mydomain.com/wp-admin/

Both of these methods will take you to the login page for your WordPress site.

5. Install a Theme and Add Plugins

Enter your credentials to login to your WordPress dashboard. Here is where you will be able to design your site, create blog posts, add plugins, and much more.

It may look a bit intimidating, but as you explore, you will find it is very easy to navigate. A great thing about WordPress is the community and the large amount of helpful resources to help with just about any question. It’s only a Google search away.

Next, you need to install a theme. These are pre-built layouts that change the design of your website. Go to Appearance, Themes, and Add New. You can always come back and change it later. There are even premium themes you can buy such as the Astra theme.

Click the Install button – it’s that easy. Then go to Appearance, and Customize to see what your theme can do and make it look how you want. Once you have configured the theme to your liking, click Activate to update your live website.

Plugins are extensions that add a function to your website. Let’s say you want your visitors to be able to contact you directly from your site – there are several plugins that will do this. Go to Plugins, and Add New. Just like themes, you can search for plugins that fit your needs.

Pay attention to the reviews and what people are saying about the plugin. Also, take into consideration which plugins have active support, since you don’t want to build functionality on your site around a plugin that may not have support down the road, leading to vulnerability issues.

6. Publish Your Affiliate Content

This is the meat of your affiliate marketing strategy, and the reason people will come to your site. A good practice is to publish often and publish valuable content. 

Another reason WordPress is so popular is because creating posts is not difficult at all. This helps content creators be able to publish new content more quickly.

To reiterate – it helps immensely to focus on topics you are passionate about. Boredom will hinder you from working on new content and ultimately earning any affiliate income.

“If you are looking to build an affiliate marketing website the key to your success is keeping it as niched as possible. Affiliate marketing and SEO go hand in hand. So do your keyword research and keep things as niched as possible. Publish as much quality content as you can for the first 6-9 months. Stay the course and you will start to see significant traffic and conversions after those first 9 months of hustle.”

Kelan & Brittany Kline, The Savvy Couple

Over time, if you have created quality content, then it will begin to rank on search results and be shared. This is the true test to know if you are adding value to your audience. The result of that will be them beginning to use your affiliate links.

While creating your content, you should be aware of, and seek out, affiliate opportunities within your niche that fits well with your target audience.

Determine which products your audience will benefit from the most and which offers affiliate commissions. Most companies will have an affiliate page that lists these details.

Promoting too many affiliate products can have a negative effect on your image. The foundation of being an affiliate marketer is earning a level of trust with your audience. These days, the Internet collectively has become more aware of how to spot websites with the sole intent to sell.

Once you have been approved into an affiliate program, you can begin using your affiliate links. Each company provides you an affiliate account that you can log into to see your performance and earnings. Here, you can copy your affiliate links.

Then you can insert your affiliate links into your articles. YouTube allows affiliate links to be placed in the video descriptions. And Linktree is a tool for adding affiliate links to your Instagram bio.

To add affiliate links in WordPress, go to your WordPress dashboard and click on Posts, then Edit under your selected post. Affiliate links can be embedded into text, buttons, or images. Select or highlight where you want to add the link and click the hyperlink icon. Paste your affiliate link into the field and press Enter

Finally, click Publish in the top right corner of the page to update the change on your live website. Shortly, any new visitors to your site will be able to use your affiliate link. 

Serious affiliate marketers monitor their traffic and conversions. Installing Google Analytics will show you the activity on your website. Some WordPress plugins like Google Site Kit let you see your traffic data from your WordPress dashboard.

Simply pasting affiliate links is not enough. To be successful, you will need to find what strategies work for you to promote your affiliate content. Connecting with other like minded authorities in your niche is a great place to start.

Sign Up to Become a Hostdedi Affiliate Today

Now that you have built your website, you may be a good fit for our Hostdedi affiliate program. If you believe your audience would be interested in our hosting services, sign up to become an affiliate. We hold regular affiliate contests for opportunities to win extra cash and other bonuses.

Subscribe to our affiliate newsletter to learn more.

Source link

Hostdedi and Oliver POS connect Ecommerce ans Brick & Mortar

As global ecommerce sales continue experiencing exponential growth, Hostdedi, a leader in digital commerce, is partnering with leading-edge software company Oliver POS, to roll-out revolutionary technology for WooCommerce merchants. This latest ecommerce application brings essential data directly into the point-of-sale system from the online store, connecting both channels for seamless inventory management and increased sales opportunities. 

Oliver POS’ cloud-based technology provides real-time insights into inventory, products, sales, orders, customers, and more. This data is directly accessible from both the POS system and the online store. There is no need to configure or populate more than a single product catalog, and any changes made either in the store or POS system will automatically sync to the other platform. Providing real-time visibility into stock levels and a buyer’s history gives users across the business an easy way to complete a sale and provide a personalized experience to every customer. This data can drive upsell recommendations, discounts and offers, and special perks like free shipping at checkout. 

“Typically, in-store and online sales run entirely separate from one another, leading to mismatched inventories, scattered data, and a lot of wasted time” says Jan Stilling, CRO of Oliver. “With Oliver POS technology, your WooCommerce store stays completely synced with your physical store at all times.” 

Hostdedi is at the forefront of continuous innovation for WooCommerce and the store owners and agencies who use the platform. Through the partnership, Hostdedi will be the first solution provider to include this technology as a core feature of their Managed WooCommerce offering, giving SMBs and enterprises a much-needed tool to bridge the data gap between retail storefronts, online stores, pop-up shops and other outlets. 

Even greater opportunities lie in the Oliver POS app store where Hostdedi will be actively leading new app development. The tool is designed to be customized, welcoming new apps that simplify POS interactions including marketing, accounting, scheduling tools and more – everything to make sales conversions easier. 

“New application opportunities that elevate the customer experience and drive revenue at point of sale are limitless,” says Chris Lema, VP of Product at Hostdedi. “As ecommerce channels expand, the need for tech and data synchronization becomes even more important. We’re excited to be leading the way through open source innovation that provides tremendous value to the industry’.

Source link

Hostdedi Enhances Auto Scaling for Traffic Spikes


Hostdedi, the market leader in Open Source Digital Commerce, has launched a new feature designed to keep heavy-trafficked websites stable under strain. Hostdedi Advanced Auto Scaling is ideal for agencies & enterprises looking to plan ahead and optimize ecommerce performance during the extreme traffic spikes expected for this year’s holiday season. 

Hostdedi Auto Scaling

For online stores, having a multitude of website visitors is similar to managing long lines in a brick and mortar store. When many people line up to check out at the same time, new registers will open to ease the flow and keep consumers engaged instead of enraged. Hostdedi launched Advanced Auto Scaling as a feature that continuously monitors websites for traffic and dynamically adds resources to accommodate bursts in user concurrency. When a scaling event is triggered and Hostdedi Auto Scaling is enabled, product pages and checkouts remain fast and crash-proof,  helping reduce cart abandonment while providing a consistent customer experience.

‘While significant traffic is a good problem to have, if you’re not prepared to handle it, you may lose a customer for life’ says Chris Lema, VP of Product at Hostdedi. ‘If you’re with a host that doesn’t offer auto scaling – or they can scale but it’s not automated – once your site gets overloaded, you’re likely to see delays and even crash. When Hostdedi Advanced Auto Scaling is enabled, it is “simply set it and forget it”. The magic lies in automation”, said Lema.  

Pricing & Availability

Advanced Auto Scaling is available for every Hostdedi customer on any of our Managed Magento, Managed WooCommerce and Managed WordPress plans for $99/month. Providing even greater flexibility, if more resources are ever needed, additional containers with 10 PHP workers a piece can be added for $50/day.

At Hostdedi, we’re focused on delivering a (truly) managed content and commerce platform for SMBs and the Web Professionals who create for them.  Advanced Auto-Scaling comes to the rescue when traffic surges, maintaining speed, security and a great customer experience.   Hostdedi customers can promote flash sales, see activity from a post that goes viral, or prepare for seasonal spikes like holiday shopping with no worries that their site can handle success when it comes their way.  

Source link

How to Take Your WooCommerce Site Mobile

While I’d like to assume that all ecommerce sites are thinking about their mobile shopping experience, my shopping proves otherwise. As a consumer, I’m regularly greeted with poor mobile purchasing experiences that leave me frustrated. From sites that take forever to load, to sites where it feels like I can’t find the products I’m looking for. Mobile ecommerce (also called mCommerce or M-Commerce) ranges from excellent to so frustrating throwing your device seems like the best option to end your shopping experience.

Today we’re going to look at why you need to take your eCommerce mobile process seriously. Then we’ll take a look at best practices for building a good mobile experience.

Why Does Mobile Ecommerce Matter?

It wasn’t that long ago that mobile sites were nice to have, but not required part of a web presence. Today, mobile use eclipses desktop usage of the web.

Source

Add to that the huge rise in mCommerce by users. In 2018 around 40% of shopping was done via mobile devices[^1]. Cyber Monday saw that number rise to 54% of traffic. Despite this rise, conversions for mobile devices often lag behind desktop purchasing conversions by a significant amount. This is often because site owners don’t take the needs of mobile users into account.

When it comes to browsing your site, a mobile user may spend 4 minutes browsing, while a desktop user is willing to put 5 minutes into the effort[^2]. 40% of mobile users say they’ll leave a site if it isn’t mobile friendly[^3] and this trumps loyalty to your store. 14% of shoppers say they don’t care if they favor your brand, a bad mobile experience will have them looking at your competitors[^4].

It continues to baffle me why store owners put so little effort into providing a good shopping experience for 40% of their users. They would never dream of making 40% of the people that walk into their store wear some blindfold that made everything harder to find, yet it’s too much expense for them to spend money on optimizing for their mobile shoppers.

When you’re not willing to spend time optimizing your mobile shopping experience, you’re telling 40% of your online customers that they’re not worth your effort. In return, they’re going to shop with your competitors.

mCommerce Best Practices

Now that we should all agree that serving mobile customers is a key to having a great eCommerce experience, let’s look at some of the best practices you need to look at when you’re building that ideal experience.

If you have an existing site, one of the best ways to find low hanging fruit is to use online testing tools like Google’s Mobile-Friendly test suite. Run those tests on your site and then use the results to identify the biggest issues. Budget regularly to fix these issues so that you can provide a better experience to your users.

Mobile First Design

One of the biggest trends to emerge over the last number of years in web development is mobile-first design. This is where you start with the stripped-down mobile version of your site and then add on tablet and desktop versions. While you’re doing this it’s worth questioning if your mobile site didn’t need a big popup for your email list, why does your desktop site. We know from Google’s documentation that they feel adding a popup covering mobile content is a sign they should not rank your site as high. By not including it on your mobile site you said that it wasn’t as important as other actions users could take. Why did it gain importance for desktop or tablet users? It’s likely that this content is just as in the way on desktop and should stay cut from those experiences as well.

You can see a well-executed example of an email list request below at the Twin Six site. Note the small green bar at the bottom, which doesn’t get in your way as you shop but is obviously pushing their email list.

Another key to mCommerce design is to make your pathways to purchase clear. That means aiming to get a user to the product they’re looking for in 3 actions. Then from finding their product, make it a clear pathway to purchase a product without needing to navigate upsell items or other things that put barriers in the way of purchasing.

For each call to action on your site, you need to take into account your market and which devices they use and where they can reach on your site. If you know that the mobile devices are big on your site and that you sell primarily to women, who often have smaller hands, then making sure that any buttons are in their range is crucial to making your site easy to use.

Which way is easiest for users to swipe to interact with your product images? How much content shows on the screen of your top few mobile devices? All of these things should be taken into account when you build out your mCommerce site.

Product Pages

When it comes to product pages, you need to think about what type of information users will be looking for. One-third of purchasing decisions include information from many sites that has already been gathered via a mobile device[^5]. Does your product page highlight the same information that users have gathered?

With a small screen, it can be hard for a user to see exactly what they’re looking at. High-quality images from all angles can help users look at each aspect of the product they’re interested in. High-quality images are easy to get today. With a bit of thought about lighting the phone, you have in your pocket easily produces excellent images. If that’s out of reach, hire a local photographer or work out a trade with them. My friend takes the menu pictures for a few local restaurants and gets free food for her and her party when she’s there. I’ve enjoyed a few wonderful meals due to her photography trade.

While some sites may produce decent images of their products, they then fall down on the mobile navigation of those images. Make sure that users can pinch or double-tap to zoom images. Make sure that swipe gestures work as expected. Frustrated users will head off to your competitor. 

It’s also worth looking at video demonstrations of the product. Can a user see the size of the product in the hands of someone? Can they see how many ports are on that computer they want to purchase, or how much room is inside the case? You can use this type of content to make your site more attractive to users, and it can even be placed on YouTube to bring in more sales.

Finally, when it comes to the purchase button, make it obvious. It should be easy to find and have a color that makes it stand out from the rest of your site design. It should be within the reach of your users on their devices without needing to adjust the grip they have on their mobile phones.

Cart

Once you have a user with products in your cart, you’re closer to purchase but that doesn’t mean a sale is guaranteed. One thing that many sites do poorly is to make their cart hard to edit. Many users will add a bunch of products to their cart and then decide which ones they’re going to purchase at checkout. It should be easy for users to remove items from their cart, and you’re going to get bonus points for making it easy to add products to a wishlist for a user.

When I visit Cotton Bureau I look through and add all the shirts that interest me to my cart. Then I look at the hundreds of dollars the purchase will cost and cut down what I’m purchasing to meet the budget I have. The only place I fault Cotton Bureau is that they don’t let me pass the shirts I decided not to purchase to a wishlist so I can see them and purchase them later.

One thing to avoid, according to the Nielson Group, is the dreaded “Update” button. Don’t make your users update their cart to have changes reflected in the totals. Unfortunately, the default WooCommerce cart does include this update button, but you can use Auto Update Cart for WooCommerce to remove it and improve the experience of your users.

You should also take advantage of device-specific features like Hand off which lets iOS, iPadOS, and macOS users pick up where they left off in their browser sessions. If coded properly, you can take advantage of this and send the products in a user’s cart to their other devices.

Checkout

When it comes to checkout, one of the first things to do is make sure that a user is not required to create an account at checkout. Even if you have a membership site that requires an account, work to secure the purchase first. Once a user has purchased you can provide instructions on setting up their account. With WooCommerce, as long as they use the same email all purchases a user has made will show up in their account once they create one.

There is always a lot of information to fill in at checkout, so make it as easy as possible. That means you need to label your checkout fields properly so that the proper keyboard is provided to users. If you’re asking for a phone number, they should see the numeric keyboard on their devices.

It’s also worth taking advantage of any facility you can to help users by filling in information. Don’t ask for the country they’re in, you can detect that with your site and fill it in for them. If you ask for the Zip Code or Postal Code before City and State information you can fill in City and State without having your user spend time on them.

If you can’t autofill their state information, make sure you don’t present it in a dropdown without any search. Huge dropdowns are terrible to scroll through on mobile devices. At the very least let a user search for their State/Province/Country inside your dropdown to save them time and frustration.

Most mobile devices have some facility to autofill form fields, make sure that your checkout process works with these systems. You should also take the time to make sure that any password or username fields on your site will work with the password management systems built into devices. 

When it comes to the order summaries on your checkout page, make sure that you present all the charges to your users. If you’ve grabbed the Zip Code, use that to estimate shipping and taxes instead of surprising users with it in a later step. If at all possible, show users their order total, and the CTA that completes a purchase on a single screen of their device.

For payment options, make sure you’re aware of what regions you’re selling into and what the preferred payment methods are. While you should offer the payment options your users want, don’t overwhelm them with every payment option you could add to your site. Look at adding Apple Pay, Google Pay, and then maybe your credit card processing. Feel free to test whether adding PayPal One-Touch or other payment gateways increase or decrease your sales, but don’t offer them a multitude of options.

If you’re offering your processing then make sure that your site works with built-in card filling systems. On iOS devices, you can open your camera and show it your Credit Card to have payment fields filled in. This can go a long way to making sure that a user isn’t frustrated at filling in a bunch of extra information. 

Now that we’ve looked at the whole purchase process, let’s take a look at a few other areas you need to optimize for an ideal mCommerce experience.

Build for Speed

Many countries don’t have fast mobile bandwidth so you need to make sure that you keep the bandwidth-limited and only display the content you MUST display to get a sale. Waiting trumps site loyalty with 14% of shoppers saying they’ll go to a different site if they have to wait too long. That means you need to run speed tests on your site and cut out any interactions or code that stands in the way of a user making a purchase.

Optimize Images

While I said above that you should have high-quality images, there is a point where your images are far too big for the web. A good rule of thumb is that images should be under 1MB, well under. This can be done by optimizing images and reducing their overall dimensions. 

Tools like Kraken have plugins for WordPress that can take care of this for you on image upload. For big sites that have a legacy of poorly optimized images, you can use command line tools like jpegoptim or pngcrush to optimize folders of images recursively. In early 2020 I used jpegoptim and pngcrush to deal with my clients 50K+ images build up over 10+ years. We saved 20GB of disk space and huge amounts of bandwidth monthly.

Minify CSS, JS, HTML, and Cache

In addition to compressing your images, you should be looking at minifying your CSS JavaScript and HTML. One of my favorite tools to do this is WP Rocket. I’ve found this to consistently provide huge speed improvements on client sites without huge amounts of time spent configuring the plugin. 

If you want to use WP Rocket with our Hostdedi CDN, we have instructions in our documentation.

Cut Tracking and Sharing

Another spot to easily optimize your site is with the tracking and sharing scripts you use. Yes, you need some analytics to see what your users are doing and to prioritize which devices need optimization, but you don’t need 5 tracking scripts and 3 social sharing scripts loaded on each page.

For most sites, social sharing buttons are a vast wasteland showing that no one is sharing your content. Worse yet, for mobile users, they often cover up portions of the content making the mobile experience terrible. I’ve left many sites because their social buttons make the content I was coming to consume unreadable.

Cut down everything you don’t need to keep the site functioning and provide a better experience to your users.

Keep Refining

Even if you go through all the suggestions above and improve your site, you’ll need to keep improving your mCommerce experience. In October 2020 Apple released iPadOS 14 which added Scribble support for the Apple Pencil. Yes, most sites should work with this without any changes, but did you test it to make sure?

Making sure that your site is optimized for mobile users is an ongoing task, just like optimizing your site for desktop users is. For each change, you make, try to do A/B testing so that you are making choices that improve user experience and site conversions. At the same time, make sure that you don’t optimize only for mobile and thus make users with other devices have a worse experience.

At the end of the day, mobile usage is not a fad. It’s here to stay and something you will need to make sure you account for if you want to keep making sales to your customers.

Source link

Agency Matters: Preparing Your Ecommerce Clients for Black Friday

Holiday sales events are right around the corner and if 2020 has taught us anything, it’s that we need to be ready for anything. This year ecommerce sales have blown projections out of the water, and even in an unstable economic climate, the holiday shopping season is anyone’s guess.

Our advice?

Prepare your clients’ sites now, be ready for that wave of traffic, and if it never comes, at least you won’t be explaining why they missed out on the biggest quarter of the year because their site couldn’t handle the traffic. 🤷‍♀️

Here’s a list to start running through.

Ask Them If They Have Any Sales or High-Traffic Events Planned

The main concern for developers outside of user experience and site functionality during the holidays is site performance. In order to set up the site for success though, you need to know what your clients are planning.

Get a detailed list of their promotions, including which products they’re targeting, which pages they’re sending traffic, dates, discount offers and codes – absolutely everything.

But above all else, communicate to them that preparing ahead of time will allow you to allocate the hosting resources they need to avoid server crashes and a slow site. Their conversions are on the line, after all.

Check Host Bandwidth Limitations and Prepare Your Clients

Holiday traffic spikes can be unpredictable to say the least, and sometimes a service restriction buried in your host’s SLA can be what throws an unexpected wrench in your client’s plans.

Remember – there’s no such thing as unlimited bandwidth. Read the fine print in your hosting agreement and press support until you get a real answer, so you can determine exactly what happens when a big wave of traffic hits your clients’ sites.

Run Performance Tests NOW

Weeks before those sales events kick off, start running performance tests across the site to determine how it holds up under dramatic increases in traffic. Are there issues with slow checkouts? Are you getting 502 errors?

Read this article to learn more about how to run performance tests on your WooCommerce store.

Get Enterprise Clients Set Up With Performance Solutions

If you’re running ecommerce sites for ecommerce clients who have high traffic volumes on a regular basis, you’ll need extra robust solutions to get them through the holidays without a hitch. Most enterprise hosting solutions require long-term contracts, but Hostdedi offers a new feature, Advanced Auto Scaling, that allows you to toggle on more resources incrementally, with no long term agreements.

Learn More About Advanced Auto Scaling

Get EVERY Magento 1 Store On Safe Harbor

Magento 1 reached end of life over the summer, which means that any client still running their store on this platform is at massive risk of compromising their customers’ data and being out of PCI compliance.

If they’re holding off on a migration because the timing isn’t right or funds are tight, send them our way to get them set up on Safe Harbor by Hostdedi. It’s a solution that will keep Magento 1 stores PCI compliant and secure until they figure something out.

Learn More About Safe Harbor

Implement Optimization Plugins for WordPress Sites

If you don’t already have speed optimization plugins running on your clients’ WordPress sites, it’s time to implement them and start testing now. Start with image compression, CDNs, and lazy loading, and eliminate redundant plugins wherever you can.

WordPress plugins are famous for not getting along and breaking sites when you have the wrong ones turned on at the same time. That’s why the Hostdedi WooCommerce and WordPress experts created Value Added Bundles – to save you money, and tons of time trying to optimize the right combination of plugins.

Learn More About WooCommerce Plugin Bundles

Set Up Coupons

Get a full list of coupons from your clients and start getting them imported into your client’s ecommerce application. Be mindful of any conflicts too – if a coupon can’t be combined with another offer, be sure to create a rule for that.

Optimize for Mobile Buyers

This. Is. EVERYTHING.

You’re probably a really good web developer, which means you probably already know that the majority of traffic these days is coming from someone on their phone. Tiny mobile devices are the new rulers of ecommerce user experience, and your sites HAVE to play nice with them.

Make sure your clients’ sites are extremely mobile friendly, and consider deploying a PWA (if nothing else, going into the new year) to keep the user experience fluid across browsers and devices.

Enable Save/Favorite Features

Giving shoppers a way to favorite items or add them to a wishlist is a great way to help your clients capture more revenue. 

Walk Through Checkouts 

Improving your clients’ checkouts can have a dramatic impact on their revenue, so be sure to walk through it as a user and take any notes on areas that may need improvement.

Cart optimization is a big topic on its own, but here are some tips on what to look into:

  • Use a persistent cart that tracks items, even if the user leaves the site and comes back later
  • Add credit card scanner to make entering payment details easier
  • Offer a few ways to pay
  • Keep it simple – try to limit it to a single page checkout
  • Reduce form fields wherever possible
  • Ask for payment details last
  • Make shipping costs clear and simple early in the process
  • Enable guest checkouts

Enable In-Cart Upselling

Smart product recommendations and upsells are a massive driver of revenue for ecommerce brands – give your clients the technology they need to capitalize on this area, too.

Ask About Abandoned Cart Emails

Abandoned cart recovery can make up for a lot of lost revenue. Talk to your clients to make sure they have retargeting set up for those carts, whether it’s ads or emails, and make sure their sites are set up to implement it ahead of Black Friday.

Audit Their Search Functionality

A good search function on an ecommerce sites can help place customers with products they’re trying to find – a bad one can send them somewhere else. Audit your clients’ search plugins, and if they don’t have one, be sure to get one setup ASAP.

Elasticsearch 

Make Sure Brick and Mortar Clients Are Using a Cloud POS

If your clients are running physical stores and online stores, be sure to have them use a cloud POS that will integrate the data across both the website and in-store purchases. 

Hostdedi has just partnered with Oliver POS for our WooCommerce clients, and it’s a fantastic solution that not only integrates this data, but does it for free on an open source platform that you can create custom apps for.

Learn More About Oliver POS

Clarify Terms For Free Shipping With Your Clients and Set It Up

Studies show time and time again that free shipping, even with an elevated product cost, triggers more customers to buy. Be sure to clarify the threshold for free shipping, program it into the checkout, and communicate it clearly across the site.

You’ll also want to clarify the time it takes to deliver items clearly throughout the site and checkout.

Have a User-Friendly Return System Ready

Simple, free returns keep customers coming back. Have a returns policy and process clearly outlined on your site, and make it easily accessible to customers.

Have a Plan for the Unexpected

Site performance is going to be your biggest concern as a developer during the holiday shopping season. The weakest link is ALWAYS going to be the potential for a site to crash and keep you on the phone all night with hosting support working on a fix.

If you’re not working with a managed platform like Hostdedi, you’re going to need to more closely monitor site performance and bandwidth.

But with Hostdedi, you can clock out at five.

Thanks to our auto scaling, your client’s sites will automatically get the resources they need when traffic spikes, with the first 24 hours of auto scaling completely free of additional charges.

Learn more about Hostdedi Managed WooCommerce and Magento hosting, and we’ll handle the migration for you.

Source link

What is a 502 error?

Is your website throwing 502 errors? You’re not alone.

Plenty of site owners encounter this error page from time to time. It’s typically a problem related to an overwhelmed server that’s getting too many simultaneous requests. Fortunately, there are some things you can do about it.

Error 502s can present in a lot of different ways, and you can, in fact, code how these pages will be displayed. Here are just a few examples of what a 502 error page might say:

  • 502 Bad Gateway
  • Error 502: Bad Gateway
  • HTTP 502
  • Temporary Error (502)
  • 502 Service Temporarily Overloaded
  • Error 502

You get the idea.

What Causes An Error 502 Bad Gateway?

There are several HTTP status codes that a browser can display as a way to tell you that something has gone wrong, and what the error correlates to.

In the case of an error 502 bad gateway, this error code typically indicates that the server was not able to fulfill the request and load the page for the user.

There are a few different things that can cause an error 502 page to show up for a user, but most often, they’re typically related to two things: server capacity, and concurrent users, i.e. how much traffic the server your site is hosted on can handle, and how many users are making requests on your website.

The Cost of a 502 Error for An Ecommerce Site

The typical internet user navigates away from a page if it takes longer than three seconds to load. When your site gives them a 502 error message, how many users do you think will stick around and refresh the page? And once they leave, how many users will come back an hour or a day later?

Slow site speed coupled with 502 errors can make a dent in your conversion rate, ultimately costing you revenue and site profitability.

How to Fix a 502 Error

On the site owner side, a 502 error usually means there aren’t enough resources available to serve your webpage to all of your users. What’s likely the issue is that your host’s server is getting more traffic than it can handle. To fix this, you either need to upgrade your plan, or switch to a host with auto scaling (like us), so that when your site does get a traffic spike, users aren’t getting 502 errors.

When you switch over to Hostdedi, you’ll get a free site migration, a two-week free trial, and up to 24 hours of free auto scaling included with your plan – with no need to upgrade until you’re actually ready.

This means that the next time you do get a traffic spike, our servers will automatically compensate and deploy additional PHP workers, not only managing the extra traffic and preventing 502 errors, but keeping your website fast and high-performance.

If you’re stuck in a contract with your current host, Hostdedi will buy you out of it – click here to learn more about our Cover Your Costs program.

Source link