CAll Us: +1 888-999-8231 Submit Ticket

Ecommerce Search Marketing Basics: The Beginner’s Guide

Running a successful ecommerce business depends on more than just organic search results.

You have to consider other marketing techniques as well. For example, you can rely on ecommerce search marketing to improve brand visibility, traffic, and conversion rates.

But you need to get the paid search basics right for a great return on investment (ROI).

Keep reading to learn:

What Is Paid Search?

Benefits of Paid Ecommerce Search Marketing

Paid Search Basics: Ecommerce Search Marketing Strategies

Final Thoughts: Ecommerce Paid Search Basics — What You Need to Know

What Is Paid Search?

Paid search advertising is a digital marketing strategy where marketers pay to run ads on search engines. The search ad system charges advertisers using a pay-per-click (PPC) and auction-based model.

In other words, paid search works like this: Ecommerce marketers create ads and bid for ad placement by indicating the highest amount they would spend per click and their ad budget for the whole campaign.

Google Ads is a typical example. It analyzes campaign metrics like quality score, keyword research, and usage to optimize ad placement on the Google search engine result pages (SERPs).

Paid search advertising is also known as search engine marketing(SEM) — it doesn’t stop at Google. It applies to search engines like Yahoo and Bing as well.

Benefits of Paid Ecommerce Search Marketing

There are several advantages online stores can enjoy with ecommerce search marketing:

  1. Ecommerce search marketing gives you access to relevant campaign data you can use to optimize for target search terms.

  2. It is a cost-effective way of paid advertisement compared to sponsored content because you only pay the cost-per-click (CPC).

  3. Paid search ads provide ecommerce marketers with better results, as they can rank higher than competitor brands who solely focus on search engine optimization (SEO).

  4. Search engine ranking is immediate, unlike organic SEO content that takes several weeks or months before you see results.

  5. Paid ecommerce search ads increase your brand visibility by making your brand the top-ranking result for search terms you bid on. This way, your target audience can find your business easily.

Paid Search Basics: 8 Ecommerce Search Marketing Strategies

Paid Search Basics — 8 Ecommerce Search Marketing Strategies.

Ecommerce search marketing is challenging initially, but you can do it effectively if you know the paid search basics to set in place for maximum ecommerce sales.

Here are eight ecommerce search marketing strategies that you should implement as an online store owner.

1. Optimize Your Search Engine Ads

To successfully grow your business with ecommerce search marketing, you need to optimize your search ad campaigns.

You should:

  • Perform thorough keyword research — Search for keywords with high commercial intent you can bid on and use for your ad copy.

  • Group relevant ad keywords — Categorize keywords you want your paid search campaign to rank for into ad groups. Also, identify negative keywords to remove from your ad campaigns.

  • Win the ad auction — Your ad placement (or ad rank) will depend on a couple of factors: your maximum bid (your ad budget) and quality score (a metric that search engines use to grade the quality of your advertisement).

2. Prepare Your Ecommerce Store for Mobile Shopping

Mobile shopping is expected to account for over $3.55 million in ecommerce revenue in 2021.

As an online store owner, you must ensure that your online store website is mobile-friendly, so you don’t lose potential customers who find you through ecommerce paid advertising.

3. Improve Your Website Speed

Your website speed plays a significant role in ensuring the success of your online store. For a high ROI of your ecommerce paid advertising, your website should be fast and available 24/7.

One essential way to prepare your webpages for conversion is to use a reliable hosting service and plan. A reliable hosting provider decreases your loading times and helps you avoid website crashes.

At Hostdedi, we offer fully managed WooCommerce hosting that includes an intelligent monitoring system, premium tools, and add-ons to improve website security, speed, and scalability. With this hosting plan, your website can bear traffic surges, encouraging conversions.

4. Target Your Customers on Social Media

Social media advertising is another strategy for ecommerce paid advertising. It can enhance your ecommerce search marketing because social media platforms are powerful places to find and target your ideal customers.

Buffer shares that 73% of marketers believe social media marketing is an effective strategy for their business.

You can use social media channels to target and retarget potential customers of your ecommerce business.

5. Incentivize Your Customers

You will find fierce competition in the ecommerce industry. But you can make your ecommerce paid advertising campaigns stand out by giving incentives.

Use incentives to boost the click-through rate (CTR) of your paid ads. You can offer gifts with purchase, free shipping, percentage off pricing, and more.

6. Run Retargeting Ad Campaigns

The retargeting or remarketing campaign is an ecommerce search marketing strategy that targets searchers who clicked your search ads or reached your website but didn’t convert.

Some of them may be surveying the products, and some may be comparing the options. Or perhaps, something distracted them while they navigated your landing page.

It’s a great idea to reach out to them again.

7. Make Use of User-Generated Content (UGC)

89% of consumers read reviews online before buying a product.

So user-generated content should be a part of your ecommerce search marketing plan.

User-Generated Content (UGC) is the type of content — review ratings, social media posts, and testimonial videos — made by users of your products. So, include UGC in the landing pages linked to your search ads to increase conversions.

Final Thoughts: Ecommerce Paid Search Basics — What You Need To Know

You can get a better ROI on your ecommerce search marketing campaigns by getting the basics right.

Go through the strategies above and craft your overall marketing strategy. Effective marketing means visitors. So make sure to improve your website’s speed.

Prepare your website for conversions with Hostdedi’s fully managed WooCommerce hosting today.

Related Resources

Source link

How to Do Full Site Editing for WordPress

Full site editing (FSE) is a way to use the block editor in WordPress to be able to edit all parts of a site when using a block-based theme that supports FSE.

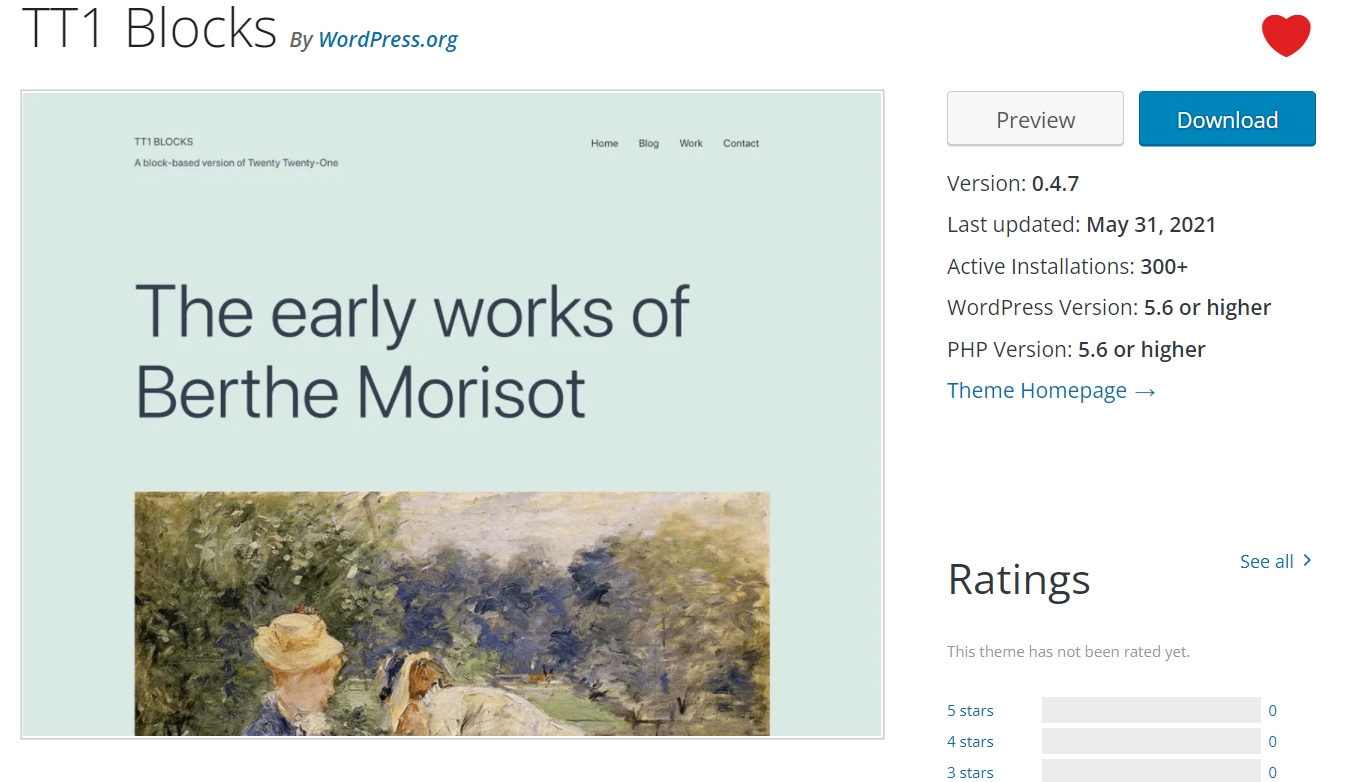
In order to be full site editing on your site, you will need to be using a block-based theme that supports it. In this case, we are going to be using the TT1 Blocks theme.

In the case of the TT1 Blocks Theme and other block-based themes, you will also need to make sure that the Gutenberg plugin is installed and active on the site. You will also need to make sure that you have not disabled the block editor using a plugin or a code snippet. It is important to take note that the full site editor is still currently in beta and that block themes are still experimental in nature.

These features are still experimental in the plugin. “Experimental” means this is just an early implementation that is subject to potential drastic and breaking changes in iterations based on feedback from users, contributors, and theme authors.

The final sub-components are coming to the upcoming version of WordPress 5.9 for full site editing which is on track to be released on the 14th December 2021.

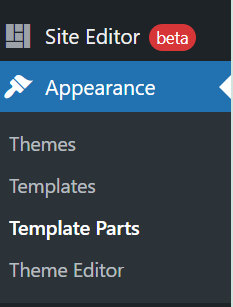
After you have activated the TT1 Blocks theme on your site, then you will notice a Site Editor admin menu now showing in the WordPress dashboard.

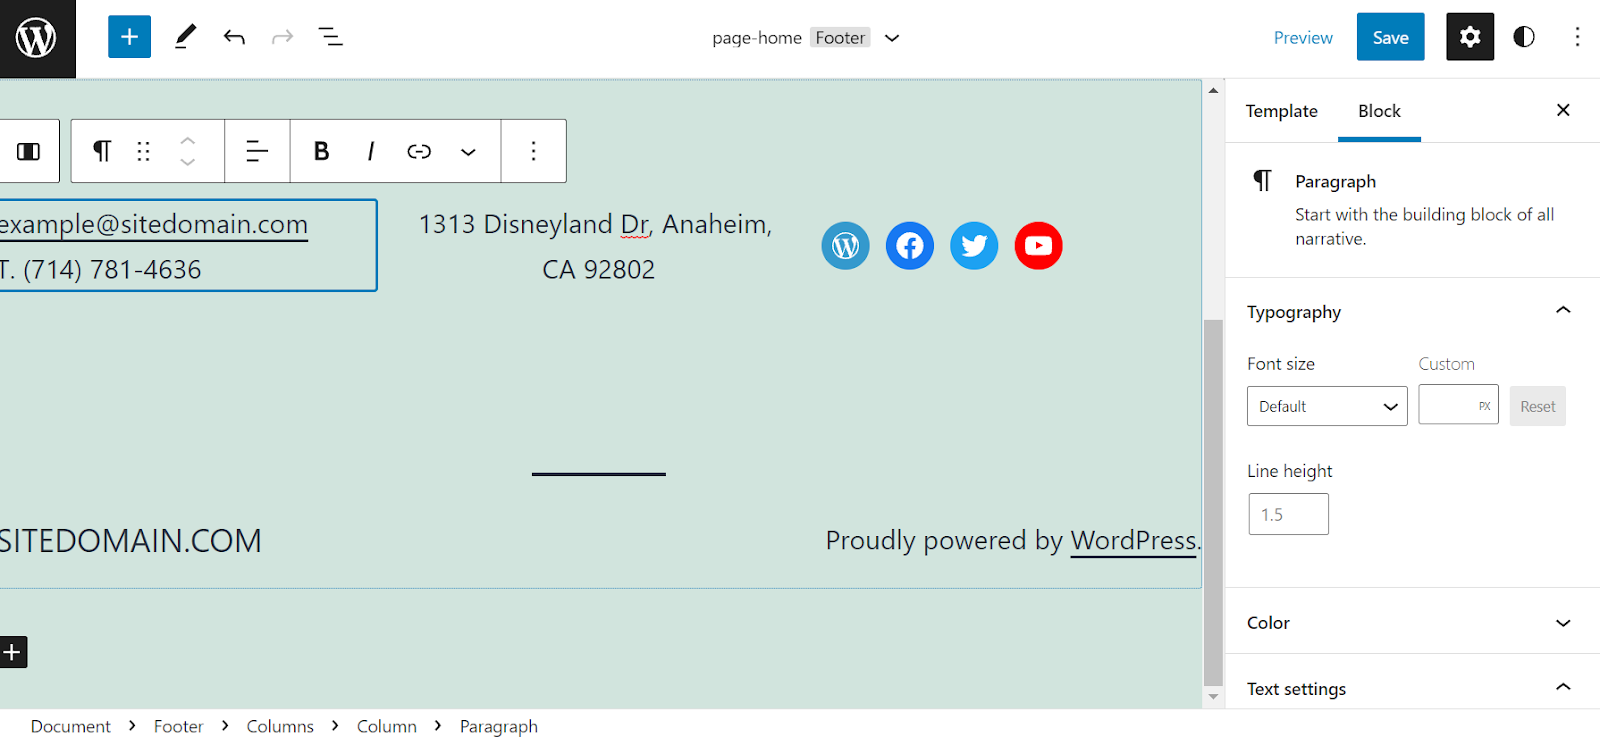
If you click on the Site Editor menu item it will allow you to edit all of the parts of your site using the block editor.

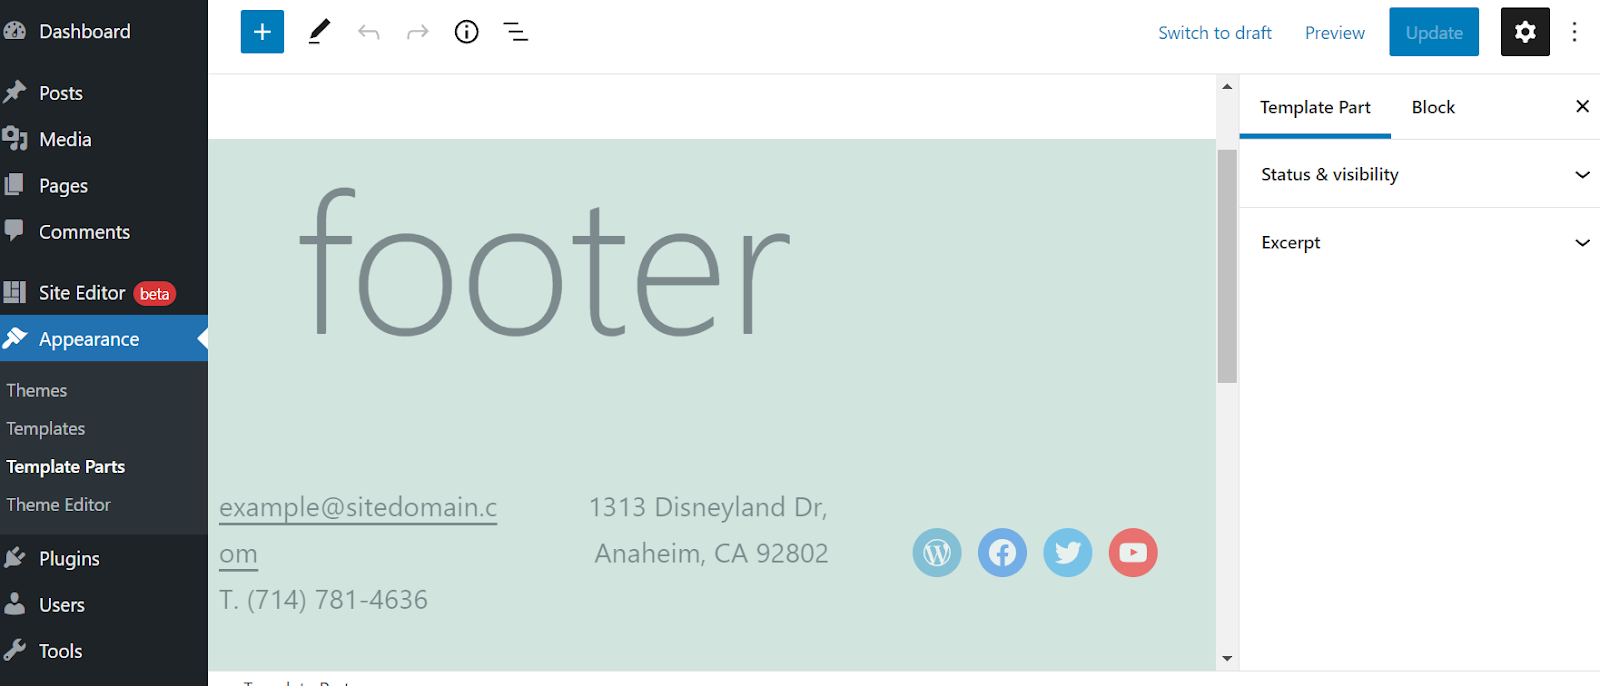
If you wanted to edit a specific template part such as the footer, go to:

Appearance > Template Parts > Footer

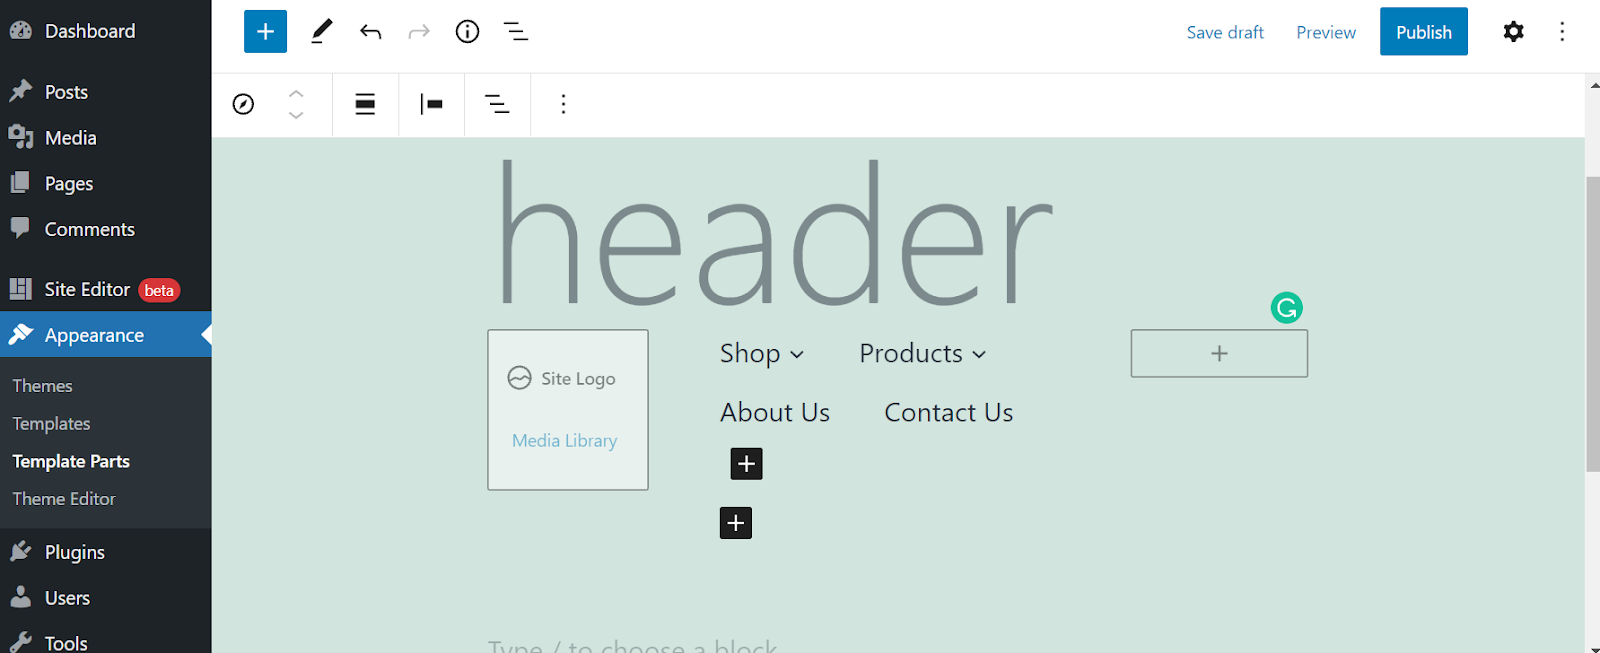
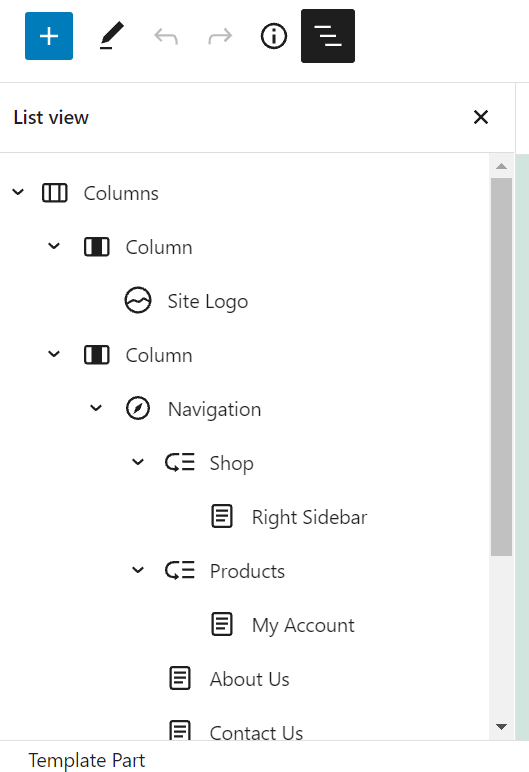
You can also create different template parts directly using the full site editor. In this example we are going to create a header.

When creating the template, you can use any of the blocks that are available. There are a number of theme blocks such as site title, site logo, and navigation. A full list of theme blocks includes ones that were added in WordPress 5.8:

  • Site Logo
  • Site Tagline
  • Site Title
  • Query Loop
  • Post Title
  • Post Content
  • Post Date
  • Post Excerpt
  • Post Featured Image
  • Post Categories
  • Post Tags
  • Login/out
  • Page List

Full site editing is a game-changer for WordPress since it enables you to be able to create and edit all parts of your site using the block editor. This makes the experience to edit the site so much faster than before when using a block-based theme on your site. There are a number of block-based themes which can be used.

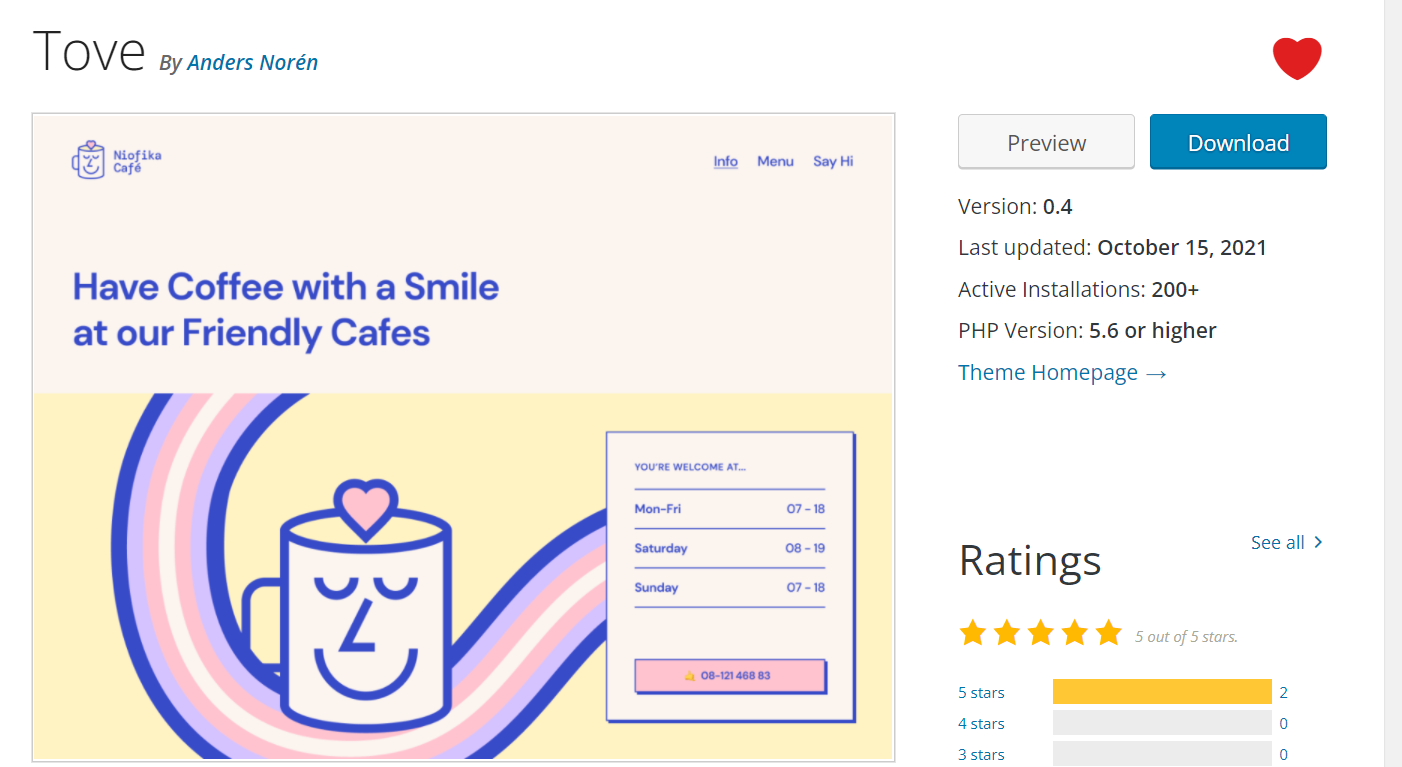
Another easy-to-use block-based theme to check out is called Tove.

For the moment due to the nature of the full site editing feature, it is recommended to use it on a staging site.

Consider Hosting With Hostdedi

If you have a WordPress site, consider hosting with Hostdedi. Hostdedi fully managed WordPress hosting will boost your site speed, scale for surges of traffic, and improve security too. Managed WordPress hosting will make sure that your plugins are always updated and that you are always running on the most current version of WordPress.

Using Managed WordPress hosting makes it easy to create a staging site for testing out a new theme or plugin changes — without affecting your live site.

Check out our fully Managed WordPress Hosting plans to get started today.

Related Resources

Source link

How To Use WordPress Reusable Blocks

WordPress is one of the most popular platforms for website creation due to its ease of use and wide variety of functionality it offers. Throughout its history WordPress has focused on improving the way site content is edited.

In 2018, WordPress Block Editor became the default editor. It provided a new editing experience to users. This project is known as “Gutenberg” and is available on wordpress.com as well as wordpress.org.

Do you find yourself adding the same content to different pages or posts of your site? Have you wondered if there was a faster, easier way? Sound familiar? Thankfully, WordPress has a useful feature you’ll find quite “reusable.”

Keep reading to learn about WordPress reusable blocks and how to use them.

What are WordPress Reusable Blocks?

A reusable block is a collection or combination of some content that can be saved, providing the ability to re-add it to any page or post easily. With the ability to save a snippet of content, WordPress reusable blocks save site editors a lot of time. Instead of writing the same content for multiple posts, one can add the same block to each post.

Want to encourage readers to follow you on social media sites? Create a block with some text and links to your social media handles and save it. On each new post you add to your site, this saved block can be added with a few clicks as opposed to writing and adding the same content every single time you create a new post.

Benefits of Reusable Blocks

Reusability of blocks serves as a tool to save you from repetitive, inefficient work. What’s more, you leave yourself open to making errors. Using reusable blocks prevents time consuming, tiring work. Never again have to go back and forth copying content from one post to another.

A great benefit of reusable blocks is that they are globally synchronized. Let’s say you have a survey form saved and used on multiple posts as a reusable block. At some point you decide to add another field to the form to collect additional information. You can simply edit the block saved and make changes there. All the posts using that block will automatically display its updated state, saving you from editing the survey form in each post manually.

WordPress reusable blocks can also be helpful when it comes to sponsored content. You can create a block for sponsored content, such as the sponsor’s logo along with other content. When needed, you can modify the saved block to replace the logo with a different one across your site with ease.

A few other cases where reusable blocks may come in handy include:

  • Saving and reusing call-to-action sections.
  • A block of featured posts.
  • In list or tabular form.

How to Create Reusable Blocks

All blocks within the Gutenberg editor are individual content elements that can be saved individually as a reusable block. Let’s talk about how to create them.

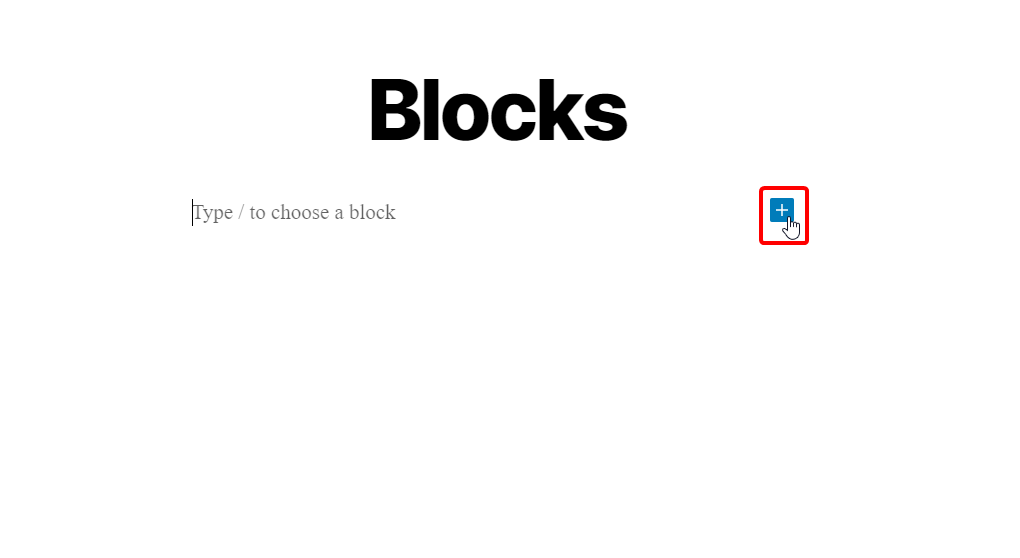
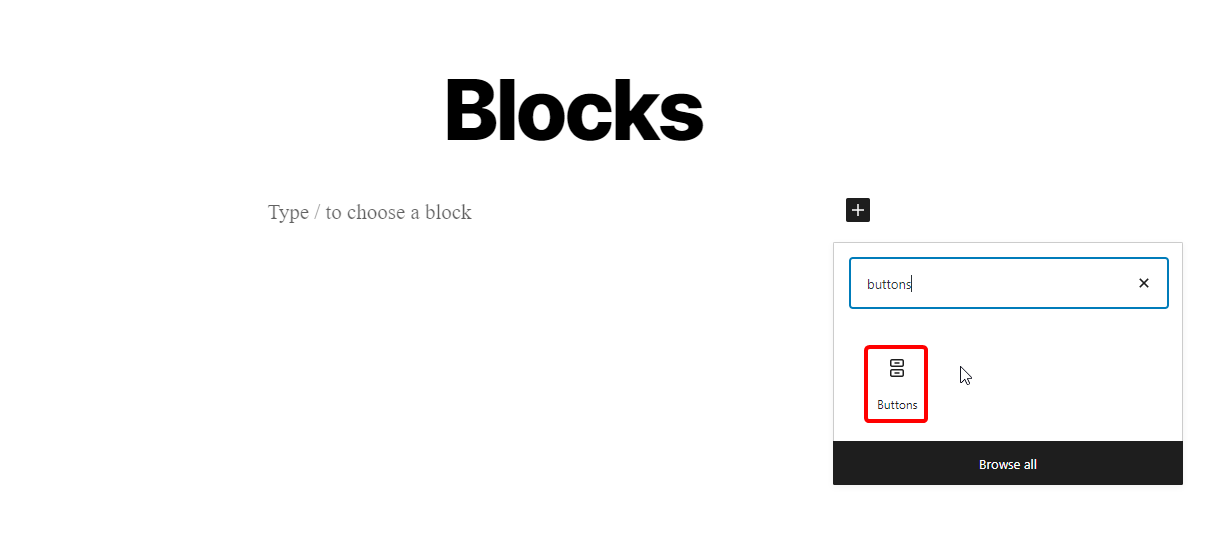
1. While in the editor, click on add new block button.

In this example we will create a button linking to a URL, using Buttons block. This is, however, just for demonstration purposes. Same steps can be used for any other individual block you may need or use, such as paragraph, image, or list.

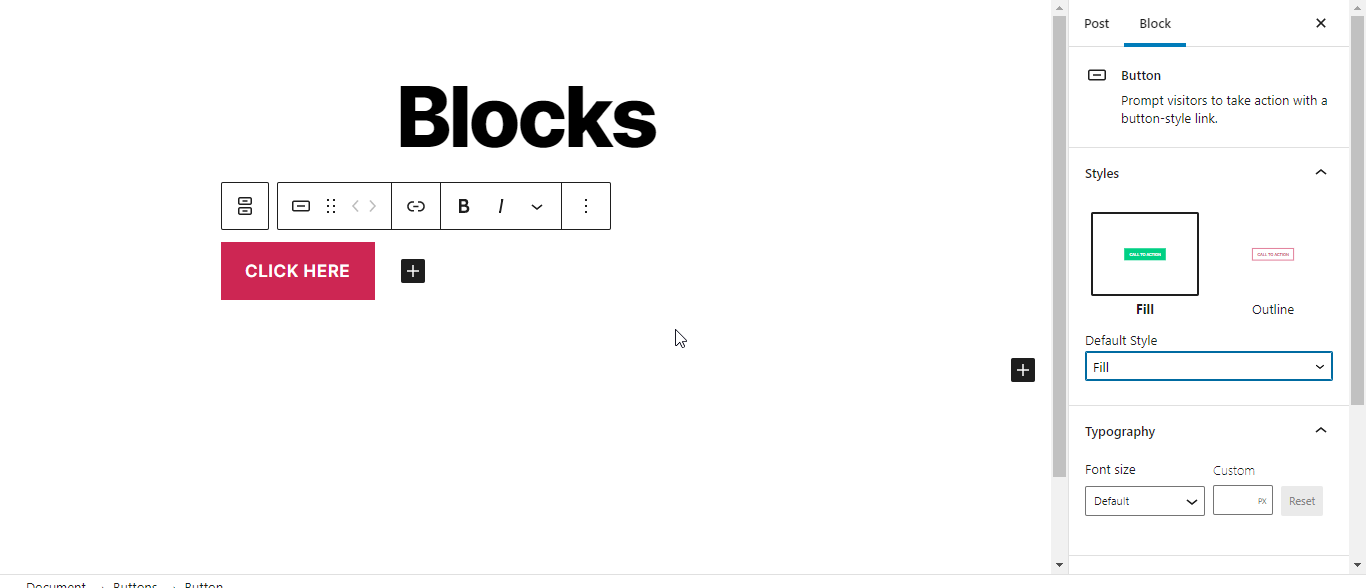
2. After adding the button block, assign it some text and a URL.

You can also stylize the button as needed using options available in the block toolbar.

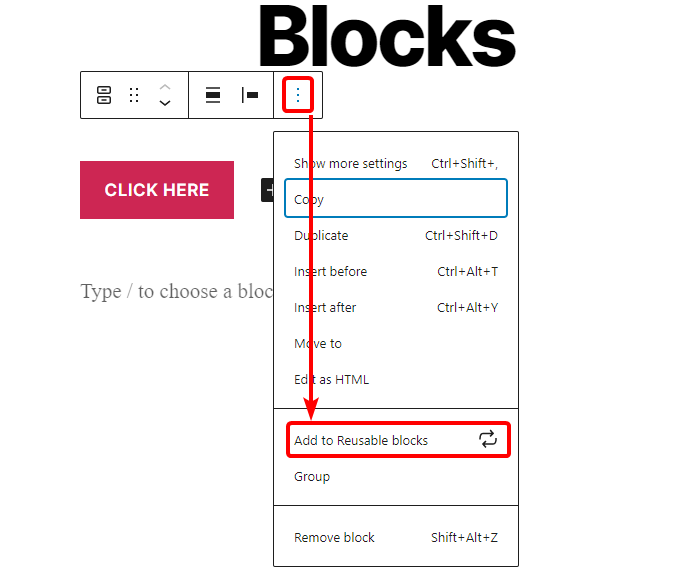
3. Once you are done editing, click on the button with three vertical dots.

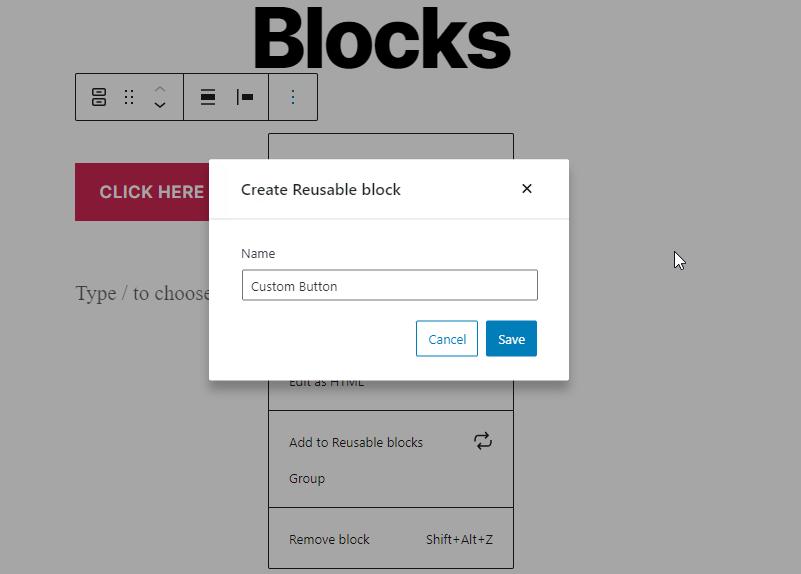
Then select “Add to Reusable blocks” from the dropdown. You will be asked to assign the block you are about to create a name which can then be used for quick identification while going through the library of available blocks.

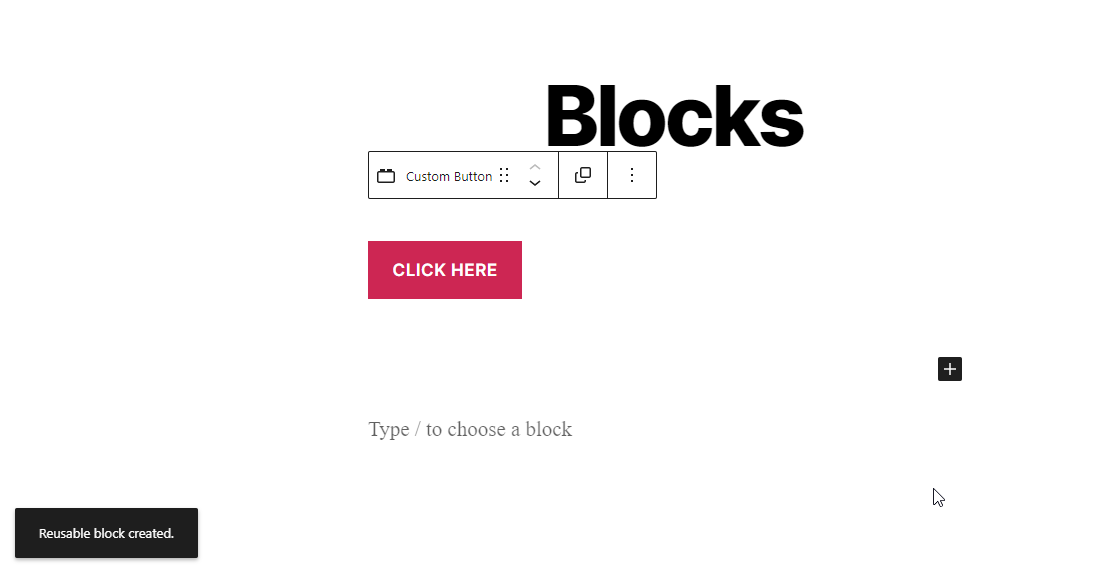
4. Click on the save button and a Reusable block will be created.

This little popup in the left hand corner confirms that a block has been saved to the reusable blocks library.

Adding Reusable Block in Other Posts

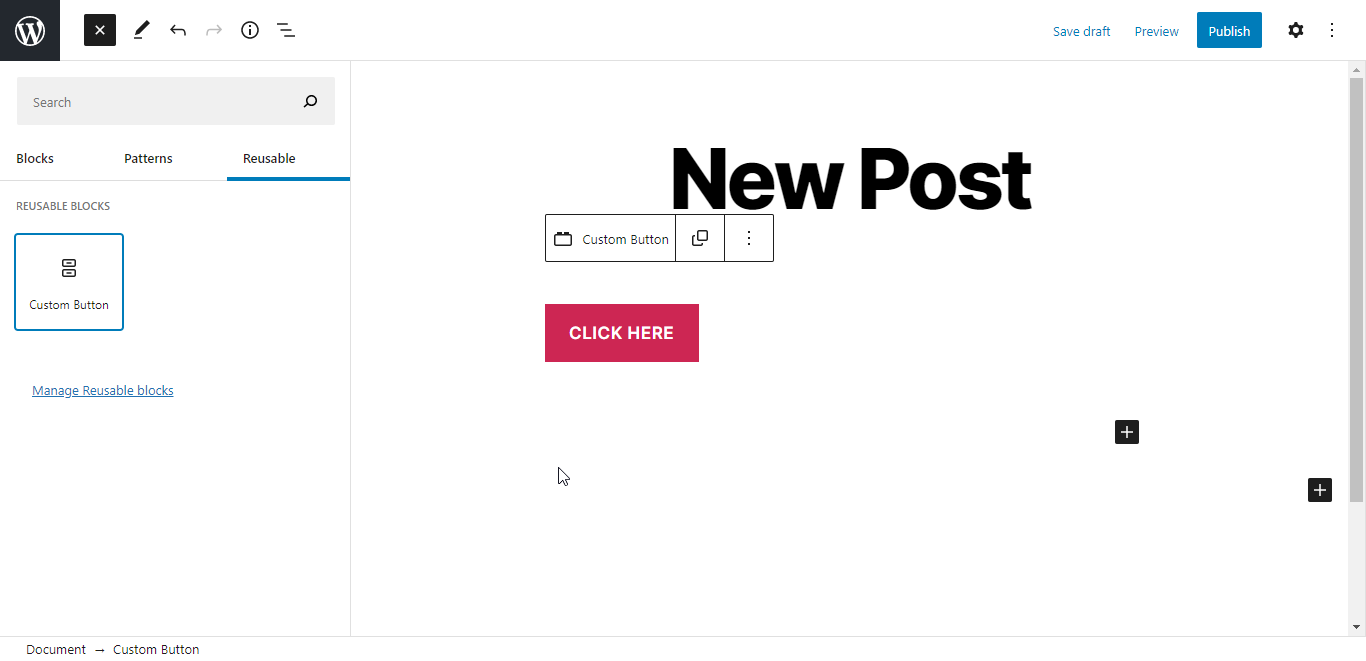
Now that we have created a reusable block, we can add this block to a different post or page. Start by creating a new post or page or editing an existing one. There are a few ways a reusable block can be called to a post or page.

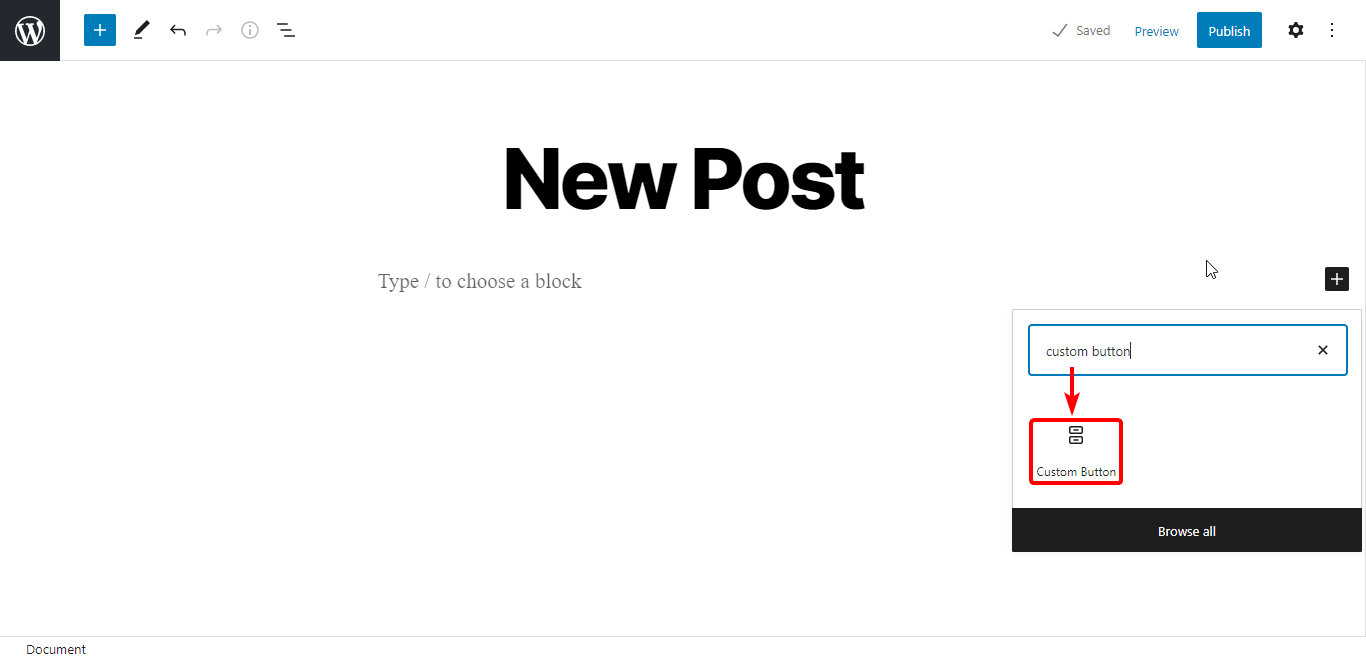
1. First is to search for the name assigned to the reusable block while adding a new block.

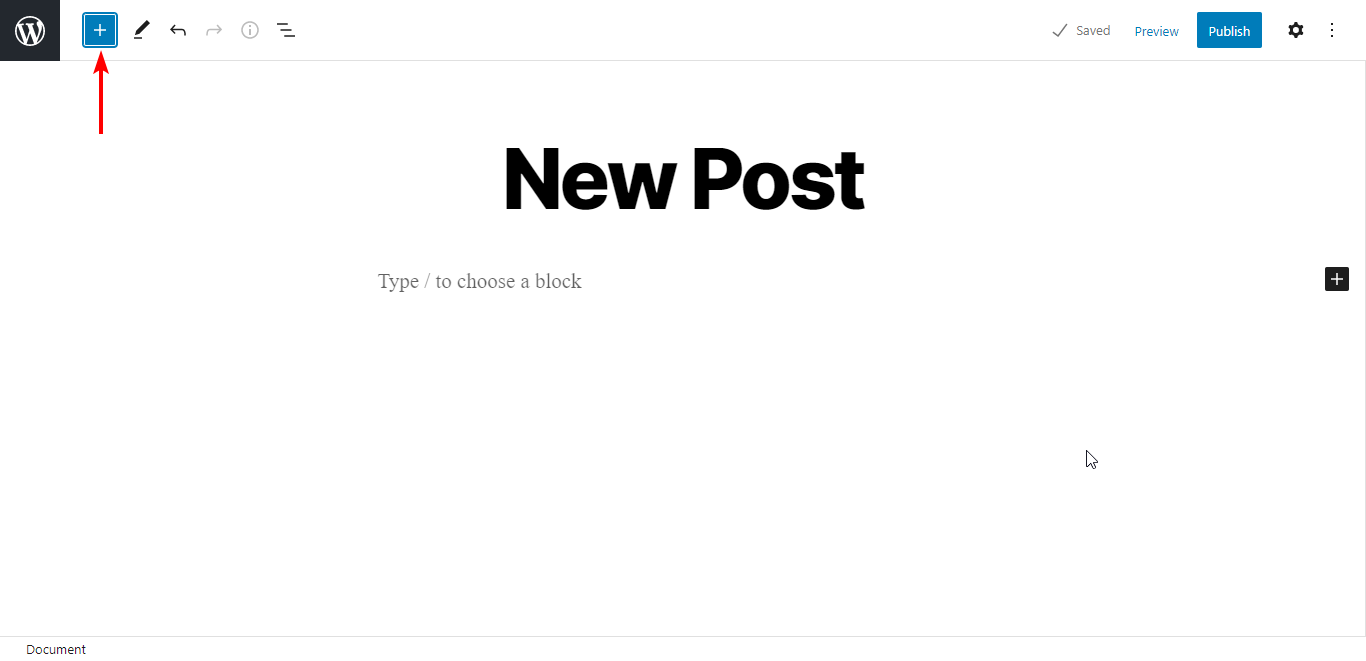
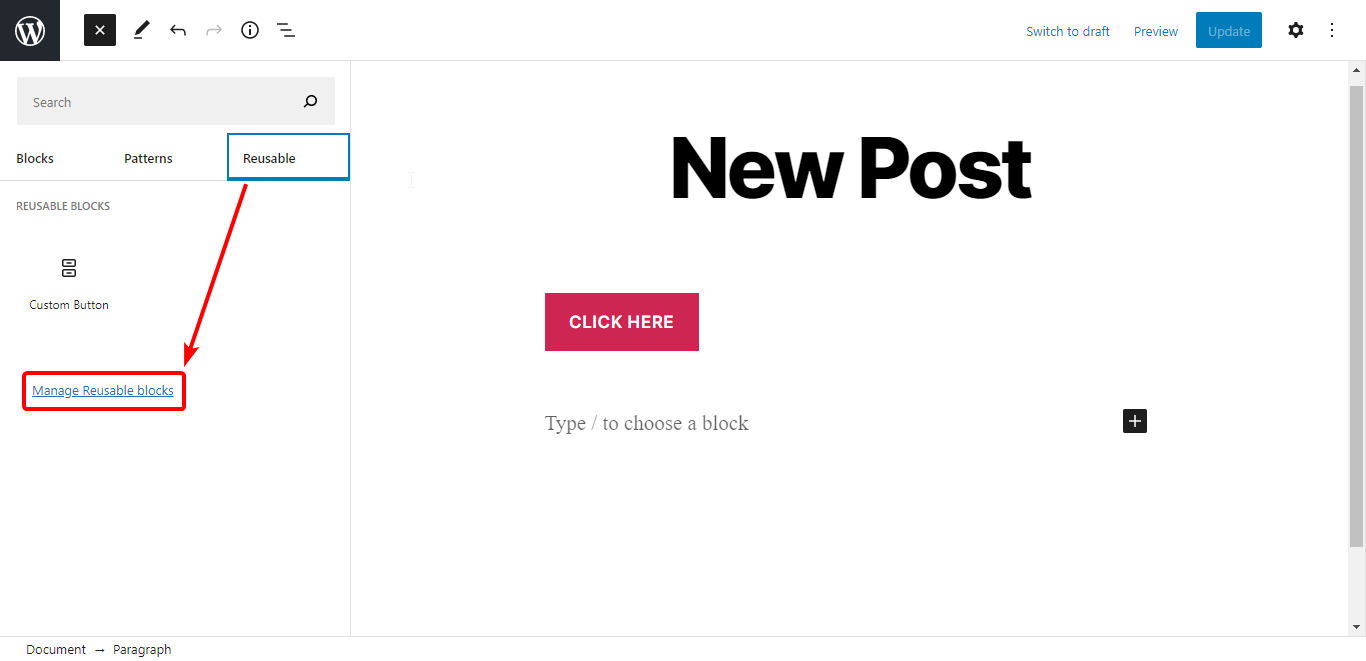
Alternatively, you can click on the add toggle block inserter button in the top left corner.

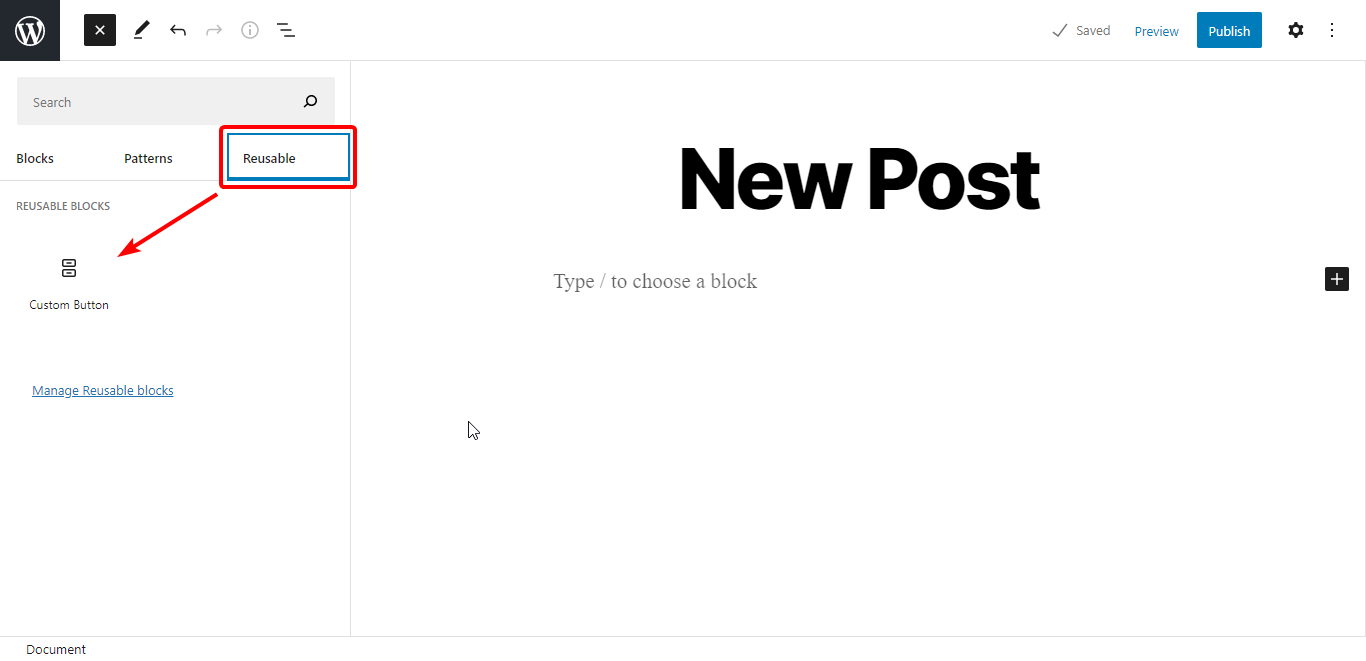
2. Go to the reusable blocks tab and insert the required block.

3. Click on the desired block and it will be added to the post or page you are editing.

How to Edit Reusable Blocks

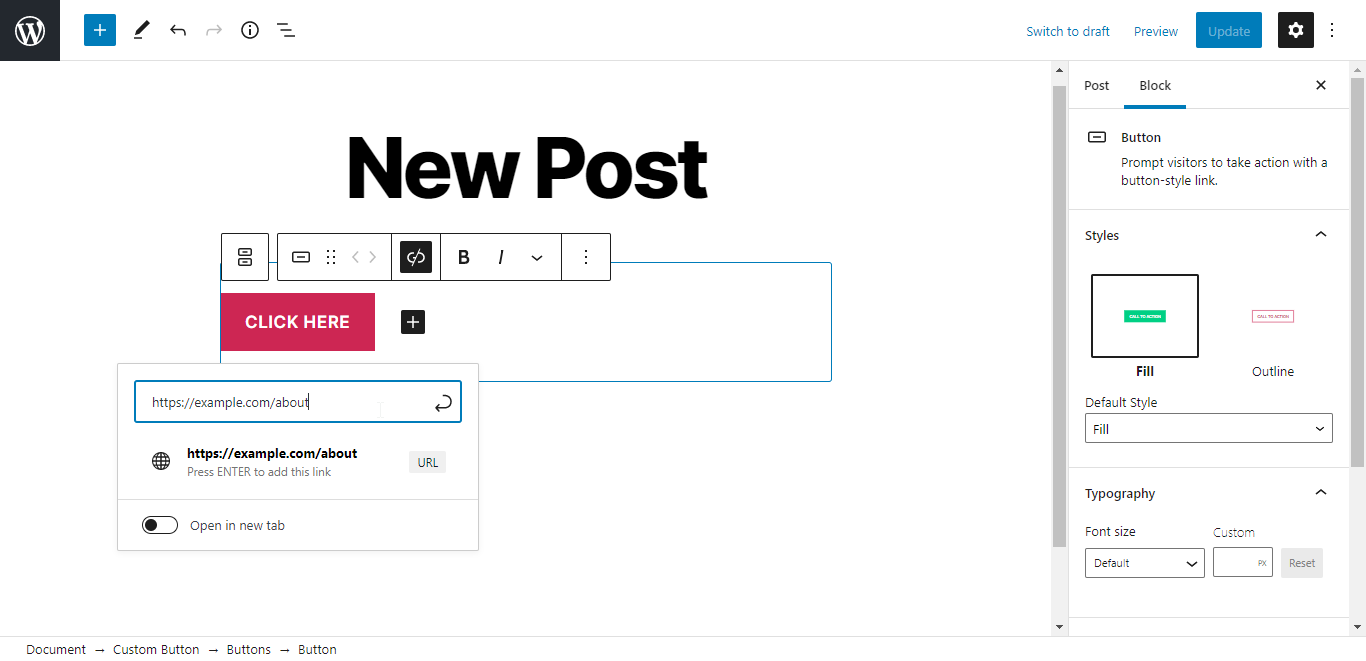
One way to edit reusable blocks is by adding the block to a post and editing the block there. In the previous step, we added our custom button block to a new post. Let’s say we want to edit the URL assigned to the block.

1. Select the block and make required changes.

2. Try updating page changes.

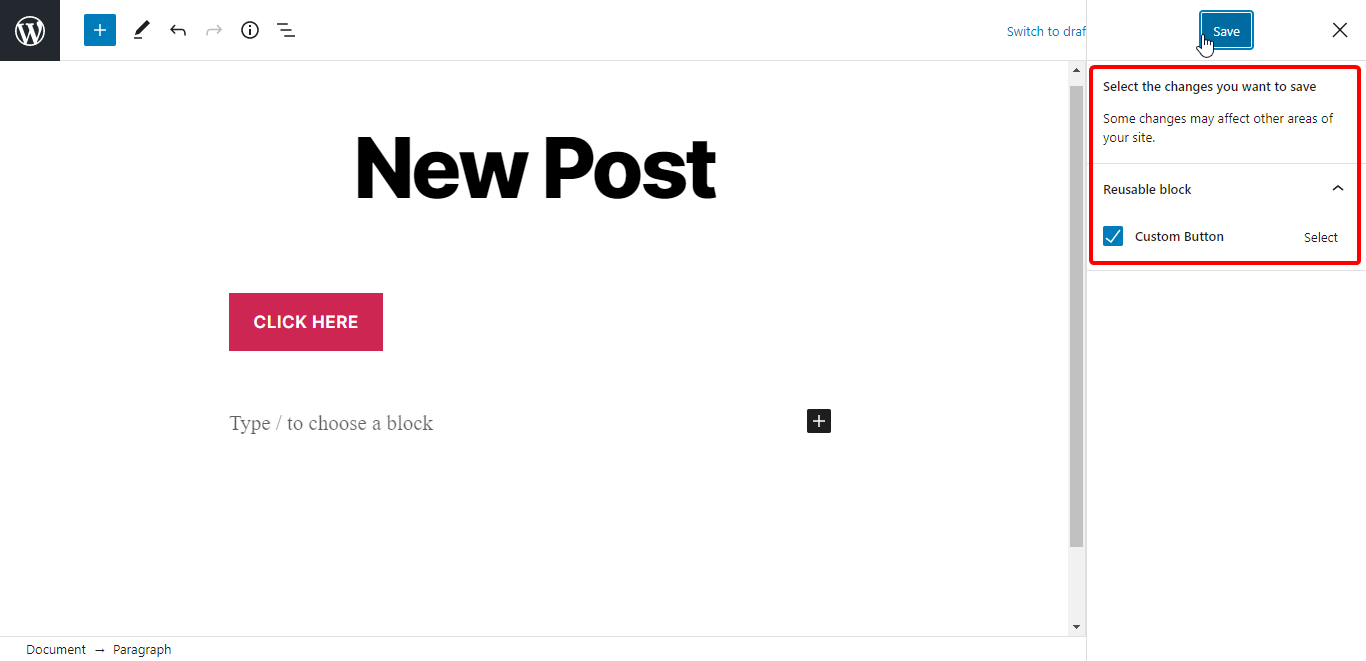
You should be notified that changes are being made to the reusable block and any other areas of site using that same block will reflect these changes.

3. Click save and the changes made will be applied to the reusable block.

Now your edits have been saved.

Converting Reusable Blocks

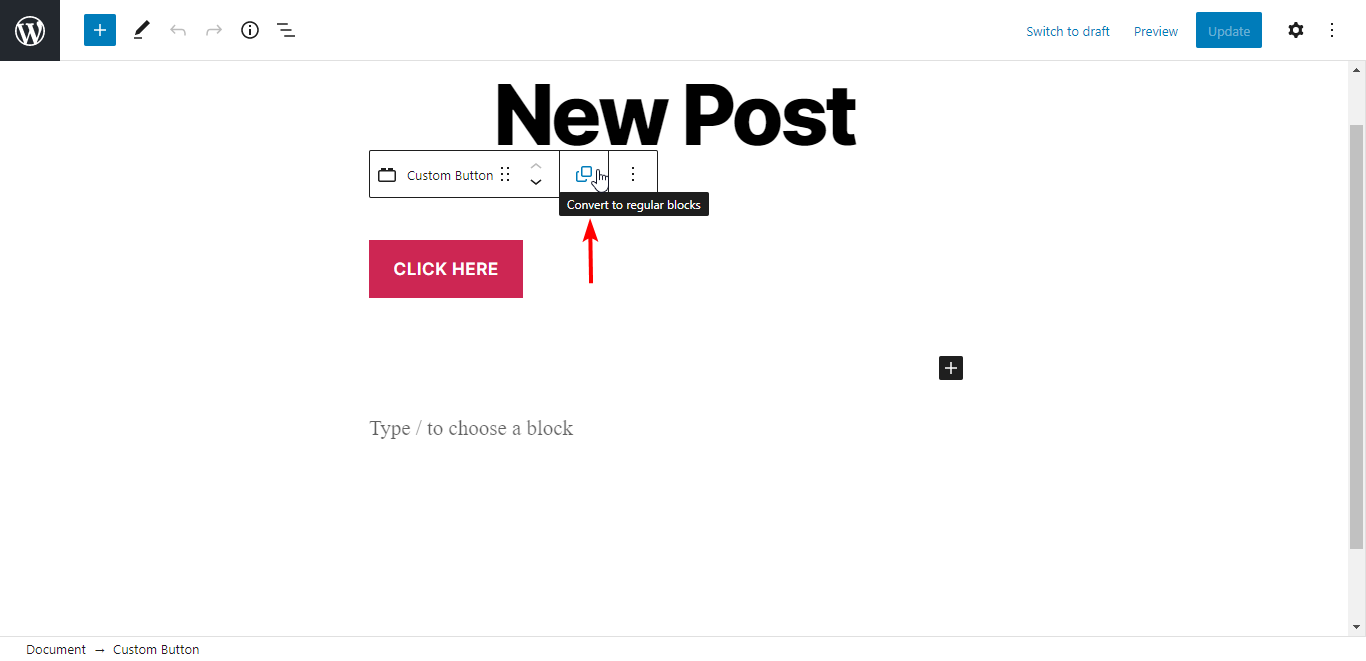
Changes made to reusable blocks are reflected across your site and anywhere the block is used. This may not be an option you want to take all the time. Sometimes you may want to just edit one block. This is where you would want to convert a reusable block to a normal block.

Once you have added a reusable block to a post or page, you can select the block. You will have the option to convert a block.

Once converted, the block will no longer be a reusable block — so any changes made to it will not be applied to the rest of the reusable blocks you had set up.

Managing WordPress Reusable Blocks

WordPress enables you to access the complete library of reusable blocks. This is another way you can make changes to a saved block.

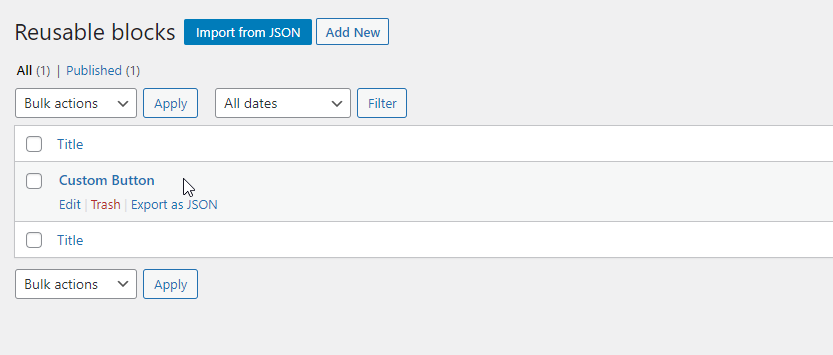
Click on toggle block inserter button and under reusable blocks, click on the Manage Reusable Blocks link.

You will be redirected to the reusable blocks library. Here you can add new blocks, edit, or delete existing ones as well as import or export blocks from one site to another.

Being able to access all available reusable blocks in one place makes it easier to manage them without having to add a block to post or page before editing. Import and export functionalities let you use blocks created on one site on a different site and vice versa.

Feel Ready To Reuse Some Blocks?

WordPress reusable blocks are a great time saver especially when dealing with a large number of posts and pages of lengthy content. However, time savers like this aren’t of much use if your site runs slowly at the frontend or is a victim of a not-so-suitable host.

You can avoid site speed problems when you’re with Hostdedi Fully Managed WordPress.

Check out our fully managed WordPress hosting plans to get started today.

Related WordPress Resources

Source link