There comes a time in the life of many WordPress sites when you want to start selling something. Maybe you wrote an ebook, or are looking to offer a way for your users to support your work?
Whatever the reason is for looking to sell something if you’re on WordPress the easiest way to do this is to install WooCommerce. You can easily add WooCommerce to WordPress. WooCommerce is a standalone plugin that sits on top of WordPress, and is very easy to use, has tons of support, and is very popular (for a good reason!).
Today I’m going to walk you through how to add WooCommerce to my WordPress site. I’ll show you what it takes to set up WooCommerce on your WordPress blog. I’m also going to talk about a few extra plugins you may want to use to maximize your store.
But first, let’s start with how to add WooCommerce to your WordPress site.
Installing WooCommerce
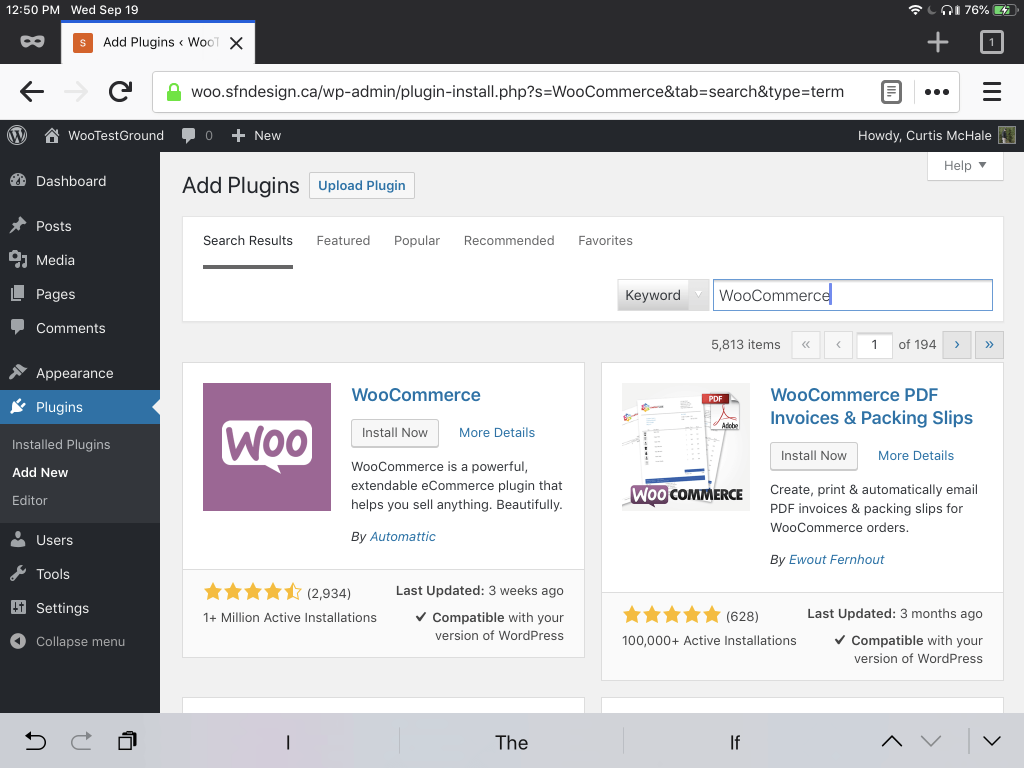
To start with WooCommerce head to the Plugins menu and then click “Add New” in the top left of the screen. Click “Install” on WooCommerce and then when it changes to “Activate” click that to turn WooCommerce on for your site.
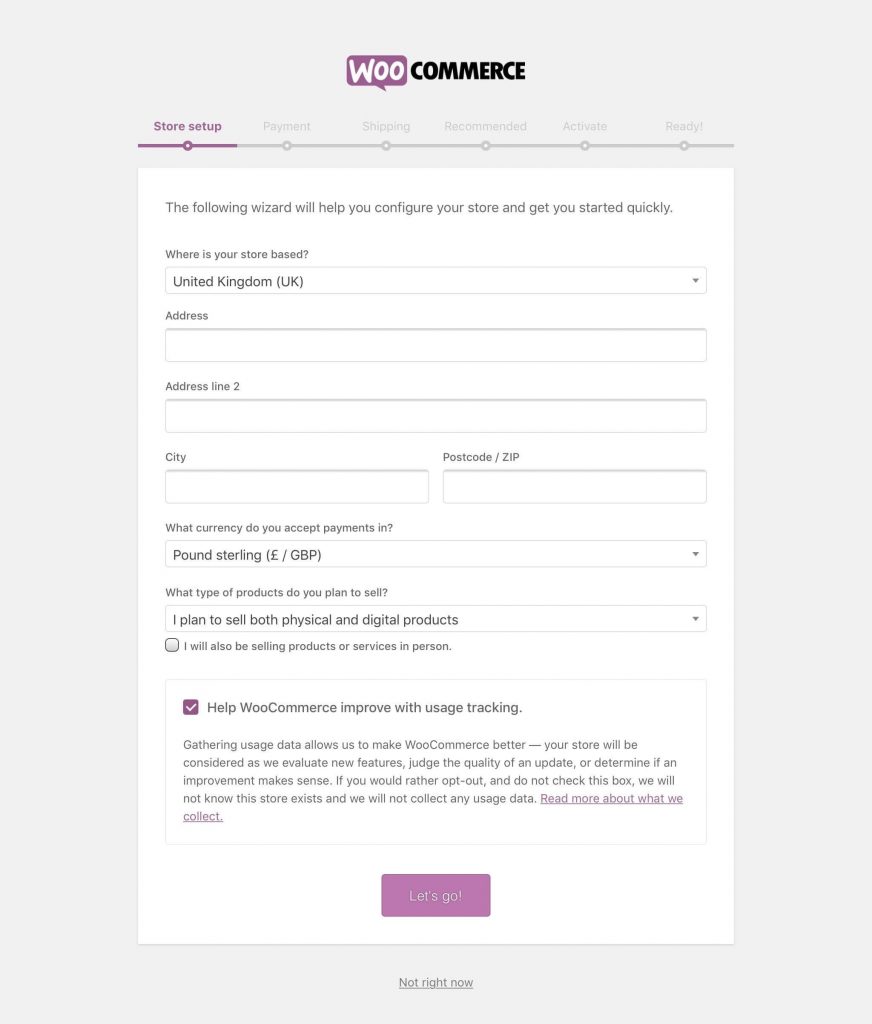
Immediately after you activate WooCommerce, you’ll be taken to the setup wizard. This is going to save you from hunting through all the different settings pages that WooCommerce has and help ensure that you have your store set up correctly.
WooCommerce Tutorial [2021] >>
The wizard starts by asking you to set your location, currency, whether you want to sell digital goods, physical goods, or both types of products. The final option is where you get to choose what you share with WooCommerce about how your store operates.
For my stores, I leave this checked because I want to help with the development of WooCommerce. If you’re not sure, then you can click through the link at the bottom to see what they collect and how they collect information. They do not collect any of the private data about your users.
10 Reasons to Choose WooCommerce >>
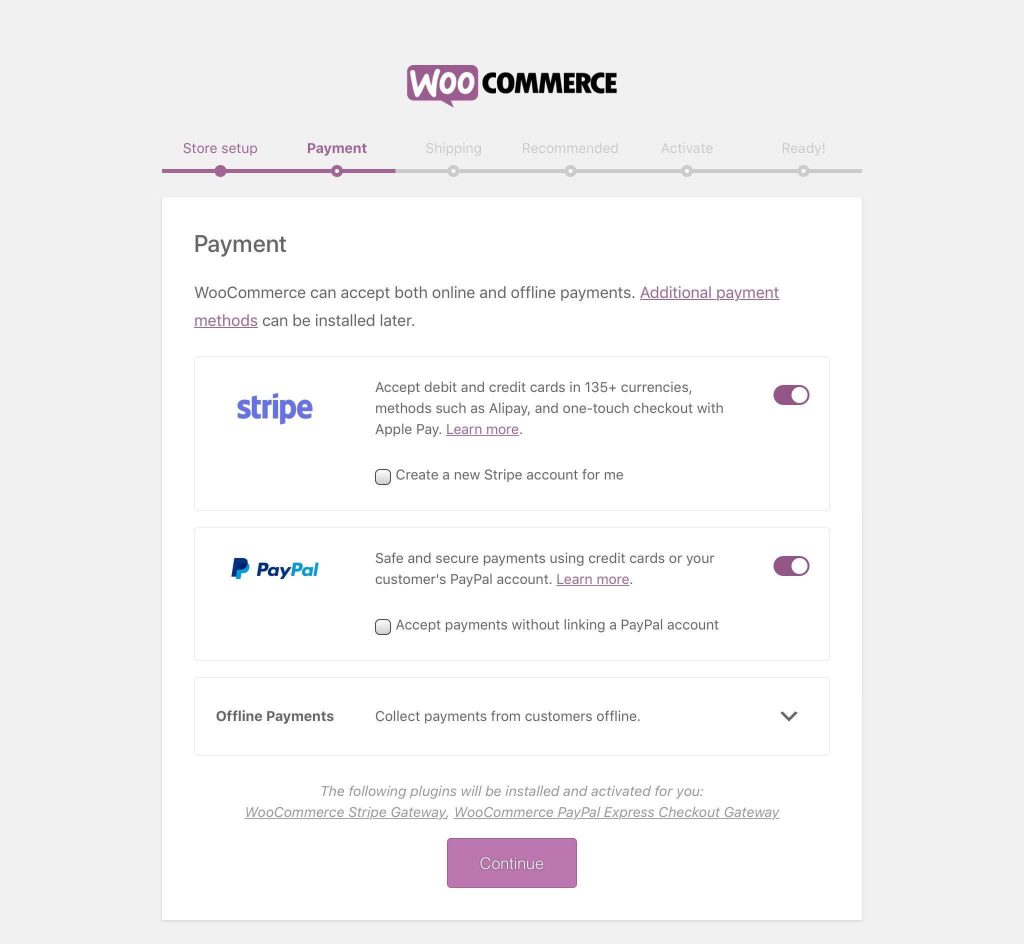
Next, you can choose the payment gateway you want to use with your site. By default Stripe and Paypal are offered because they’re the most popular payment gateways. There are other options, and depending on where you live one of the alternatives may be a better choice for you.
One other note on payment gateways is that it’s worth testing which one converts better. One client I worked with began with PayPal but then started to prefer Stripe as their preferred gateway. When they took away PayPal as an option they saw a 20% decrease in sales, so they opted to turn PayPal back on and adjust their preferences accordingly.
9 Types of Ecommerce Business Models for 2021 >>
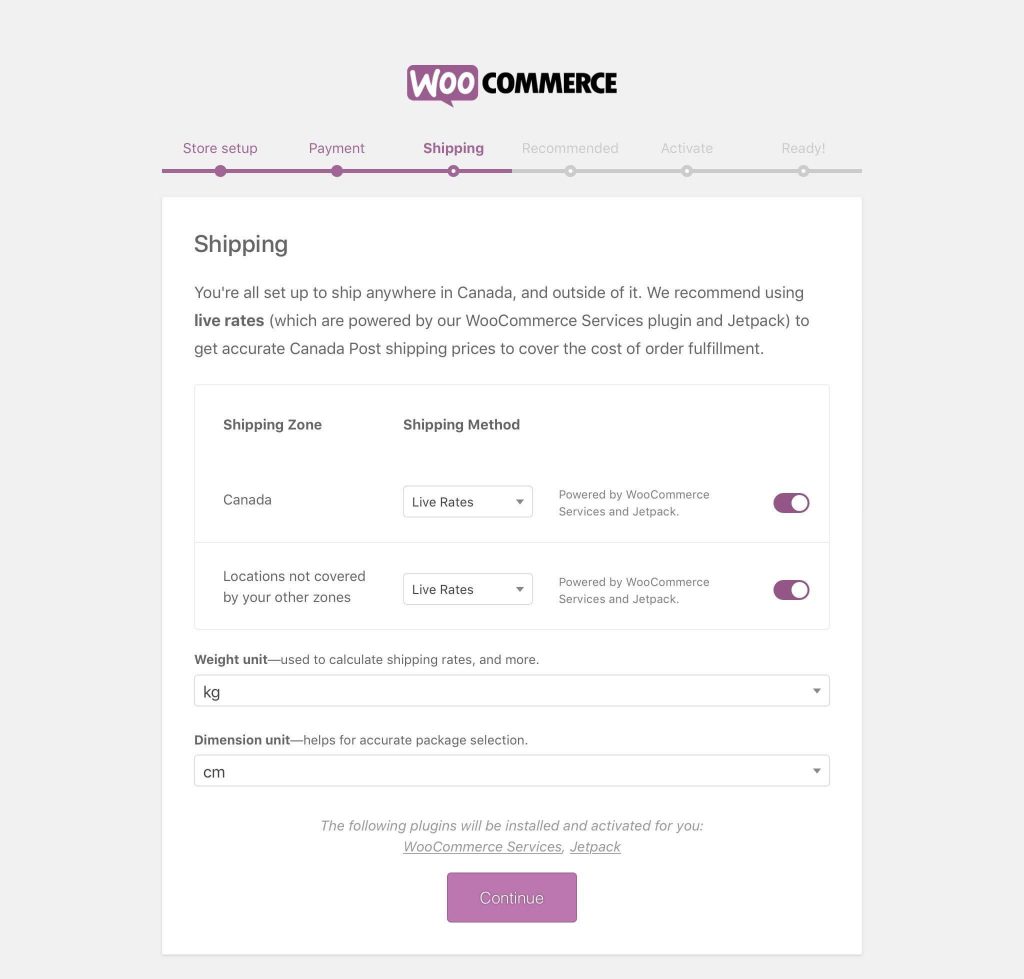
Next WooCommerce is going to ask you about shipping. If you’re in Canada or the United States, then you can use WooCommerce JetPack to get live rates on your shipping. Here it’s going to ask you what your default weights and measurements are. For most people, WooCommerce will set this adequately based on the location information you set in step one.
It’s important to note here that JetPack is not free. There is a free tier, but it may not include all of the features you may need for your site. The live shipping rates and the live taxes are free, so the main things you’ll need for your WooCommerce store are taken care of.
Options for WooCommerce
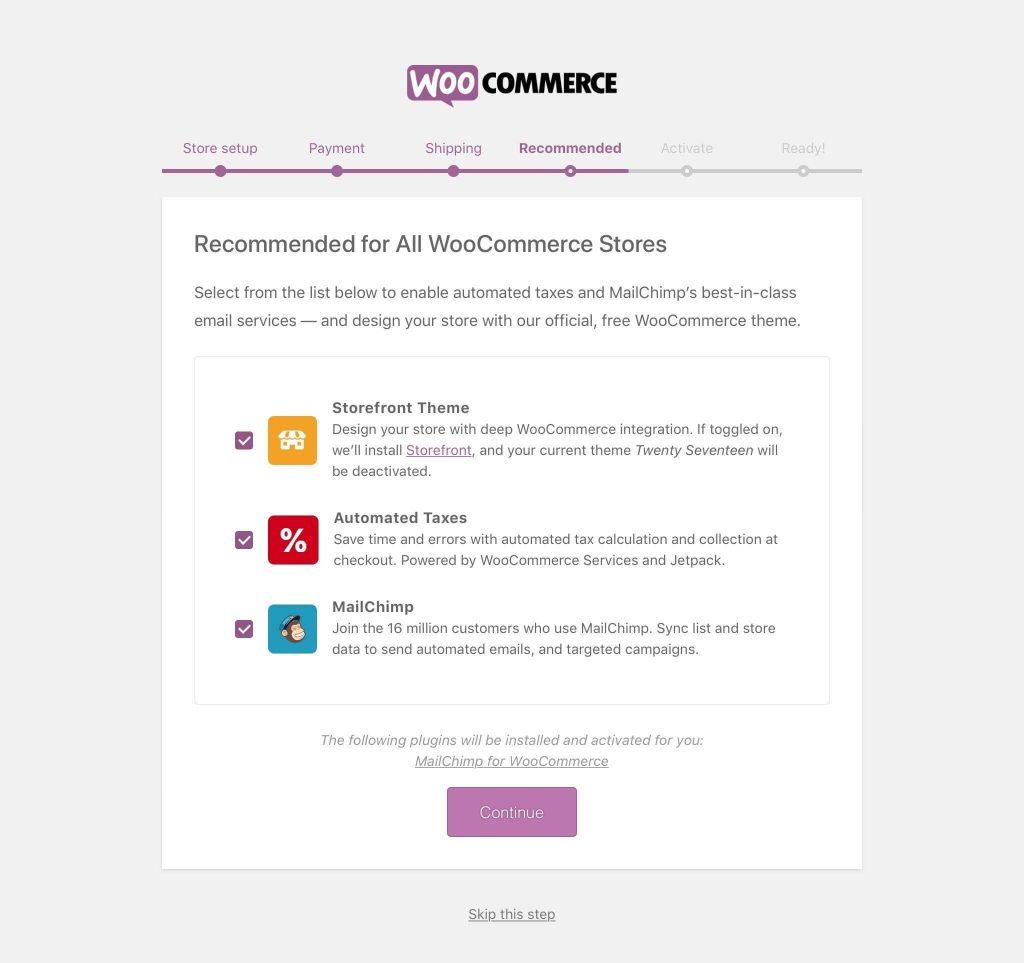
Now we’re moving to a few things that you may or may not need on your WooCommerce site if you’ve already been using it as a blog. The WooCommerce wizard will offer to install and activate the Storefront theme.
Ecommerce KPIs To Grow Your Business and Increase Revenue >>
Storefront is the default theme that WooCommerce provides to make sure you have something that looks nice with WooCommerce. If you’ve already got a theme, then you probably don’t need this. Most themes look fine with WooCommerce out of the box, so if you’re not sure, I wouldn’t worry about it. Eventually, you will want to look at making sure your theme is a lightweight theme because lightweight will mean a faster site and the ability to convert more leads.
The wizard is also going to ask you about installing MailChimp so that you have an email marketing plugin for your store. Many bloggers already have an email marketing solution, and if it’s not MailChimp, which is the default offered option, then you can uncheck the box and not install MailChimp.
One thing that WooCommerce offers here that you do want is to automate your taxes. Taxes can be very complicated. Some countries have hundreds of tax zones and sorting them all out is a full-time job. Just let WooCommerce JetPack take care of that for you.
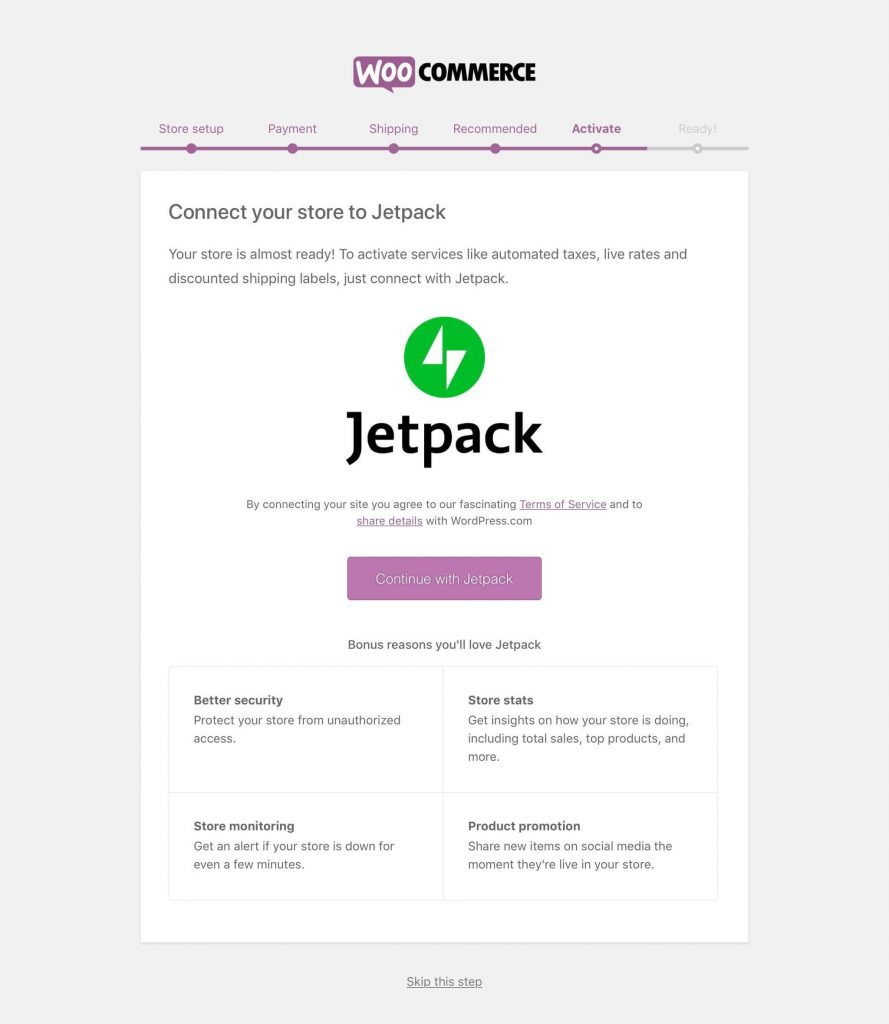
Now the WooCommerce setup wizard is going to ask you to install JetPack. Click “continue with Jetpack” if you do plan to use WooCommerce for taxes.
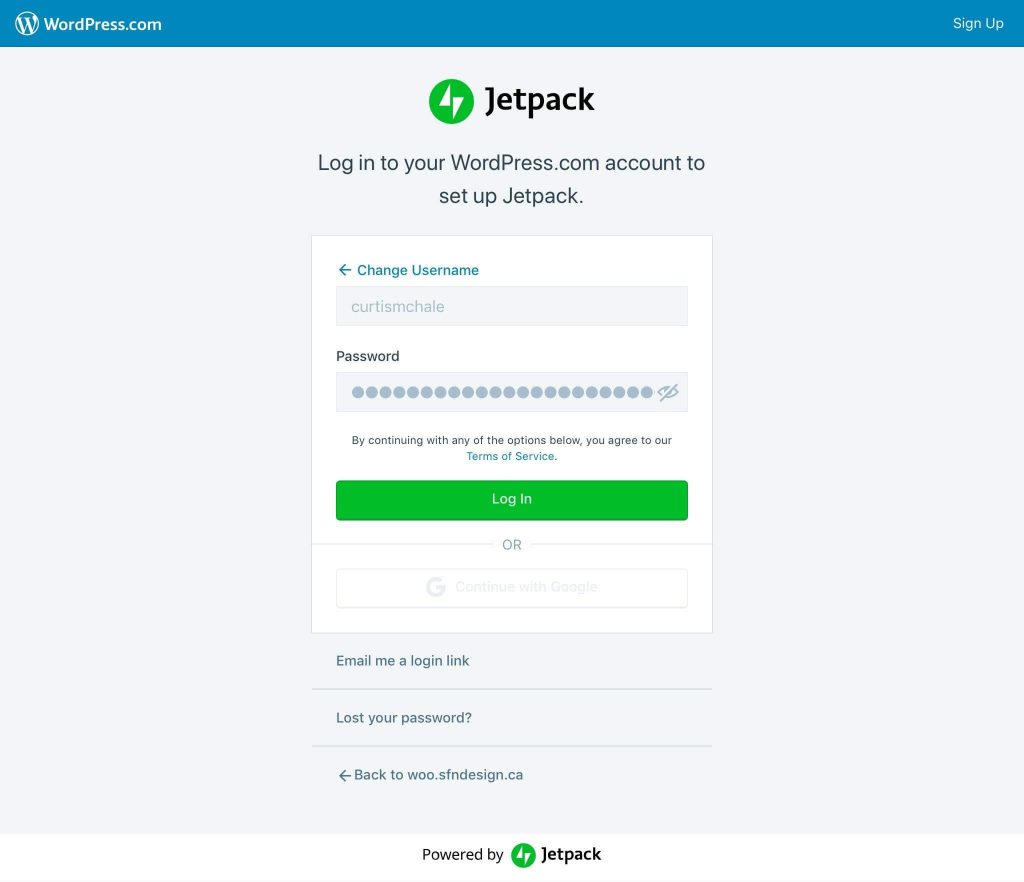
When you continue with JetPack, you’ll be asked to set up an account with WordPress.com. WordPress is what powers JetPack on your site to set up your account. If you have a WordPress.com account already then sign in to your existing account.
With that done, you’re almost ready to go. You still need to set up your Stripe and PayPal Payment gateways.
- For Stripe, you’ll need to add your Stripe account keys to the WooCommerce Stripe page. The process is reasonably straightforward copy and paste operation.
- To setup Paypal, there is a button built into the WooCommerce settings page to click that will grab your API keys from your PayPal account. All you need to do is click the button and then sign in to PayPal.
Now your WooCommerce site is ready for you to enter products. Let’s start that process by adding a basic ebook to our WooCommerce site.
Adding an eBook to WooCommerce
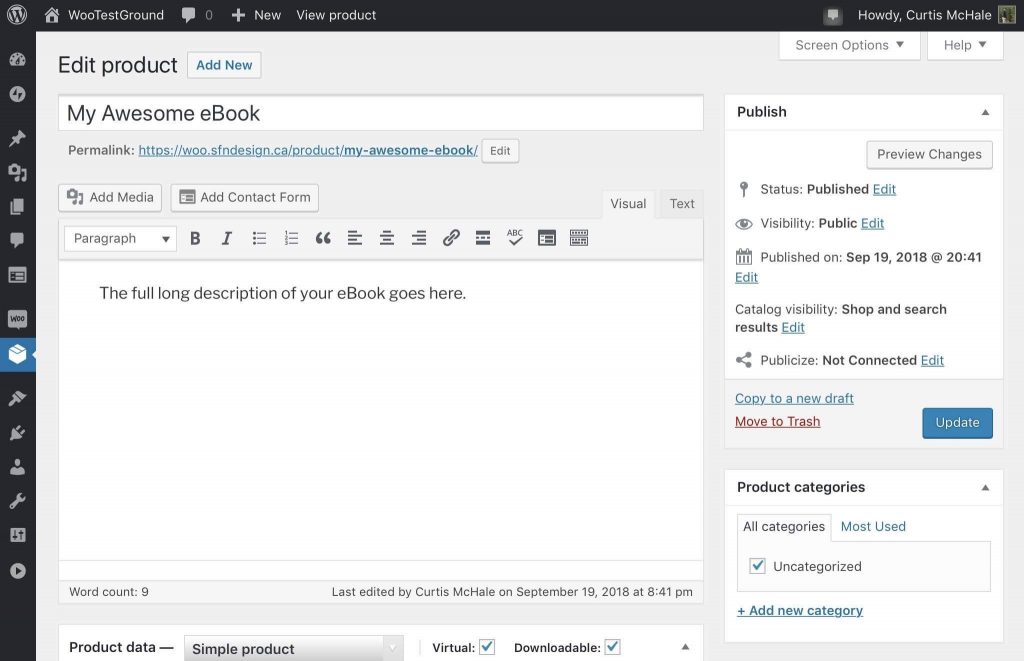
To get started go to the Products Menu and then click “Add New.” Clicking will take you to the place to add products. It should look very familiar if you’ve been blogging with WordPress for a while.
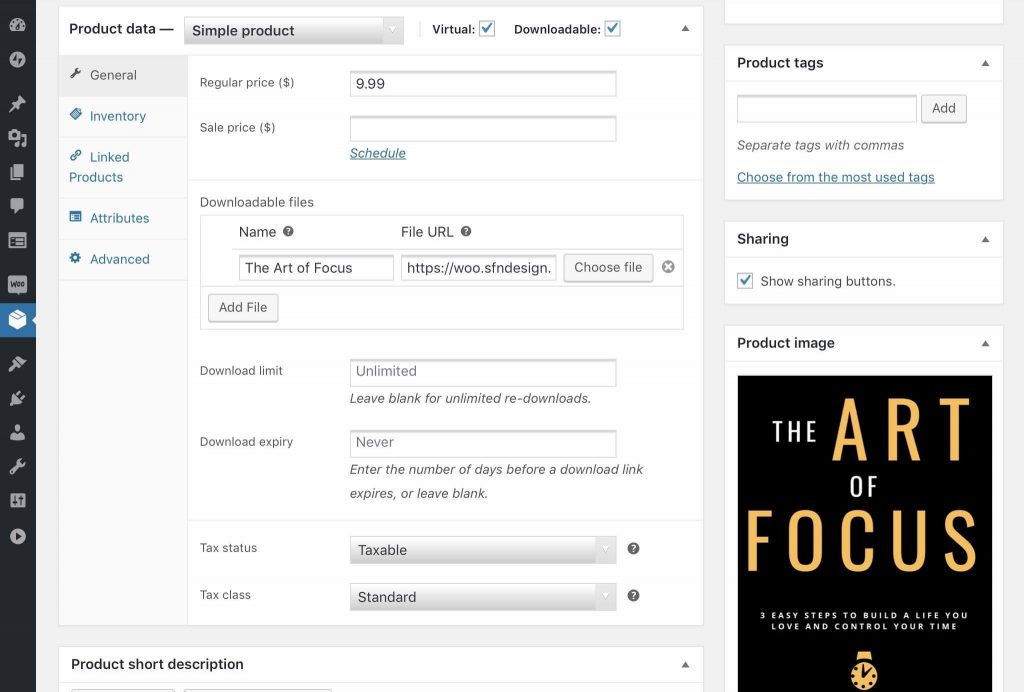
Start by adding the title of your book at the top of the page. Under that, where you have been putting your blog content, set in the long description. In the default WooCommerce theme this shows up just under the product on its page.
Next, you choose the product type. For a downloadable book, we can leave it set as a Simple Product. We do need to remember to check both the “Virtual” and “Downloadable” boxes or else WooCommerce is going to expect us to ship something and hold the order as processing instead of completing it and delivering it to our client.
Next, set the price of your book. You can even schedule a sale price here so that you can set it, and then forget it without having the book stay on sale forever.
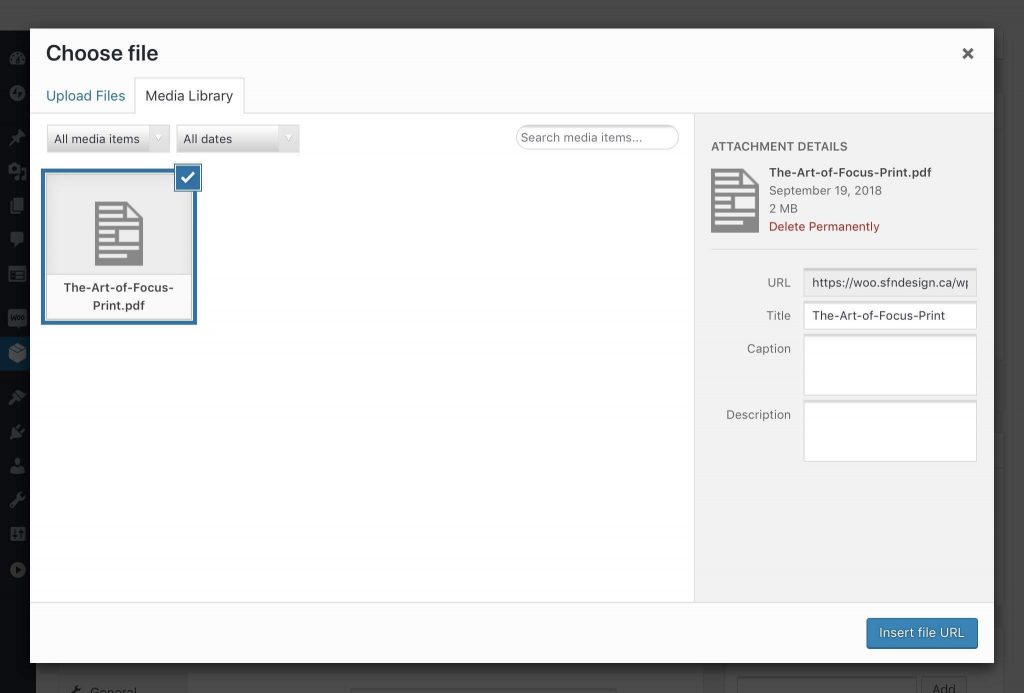
Now we need to specify the file that we’ll be delivering to customers when they purchase our book. Click on “Add File” and then click on “Choose File.” From here the WordPress media uploader will open. You can choose an existing file, or you can upload the file you want to use.
Now you can set the number of times a user can download your book and the number of days until the download link expires. I usually set the download link to a few days. Setting an expiration on the link helps stop people from sharing the link (and your book) with others.
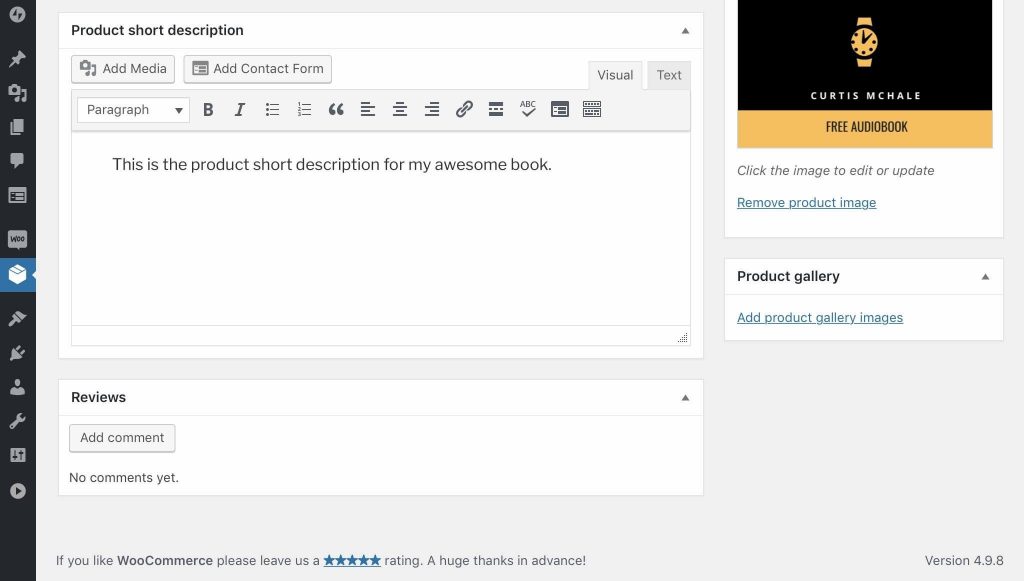
Scrolling down to the bottom, you can set the short description for the product. The short description goes right beside the product by default so it’s the first thing your customers can read outside of your product image.
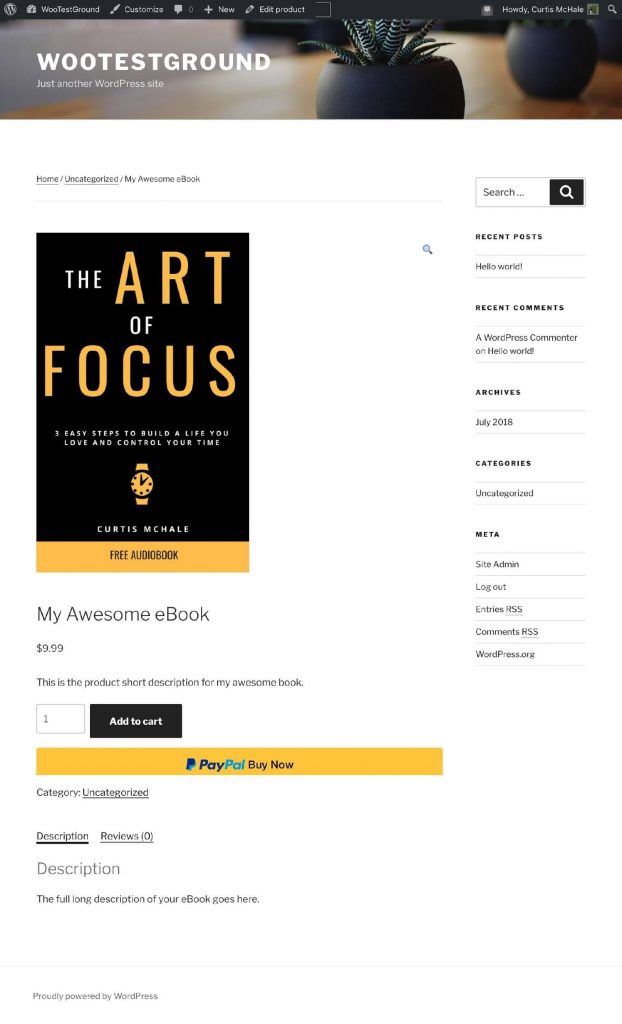
Finally, don’t forget to set a product image. For a book, the cover is probably sufficient. On the right side of your screen under Product Image click Select Product Image. Here you’ll see the familiar WordPress Media Gallery open again. Choose an existing image or upload the new one.
Now you’re ready to publish your product. You can see what my demo product looks like with the default TwentySeventeen theme below.
Other Need-To-Have Plugins
While we do have all the basics of WooCommerce setup with our WordPress site, there are still a few things you’re likely to want to add. You don’t need these plugins, but they’re going to help you maximize your store.
First up is Google Analytics for WooCommerce. You should be running Google Analytics on your site already so that you can tell how your content resonates with your customers. This plugin helps connect Google Analytics with your WooCommerce store so that you get eCommerce metrics in Google Analytics. While you may not do much with it to start, long-term this data can help you understand where problems are in your store.
Advanced Inventory Management Options for WooCommerce >>
It’s important to communicate with your customers, but it can be hard. By installing Follow Ups, you can automate this process. For our ebook above, you can send purchasers an email 15 days after they purchase the book to ask them if they’ve enjoyed reading it. You can follow up again in 20 days and ask them to leave a review on your product.
If you end up with more than one product, then Smart Offers is a must have plugin. What Smart Offers let’s you do is offer other products to your customers. Say they purchase your second ebook; you can offer them your first at a discounted price if they buy both at the same time.
Bottom Line
While there are a number of steps to set up a WooCommerce store, it doesn’t take long. With the WooCommerce wizard, it took me less than 30 minutes to set up the WooCommerce store above.
Know you know how to add WooCommerce to your WordPress site.
With a small amount of effort, you can own the relationship between yourself and your customers. You can retain the maximum amount of revenue from your products, and you can have another asset for your site. WooCommerce makes all of this easy.
Power WooCommerce With Fully Managed Hosting
With a dedicated solution for WooCommerce hosting, you get:
- Automated scaling to keep your site fast during traffic surges.
- Automatically optimized images for fast loading times.
- Lightning fast load times thanks for our built-in CDN.
- And more!
See why users gave us a 4.6 out of 5 star rating on Trustpilot. Experience optimized hosting for your store. Start your free two-week trial today.
Related Content