A SQL injection attack can allow malicious actors to make requests against your website which execute queries on the Magento database. These requests can potentially read or write to the Magento database, allowing unauthorized access or changes such as adding an administrative user or reading hashed passwords, encryption keys and encrypted credit card data.
This particular vulnerability is troubling due to the fact that it requires no authentication and any website visitor can potentially execute a malicious SQL injection request against your web store.
How Is Hostdedi Handling This Disclosure?
Soon after receiving notification about this vulnerability, our System Operations team immediately started investigating mitigation strategies.
We found that our existing Web Application Firewall (WAF) rules were successfully mitigating a proof of concept of this vulnerability. However, there was room for improvement and possible conditions under which the vulnerability could still be taken advantage of.
Our System Operations team created an improved set of WAF rules for this vulnerability and successfully deployed them across our managed platform on the morning of March 29th.
To be clear, this mitigation only filters the currently known attack strategies for this vulnerability. It still remains critically important that you patch your Magento installation as soon as possible.
What Should I Be Doing?
While we’ve implemented the mitigation strategy, we would highly recommend still ensuring that you update your Magento installation to the newest version or that you patch (via the patch “PRODSECBUG-2198”, which is available here) your site to ensure that you’re completely protected.
Additionally, we’d recommend that you or your development team review your existing codebase to ensure that no malicious code was injected into your site prior to this vulnerability is disclosed.
As always, if you have any issues with doing so on your own or run into any problems there, please reach out to our Support team directly and we’ll do our best to help.
So you’ve weighed your choices and decided Drupal is the best fit for you!
As discussed in our recent Drupal Vs WordPress Cagematch, it takes a developer skill set to get the most out of Drupal. Even so, it can be worthwhile to explore Drupal and get an idea of what it has to offer. Or, perhaps you’re a developer-in-training looking to dip your toes into the CMS ocean.
This is part 1 of a short series designed to show you the basics of installing, updating, and backing up Drupal 8.
Our Drupal cloud solution makes it easy and quick, and we back every account with a 30-day money back guarantee. You can read about our Drupal cloud offering on our website, but the best place to start is our Knowledge Library with How to create Hostdedi Cloud accounts.
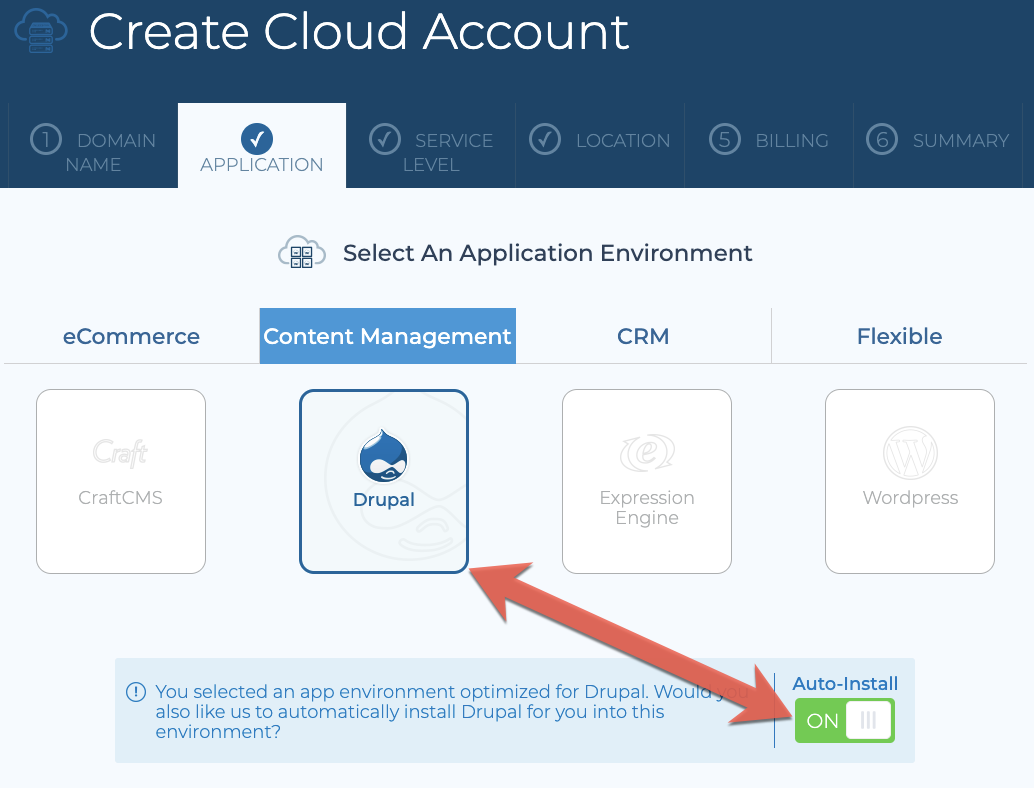
When choosing your platform, select Drupal, toggle the Auto-Install, and you’ll be up and running within minutes.
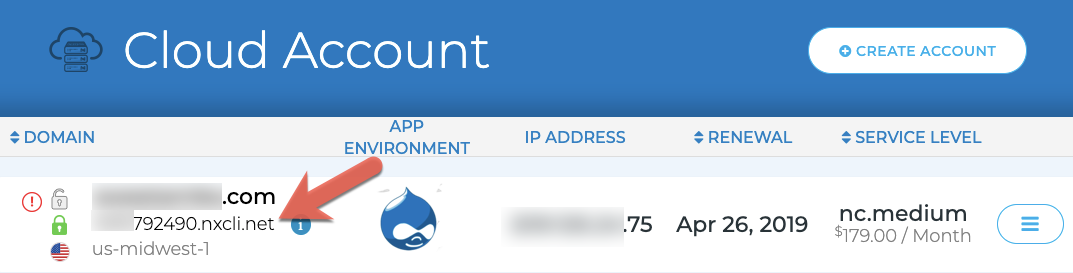
Once installed, you can view your live site by clicking on your secondary domain name from within your Client Portal.
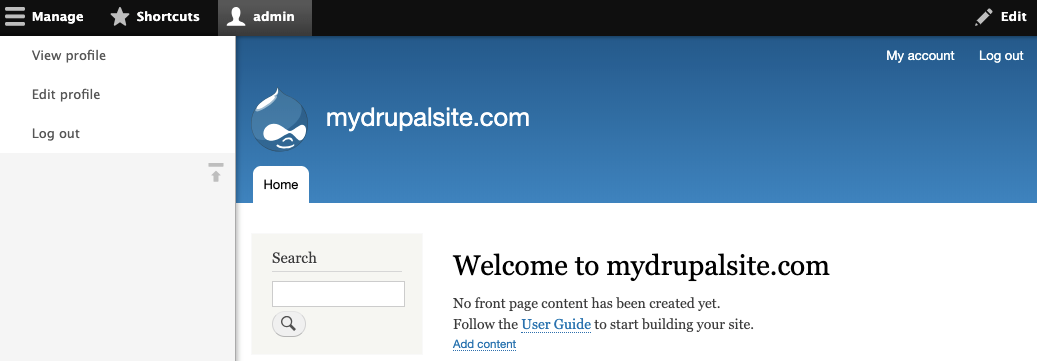
When you visit your site for the first time, you’ll see something like:
Your site is live, albeit in a humble, uncooked state. Now, time update your installation to the latest version!
Updating Drupal 8
Although we install Drupal 8, it falls to you to update to the most current stable release. We strongly recommend staying current on releases. No content management system (CMS) is immune to exploits, and staying current is the first line of defense against malicious activity.
This entry provides two options for updating your installation: the command line (CLI) or Secure File Transfer Protocol (SFTP). Both methods require SSH access.
Attention: The Drupal development team recommends Composer for updating purposes, though it requires familiarity with dev-centric language. See the official Drupal documentation for details.
If you’re unfamiliar with the CLI, then SFTP is your best option. Many SFTP applications are available. This document features Cyberduck because it’s free, safe, and relatively easy to use, though many other suitable options are available. For details about how to use it, please see How to transfer files to a server with SFTP.
Take note!
This process won’t update any modules or themes. If this is a new installation, this won’t matter now, but it will matter later. Third party extensions require separate updates, and overlooking them exposes your site to possible attack.
For anything other than new installs, back up your site before continuing.
This process will remove any modifications to files like .htaccess, composer.json, and robots.txt.If and when you’ve modified these files, save them somewhere so you can reapply them post-update.
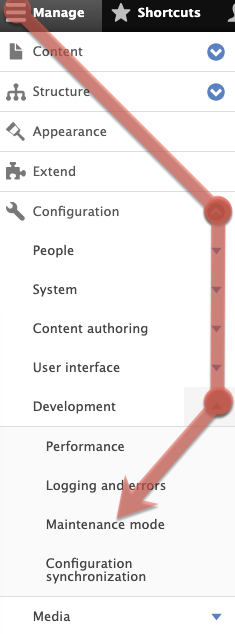
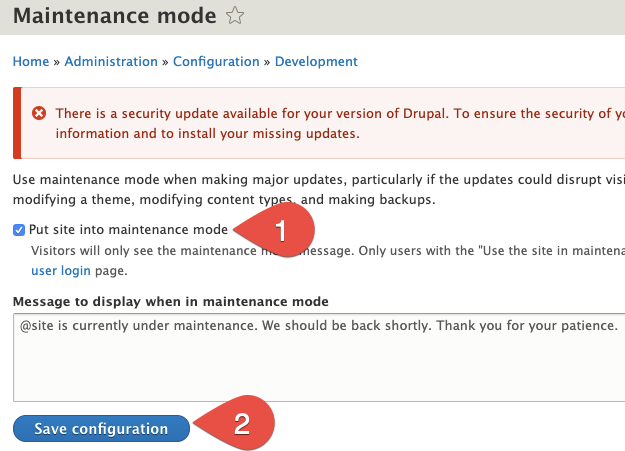
Step 1: Put Your Site Into Maintenance Mode
Log in to your Drupal admin panel. Click Manage > Configuration > Development.
Select the Put site into maintenance mode check box, then click Save configuration.
Step 2: Remove Old Files
Choose one of the below methods.
Using the CLI
Navigate to your Drupal installation:
cd /path/to/your/drupal/directory
Remove the core and vendor directories:
rm -rf core vendor
Remove all files in the top-level directory:
rm -f *.* .[a-z]*
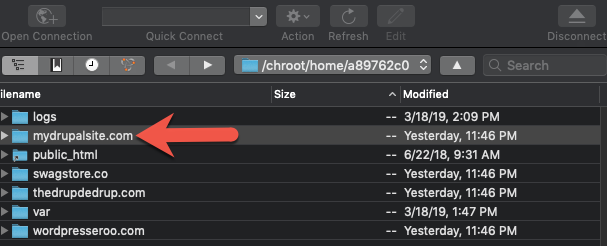
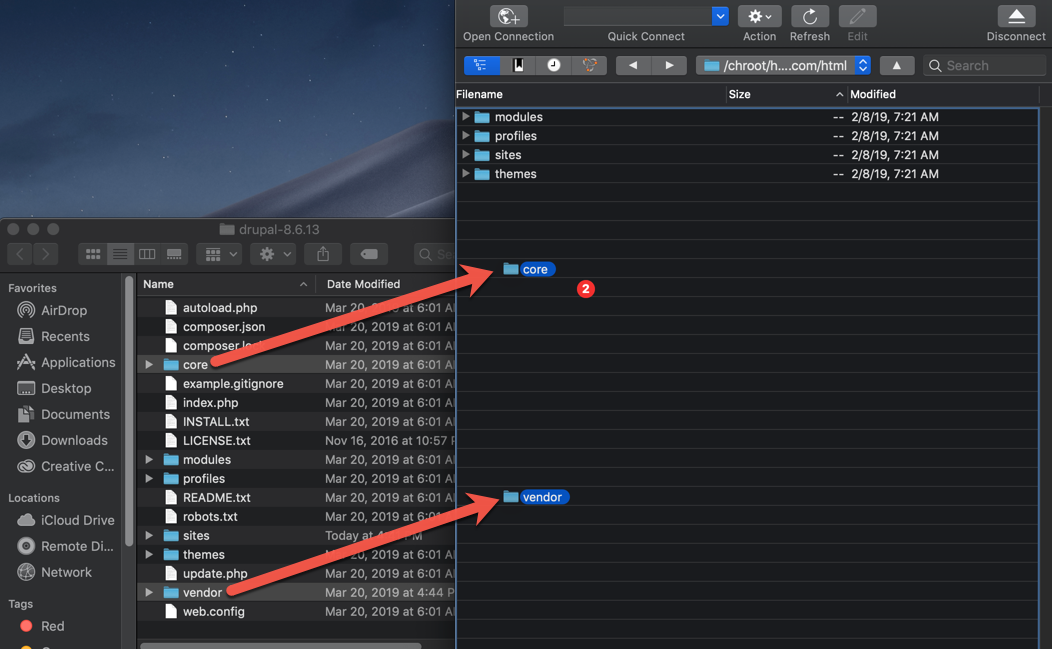
Using SFTP
Select your Drupal directory. In this example, it’s mydrupalsite.com.
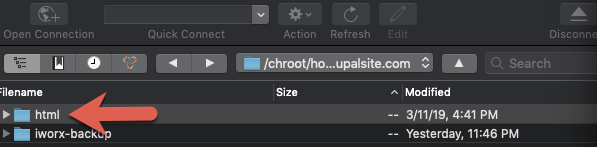
Select html.
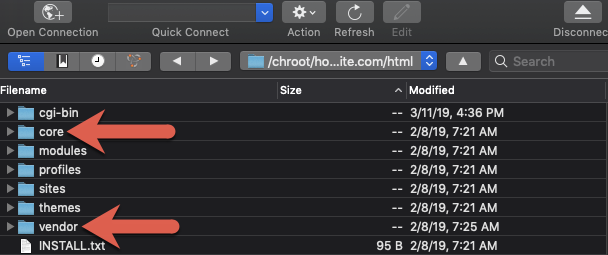
Delete the core and vendor directories.
Step 3: Download and Extract Update Files
Choose your preferred method below.
Using the CLI
Issue the following, but replace x, y, and z with the updated Drupal version number; for example, /drupal-8-6-13.tar.gz:
wget https://ftp.drupal.org/files/projects/drupal-x-y-z.tar.gz tar zxf drupal-x.y.z.tar.gz
This command creates a new directory, drupal-x-y-z/, which contains all updated Drupal files and directories.
Change to the new directory, and copy the core and vendor directory and the files in the top-level directory to your Drupal installation directory. As before, replace x, y, and z with the updated Drupal version number:
Within Cyberduck or another SFTP application, upload the new core and vendor to your Drupal installation by clicking-and-dragging from your local machine to your top-level directory.
As mentioned in the Take note section, this is where you would reapply modifications to your .htaccess, composer.json, or robots.txt files. Since this is a new installation, you may skip this step.
Step 4: Update Database Tables
Verify you are logged in as your site admin.
In your browser, update your core database tables by visiting http://www.example.com/update.php, but replace www.example.com with your domain name.
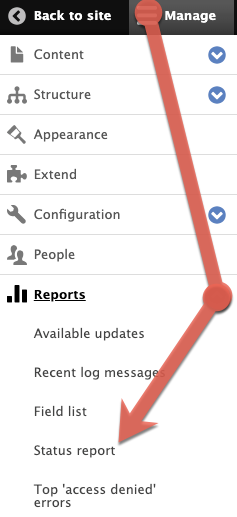
Step 5: Run Status Report
From your Drupal admin panel, navigate to Manage > Reports > Status report.
Resolve any warnings or errors.
Step 6: Remove Your Site From Maintenance Mode
Return to your Drupal admin panel.
As in Step 1, from your admin panel, click Manage > Configuration > Development > Maintenance Mode, or just click Goonline from the green bar notification.
Clear the Put site into maintenance mode check box, then click Save configuration.
Step 7: Clean Up Files (If Necessary)
If you used the CLI method in Step 3: Download and extract files, remove the Drupal release files by issuing the below command. As before, replace x.y.z with the release version number.
rm drupal-x.y.z.tar.gzrm -rf drupal-x.y.z/
Keeping Drupal Up to Date
It is best practice to stay current. There are several ways to stay informed, and we recommend using all of the below methods:
Backing Up Drupal
Backups are your failsafe. If you’re not already in the habit of doing so, we strongly recommend the best practice of making them regularly. As is often the case with Drupal, there are many possible methods. We will focus on two: Drush and the backup_migrate module
Using Drush
For those with developer skills, Drush may offer the most direct method. For details on Drush and additional resources, see the Drupal documentation.
Using the backup_migrate Module
If Drush and the CLI don’t appeal to you, it is possible to add a module that allows you to set up automatic backups.
From your Drupal admin panel, select Manage > Extend.
Click .
From the Upload a module or theme archive to install option, click ChooseFile. Select the tar.gz file you downloaded in Step 1, then click .
Click Enable newly added modules.
Scroll to the Other section and select the Backupand Migrate check box. Once again, click .
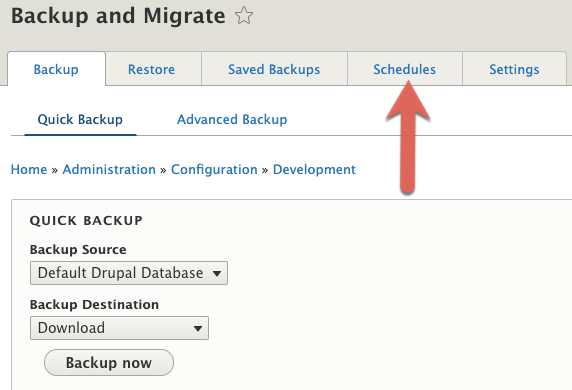
From your Drupal admin panel, navigate to Manage > Configuration > Development > Backup and Migrate.
Though you can perform a manual backup by clicking , we recommend setting up daily automatic backups. Click the Schedules tab.
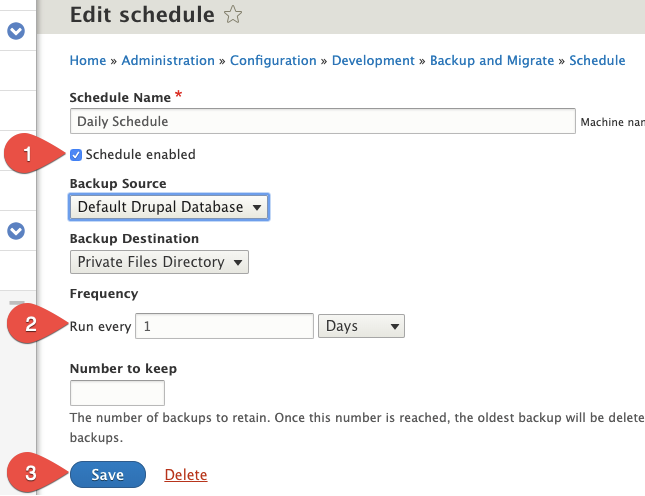
In the Daily Schedule row, click . Select the Scheduleenabled check box (1), then set Frequency to Run every 1 Days (2). Click when ready (3).
Daily backups are now configured! If you are a Hostdedi client and relatively new to Drupal, we recommend contacting our support for assistance with restoring your site from a backup.
Next Steps
Keep an eye on this space for more about Drupal, including tips about how to create content, administer a team, and other essentials. In the meantime, feel free to experiment with your new site!
 On March 28th, a set of vulnerabilities for Magento Core were disclosed, one of which can allow an unauthenticated visitor to execute a SQL injection attack. These vulnerabilities are addressed in the most recent Magento security update and affect the following versions: